Manifests
Every Workload you create in SleakOps is deployed to Kubernetes through a set of manifests — the Deployment, Service, Ingress, PodDisruptionBudget and HorizontalPodAutoscaler resources that SleakOps generates for it. The Manifests feature makes those resources first-class citizens: you can inspect each one, customize its YAML, disable it, or add your own extra manifests — per Workload or shared across the whole Project.
Manifests are being rolled out progressively. If you don't see the Advanced toggle on your Workload forms or the Manifests section in your Project's Chart Configuration, the feature is not enabled for your company yet.
Where to find them
Manifests live in two places:
- Per Workload — open any Workload (WebService, Worker, CronJob or Hook) and switch the view toggle from Form to Advanced. The Advanced view has two tabs: Manifests (the graph of resources) and Values (see Values).
- Per Project — go to Project → Settings → Chart Configuration. The Manifests section lists every Workload and manifest in the Project, and manages the shared project bucket.
The Form view is still the source of truth for your Workload's configuration: one submit updates every generated manifest. The Advanced view is where you inspect and customize what gets deployed.
The manifest graph
The Manifests tab shows the Workload's resources as a graph, with the edges representing the relationships between them:
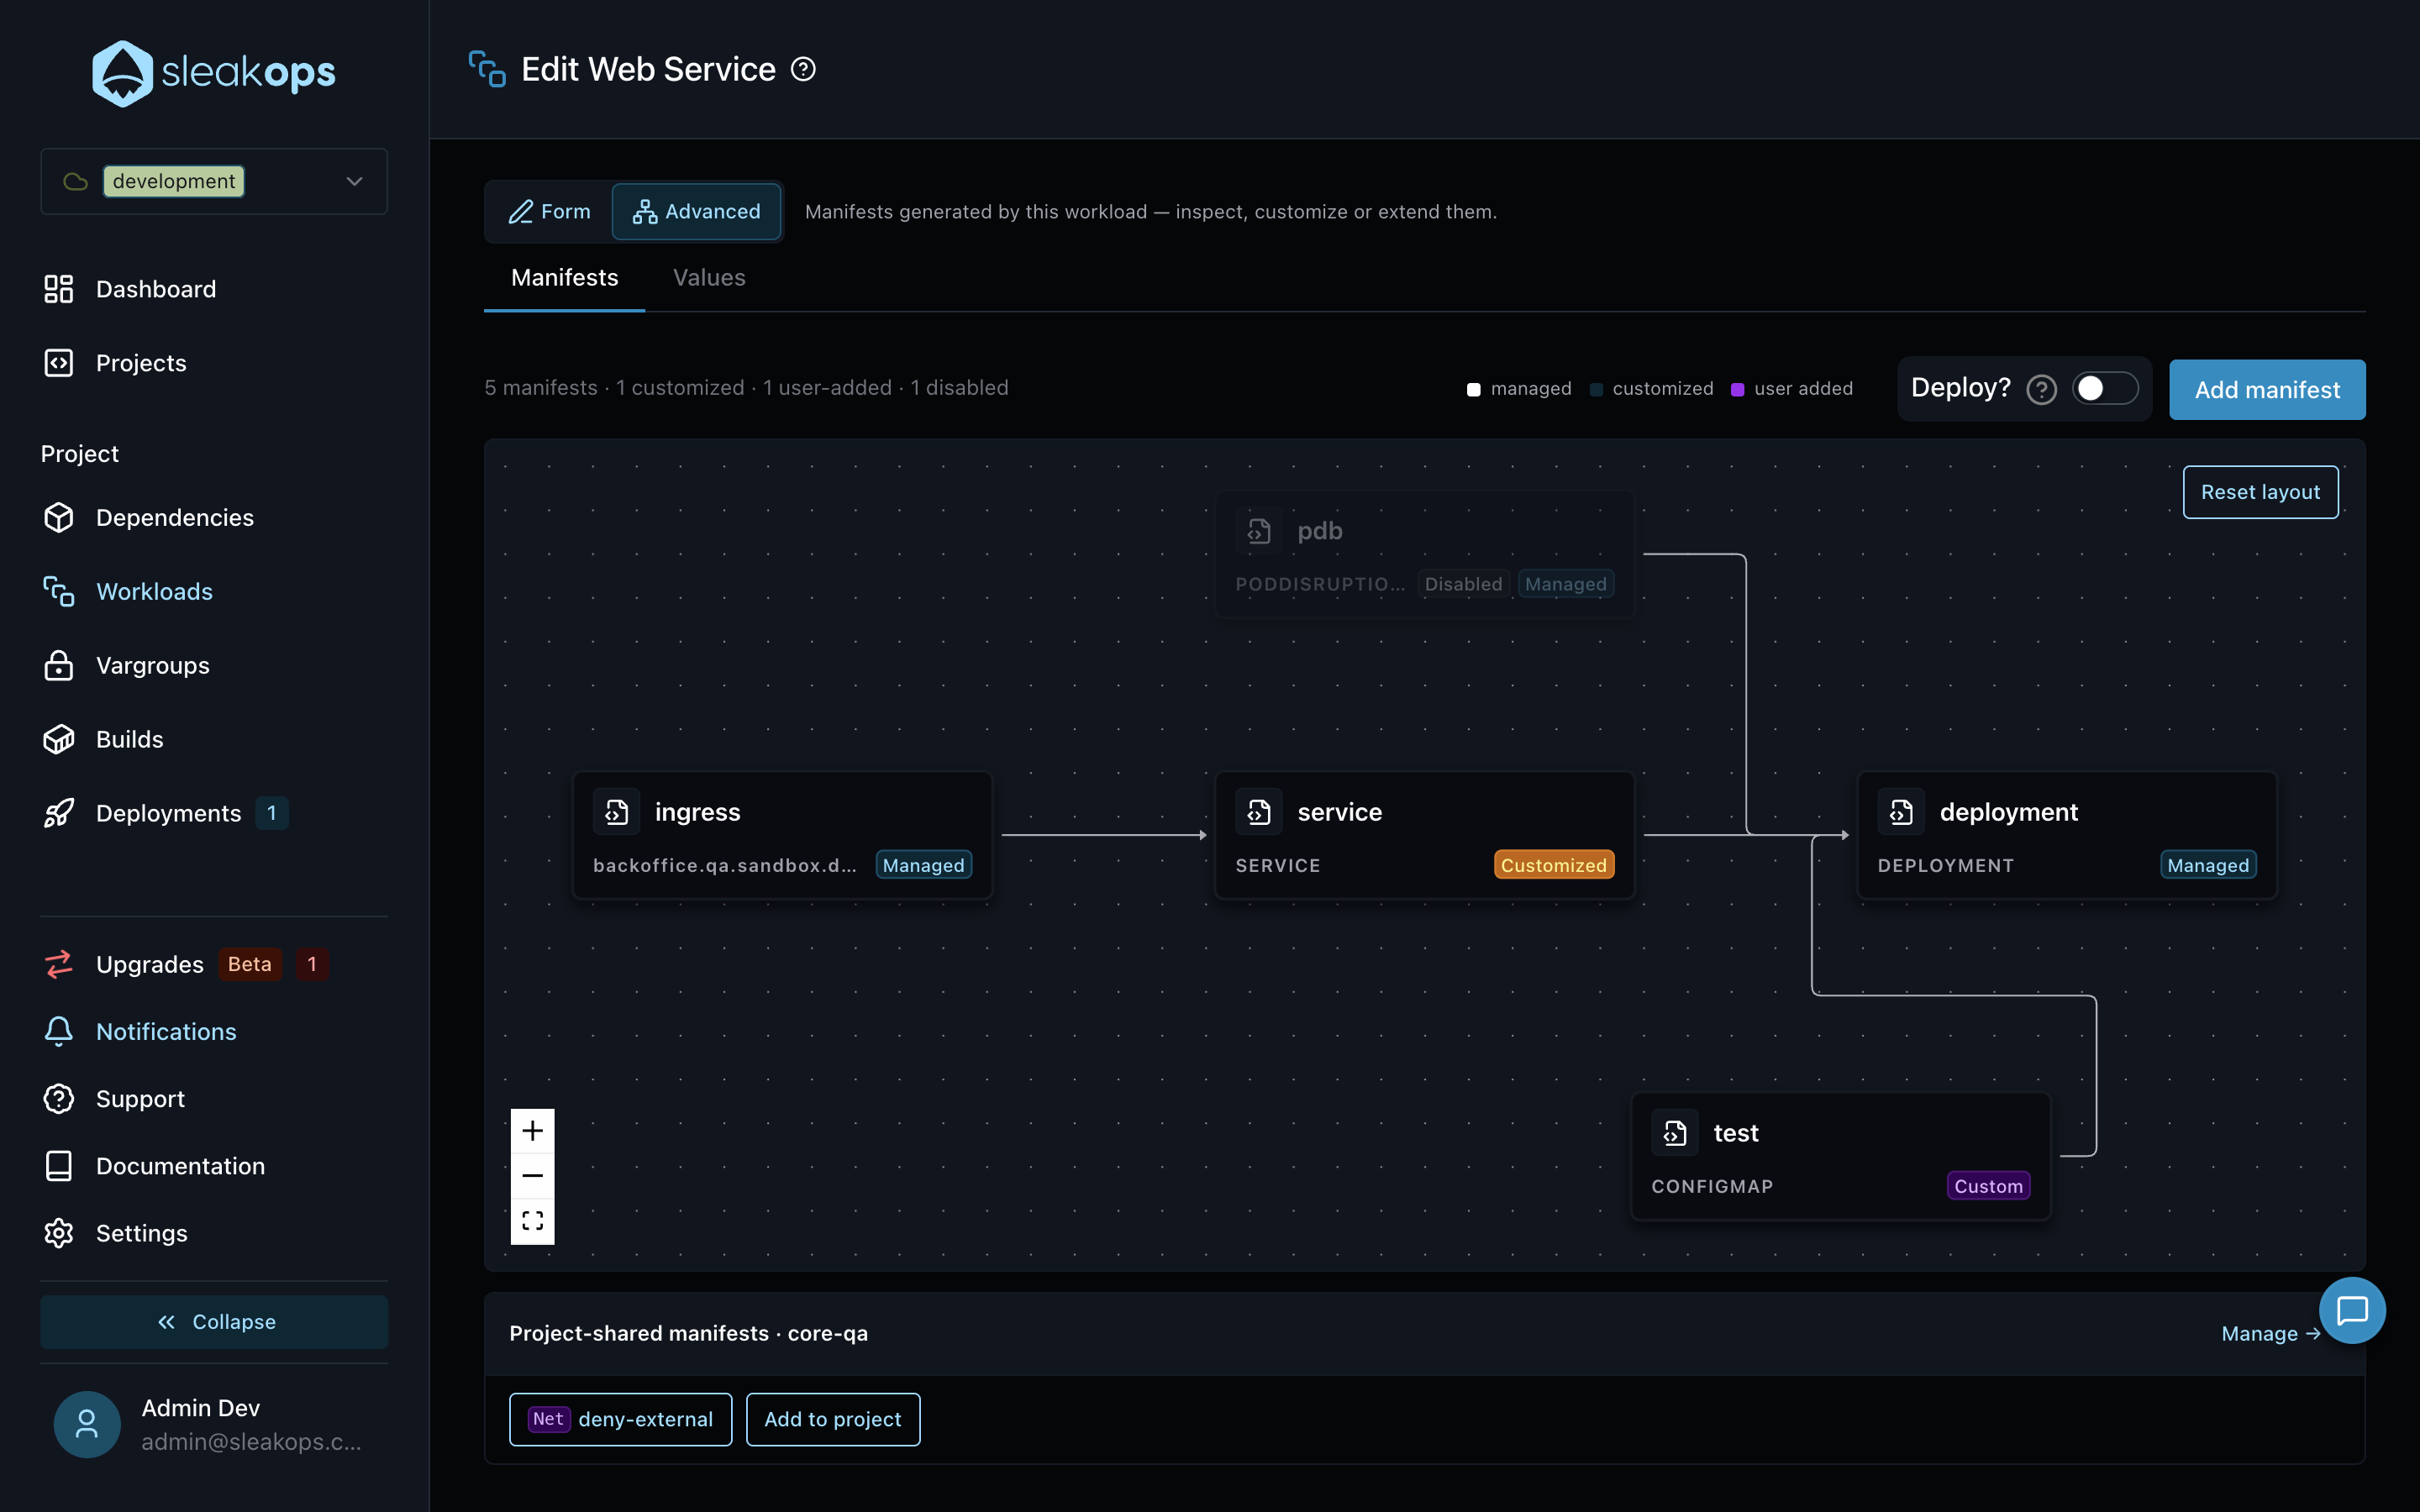
Each node shows the manifest's name, its Kind (or resolved host, for Ingress manifests) and its origin:
| Origin | Badge | Meaning |
|---|---|---|
| Managed | Managed | Generated and kept up to date by SleakOps. Base template updates apply automatically. |
| Customized | Customized | You edited its YAML. SleakOps never overwrites your copy — see template updates. |
| Custom | Custom | A manifest you added yourself. It has no SleakOps base template. |
Disabled manifests show a Disabled badge and their edges render dashed.
You can drag nodes to arrange the graph — positions are saved per Workload, and Reset layout restores the automatic arrangement.
Below the graph, the Project-shared manifests strip shows the manifests in the project bucket that deploy alongside every Workload, with a Manage → shortcut to the Project's Chart Configuration.
Editing a manifest
Click any node to open the manifest editor. The header shows the manifest's kind, origin, base template version, an Enabled switch, a copy button and Delete.
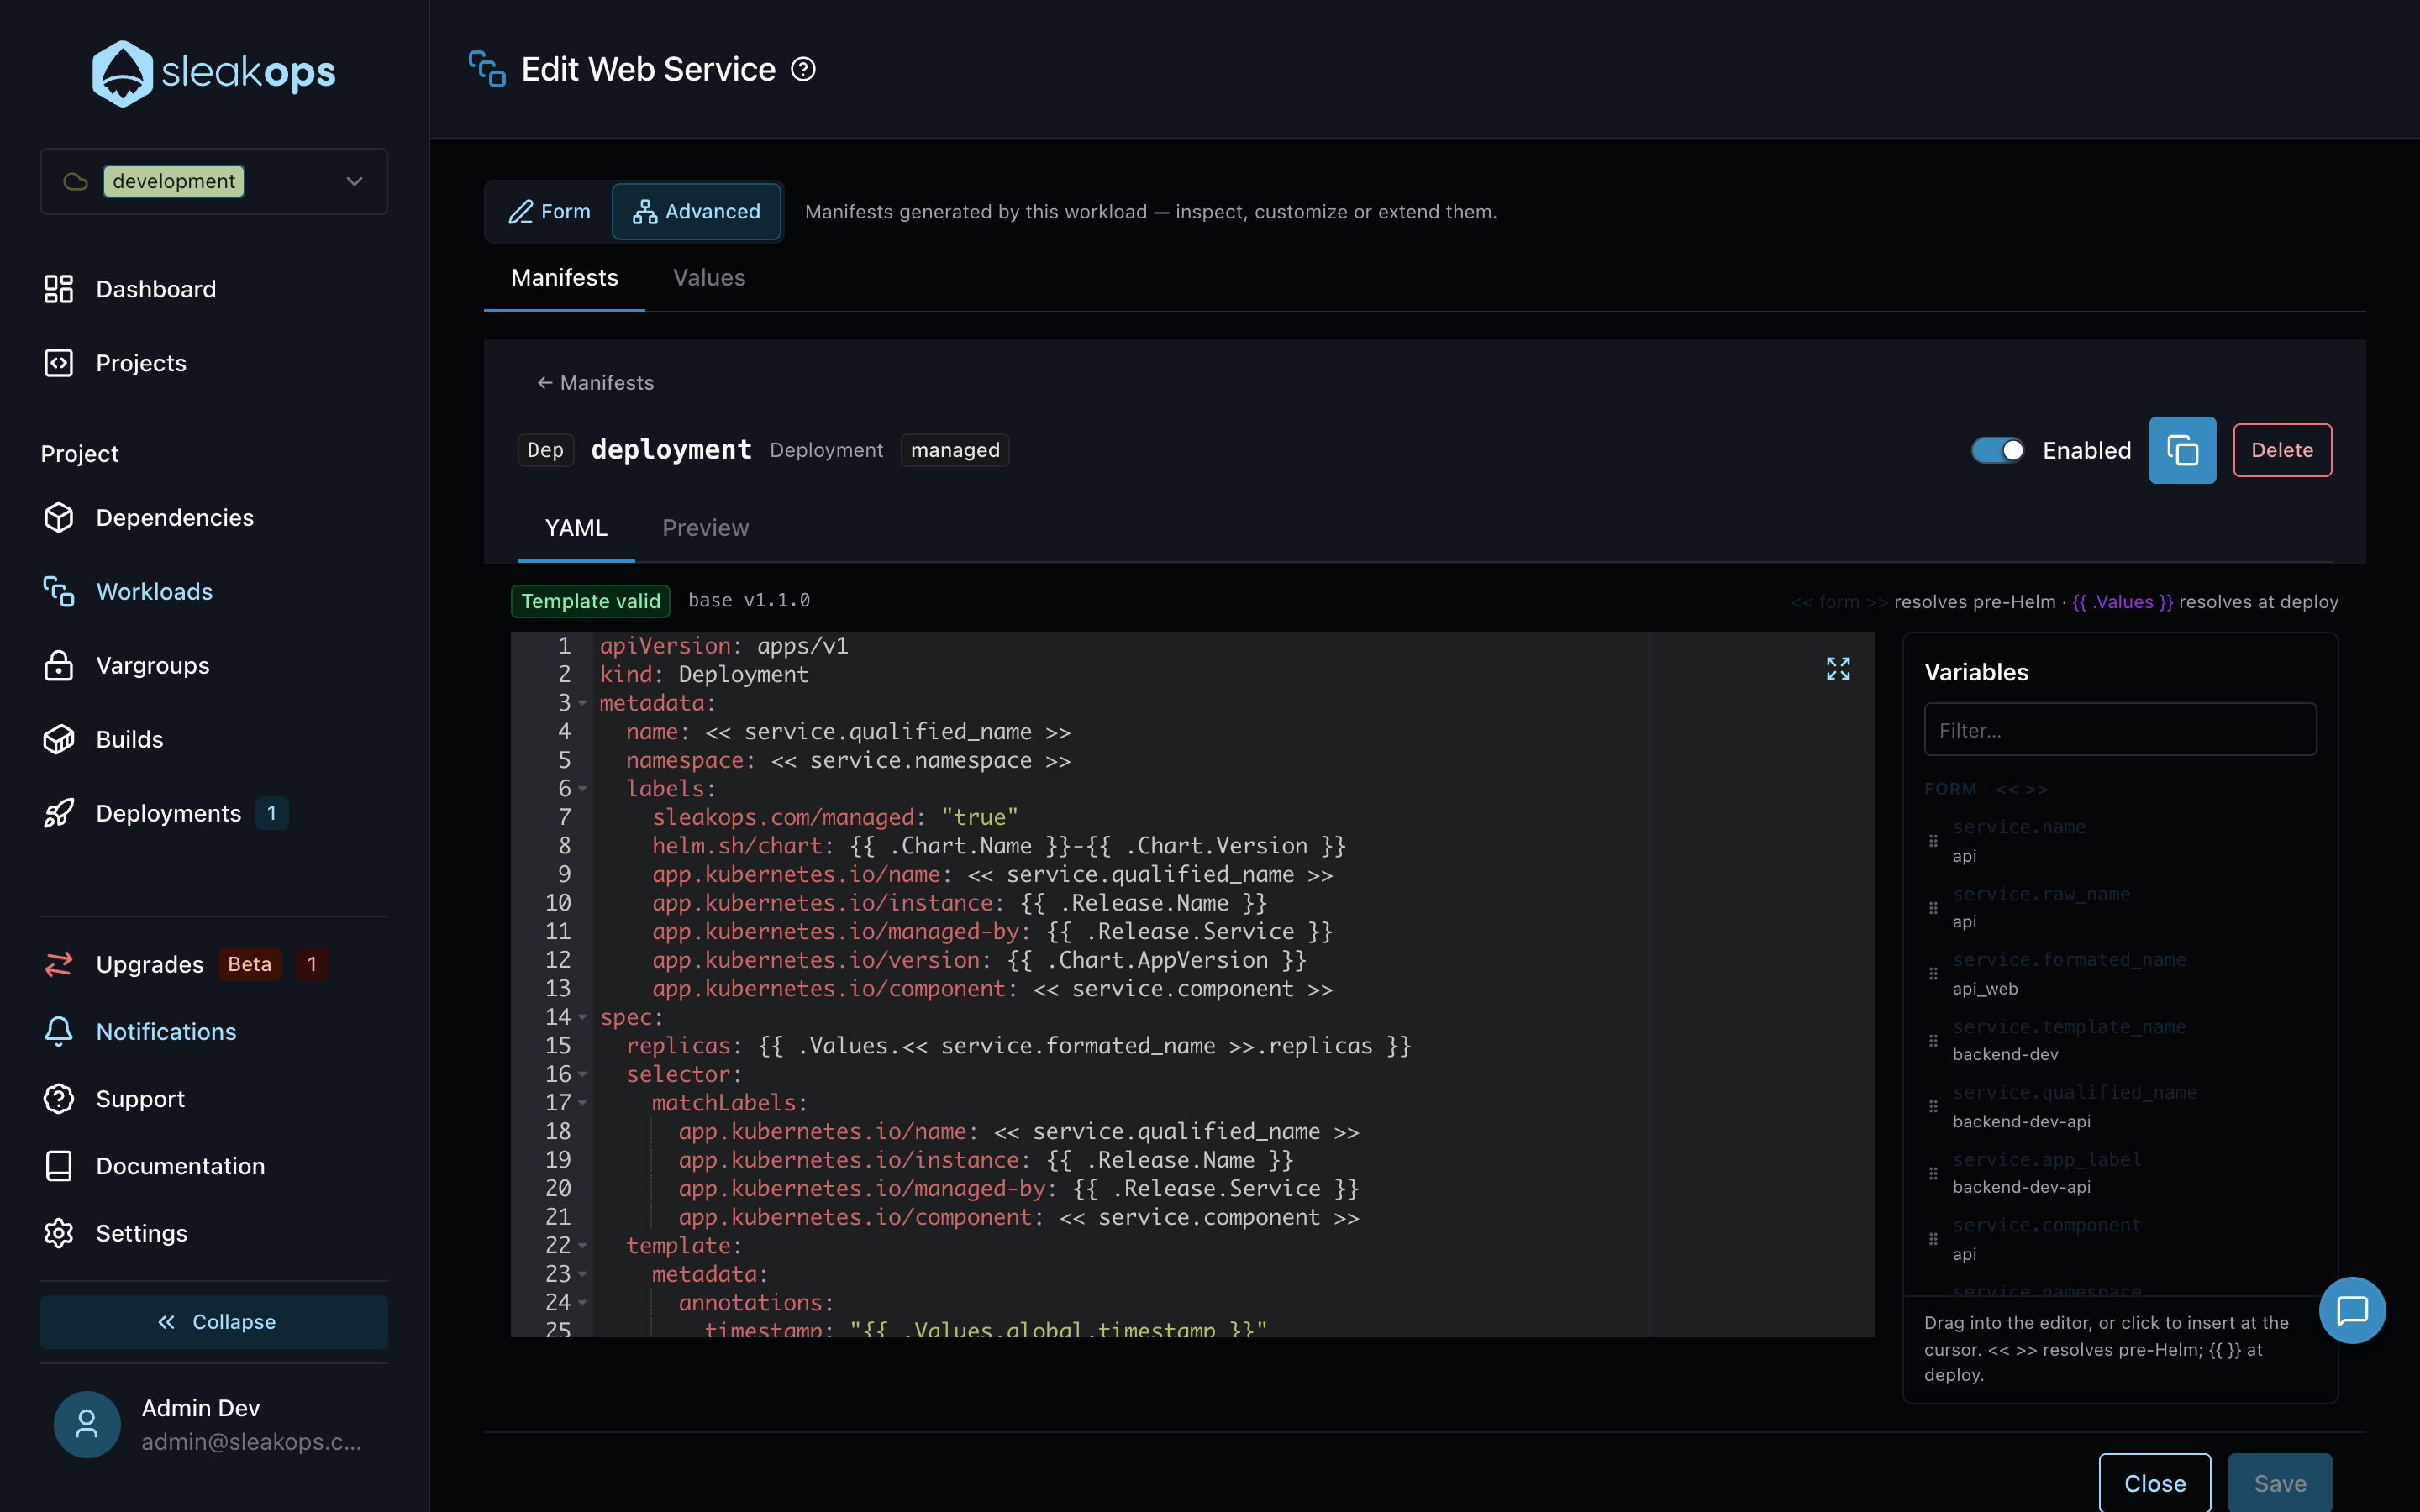
The YAML tab is where you edit the template. Two kinds of placeholders can appear in it:
<< form >>variables resolve before Helm, from the values of your Workload form (name, namespace, command, healthcheck, etc.).{{ .Values }}expressions are left for Helm at deploy time (replicas, resources, image tag — everything that comes from Values).
The Variables panel on the right lists everything available: click an entry to insert it at the cursor, or drag it into the editor.
The editor validates as you type. Errors block saving, and include:
- Unknown variables not declared in the Workload's variable context.
- Expressions blocked by the template sandbox.
- Removing the protected
sleakops.com/managedlabel. - A
namespacedifferent from the Project environment (warning — the namespace always belongs to the environment).
Saving your first structural edit turns a managed manifest into customized. If the Deploy? switch on the graph toolbar is off, the save is registered as a pending change; if it's on, a deployment is triggered right away.
Preview
The Preview tab renders the template with the current form variables and shows exactly what will be handed to Helm:
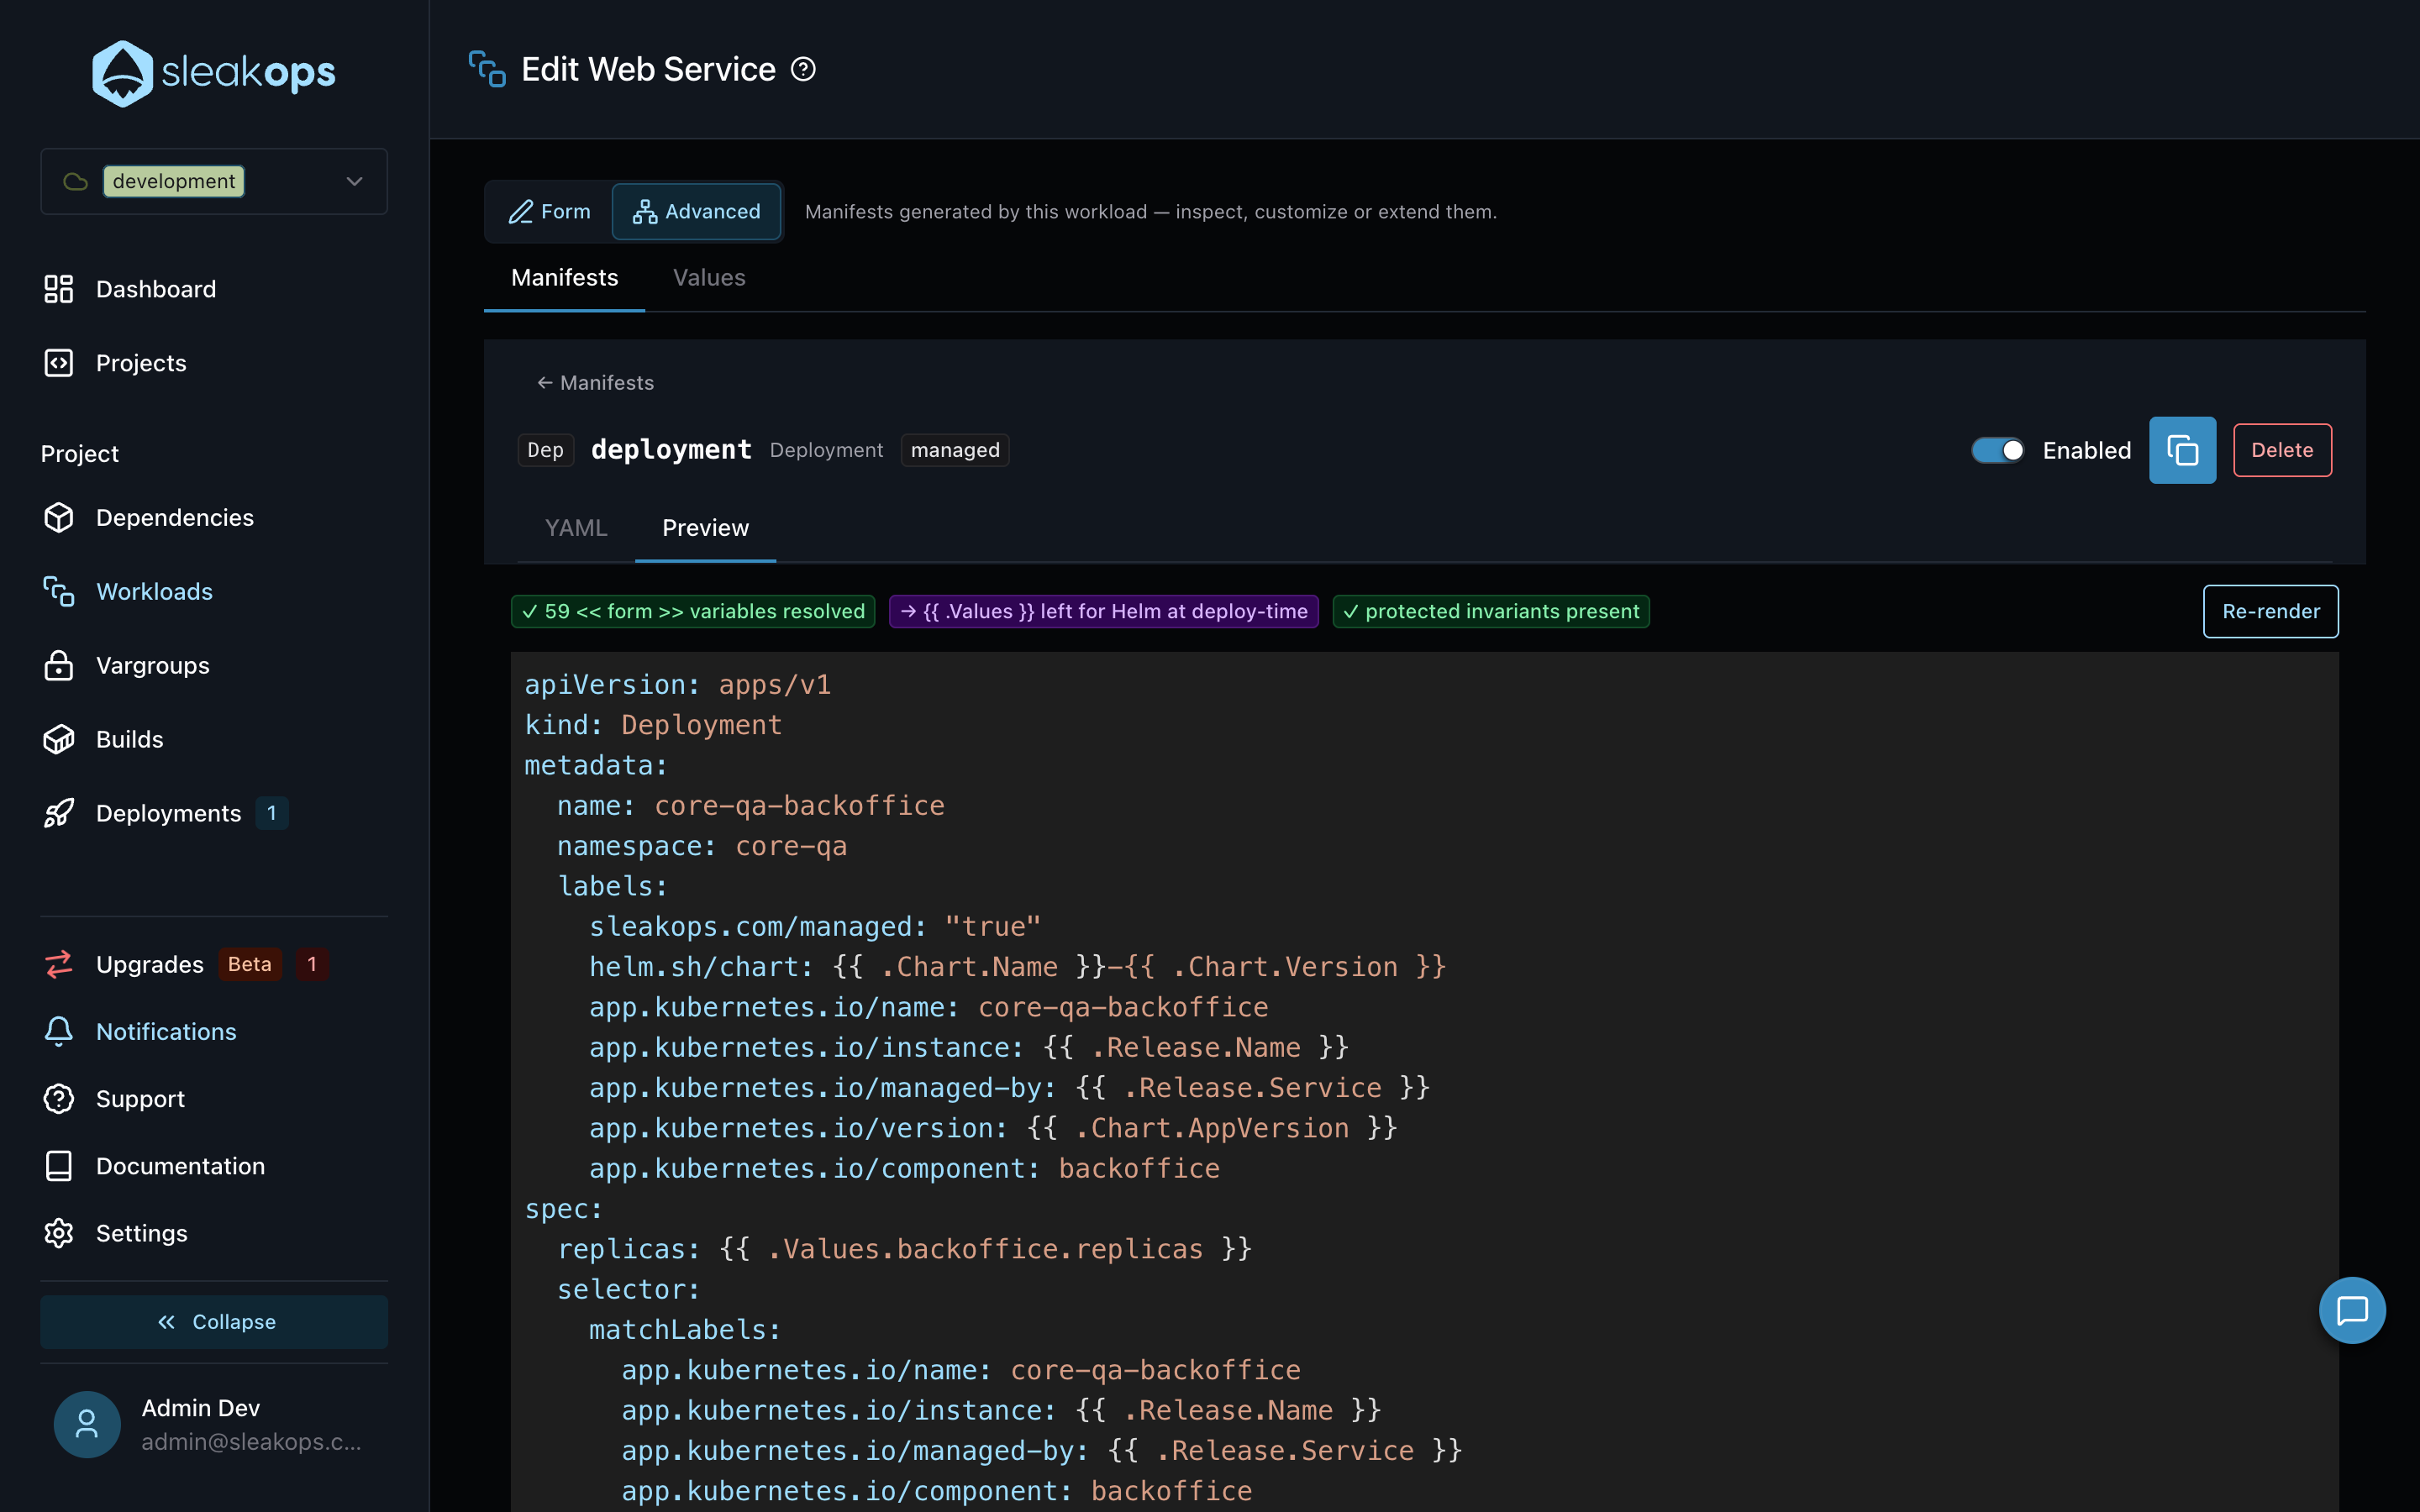
The badges above the output confirm how many << form >> variables were resolved, whether {{ .Values }} expressions remain for deploy time, and that the protected invariants are present. If the template fails to render, the errors are listed with their line numbers and a Fix in YAML shortcut — a manifest that doesn't render will not deploy.
Adding a manifest
Use Add manifest (on the Workload graph toolbar, or in the project bucket) to deploy resources beyond the generated ones:
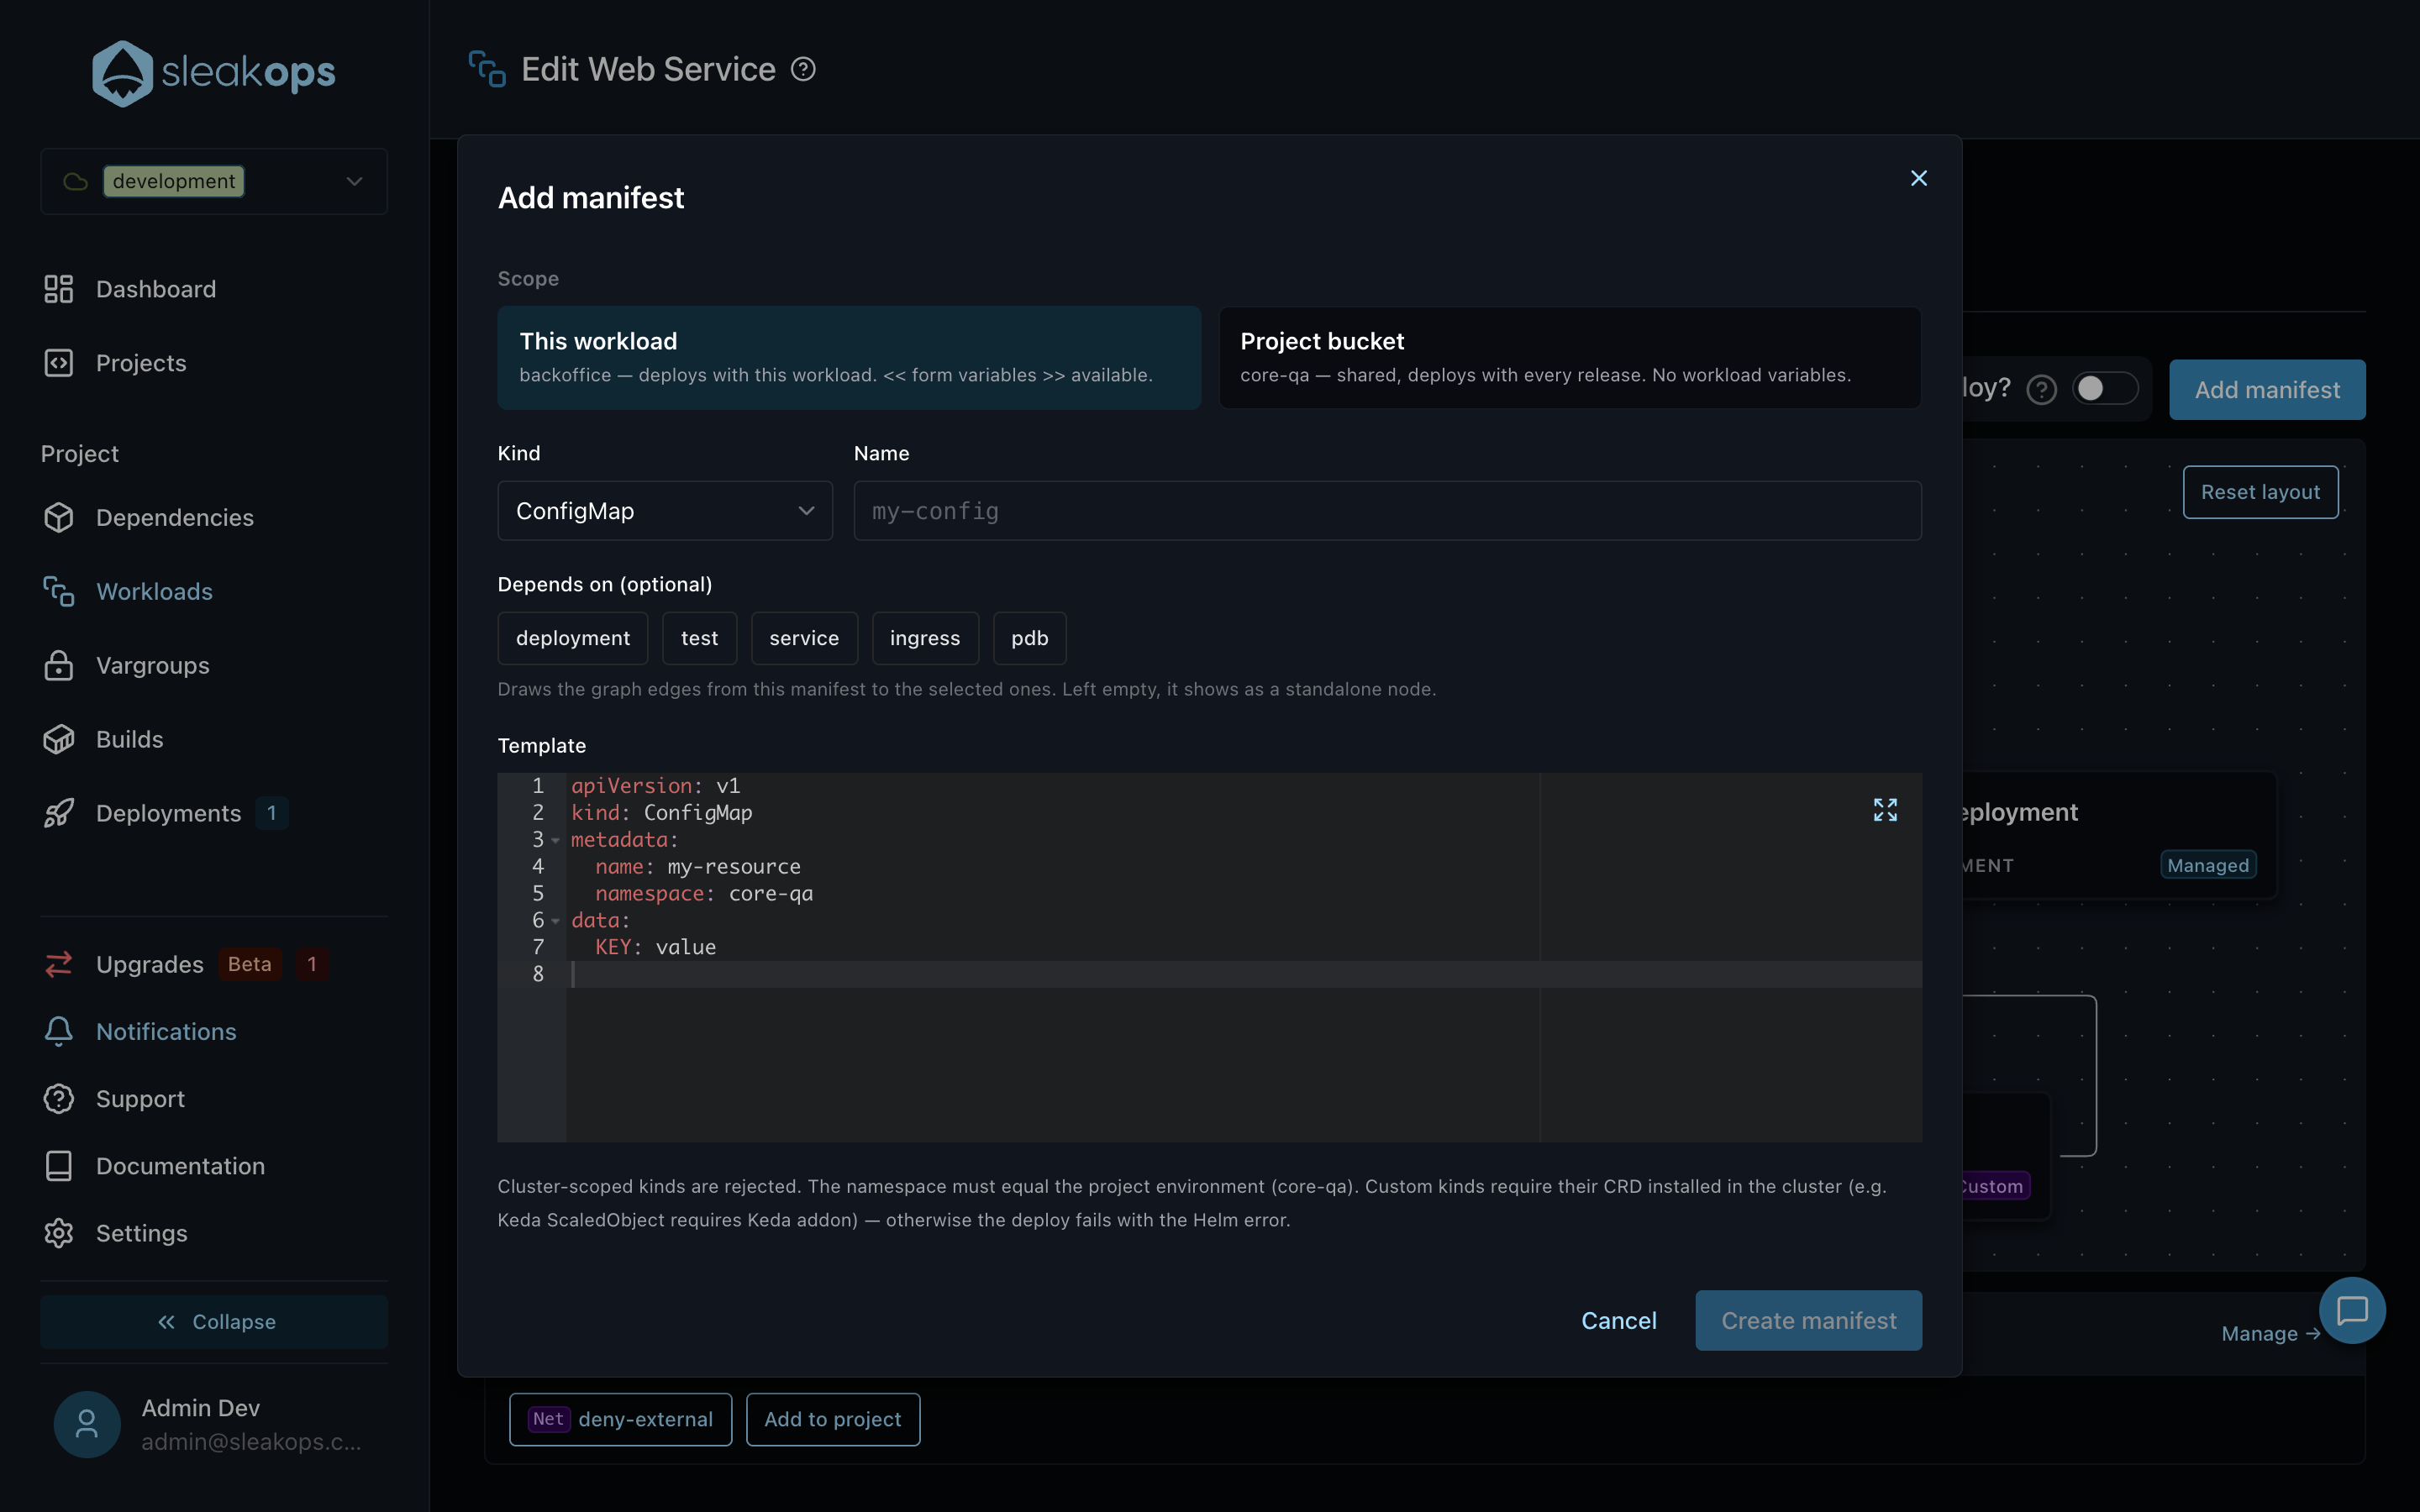
| Field | Description |
|---|---|
| Scope | This workload (deploys with the Workload, << form >> variables available) or Project bucket (shared, deploys with every release). |
| Kind | ConfigMap, Secret, ServiceAccount, NetworkPolicy, PersistentVolumeClaim, CronJob — or Custom… for any other kind, including CRDs. |
| Name | The manifest's name; it is mirrored into the template's metadata.name. |
| Depends on | Optional. Draws the graph edges from this manifest to the selected ones. |
| Template | The manifest YAML. A starting stub is generated for the selected Kind. |
Keep in mind:
- Cluster-scoped kinds are rejected, and the
namespacemust equal the Project environment. - Custom kinds require their CRD installed in the cluster — for example, a Keda
ScaledObjectneeds the Keda Addon. Otherwise the deploy fails with the corresponding Helm error.
The project bucket
Manifests added with the Project bucket scope are not tied to any Workload: they deploy with every release of the Project. Typical residents are NetworkPolicies, shared ConfigMaps and ServiceAccounts. Manage them from Project → Settings → Chart Configuration → Manifests:
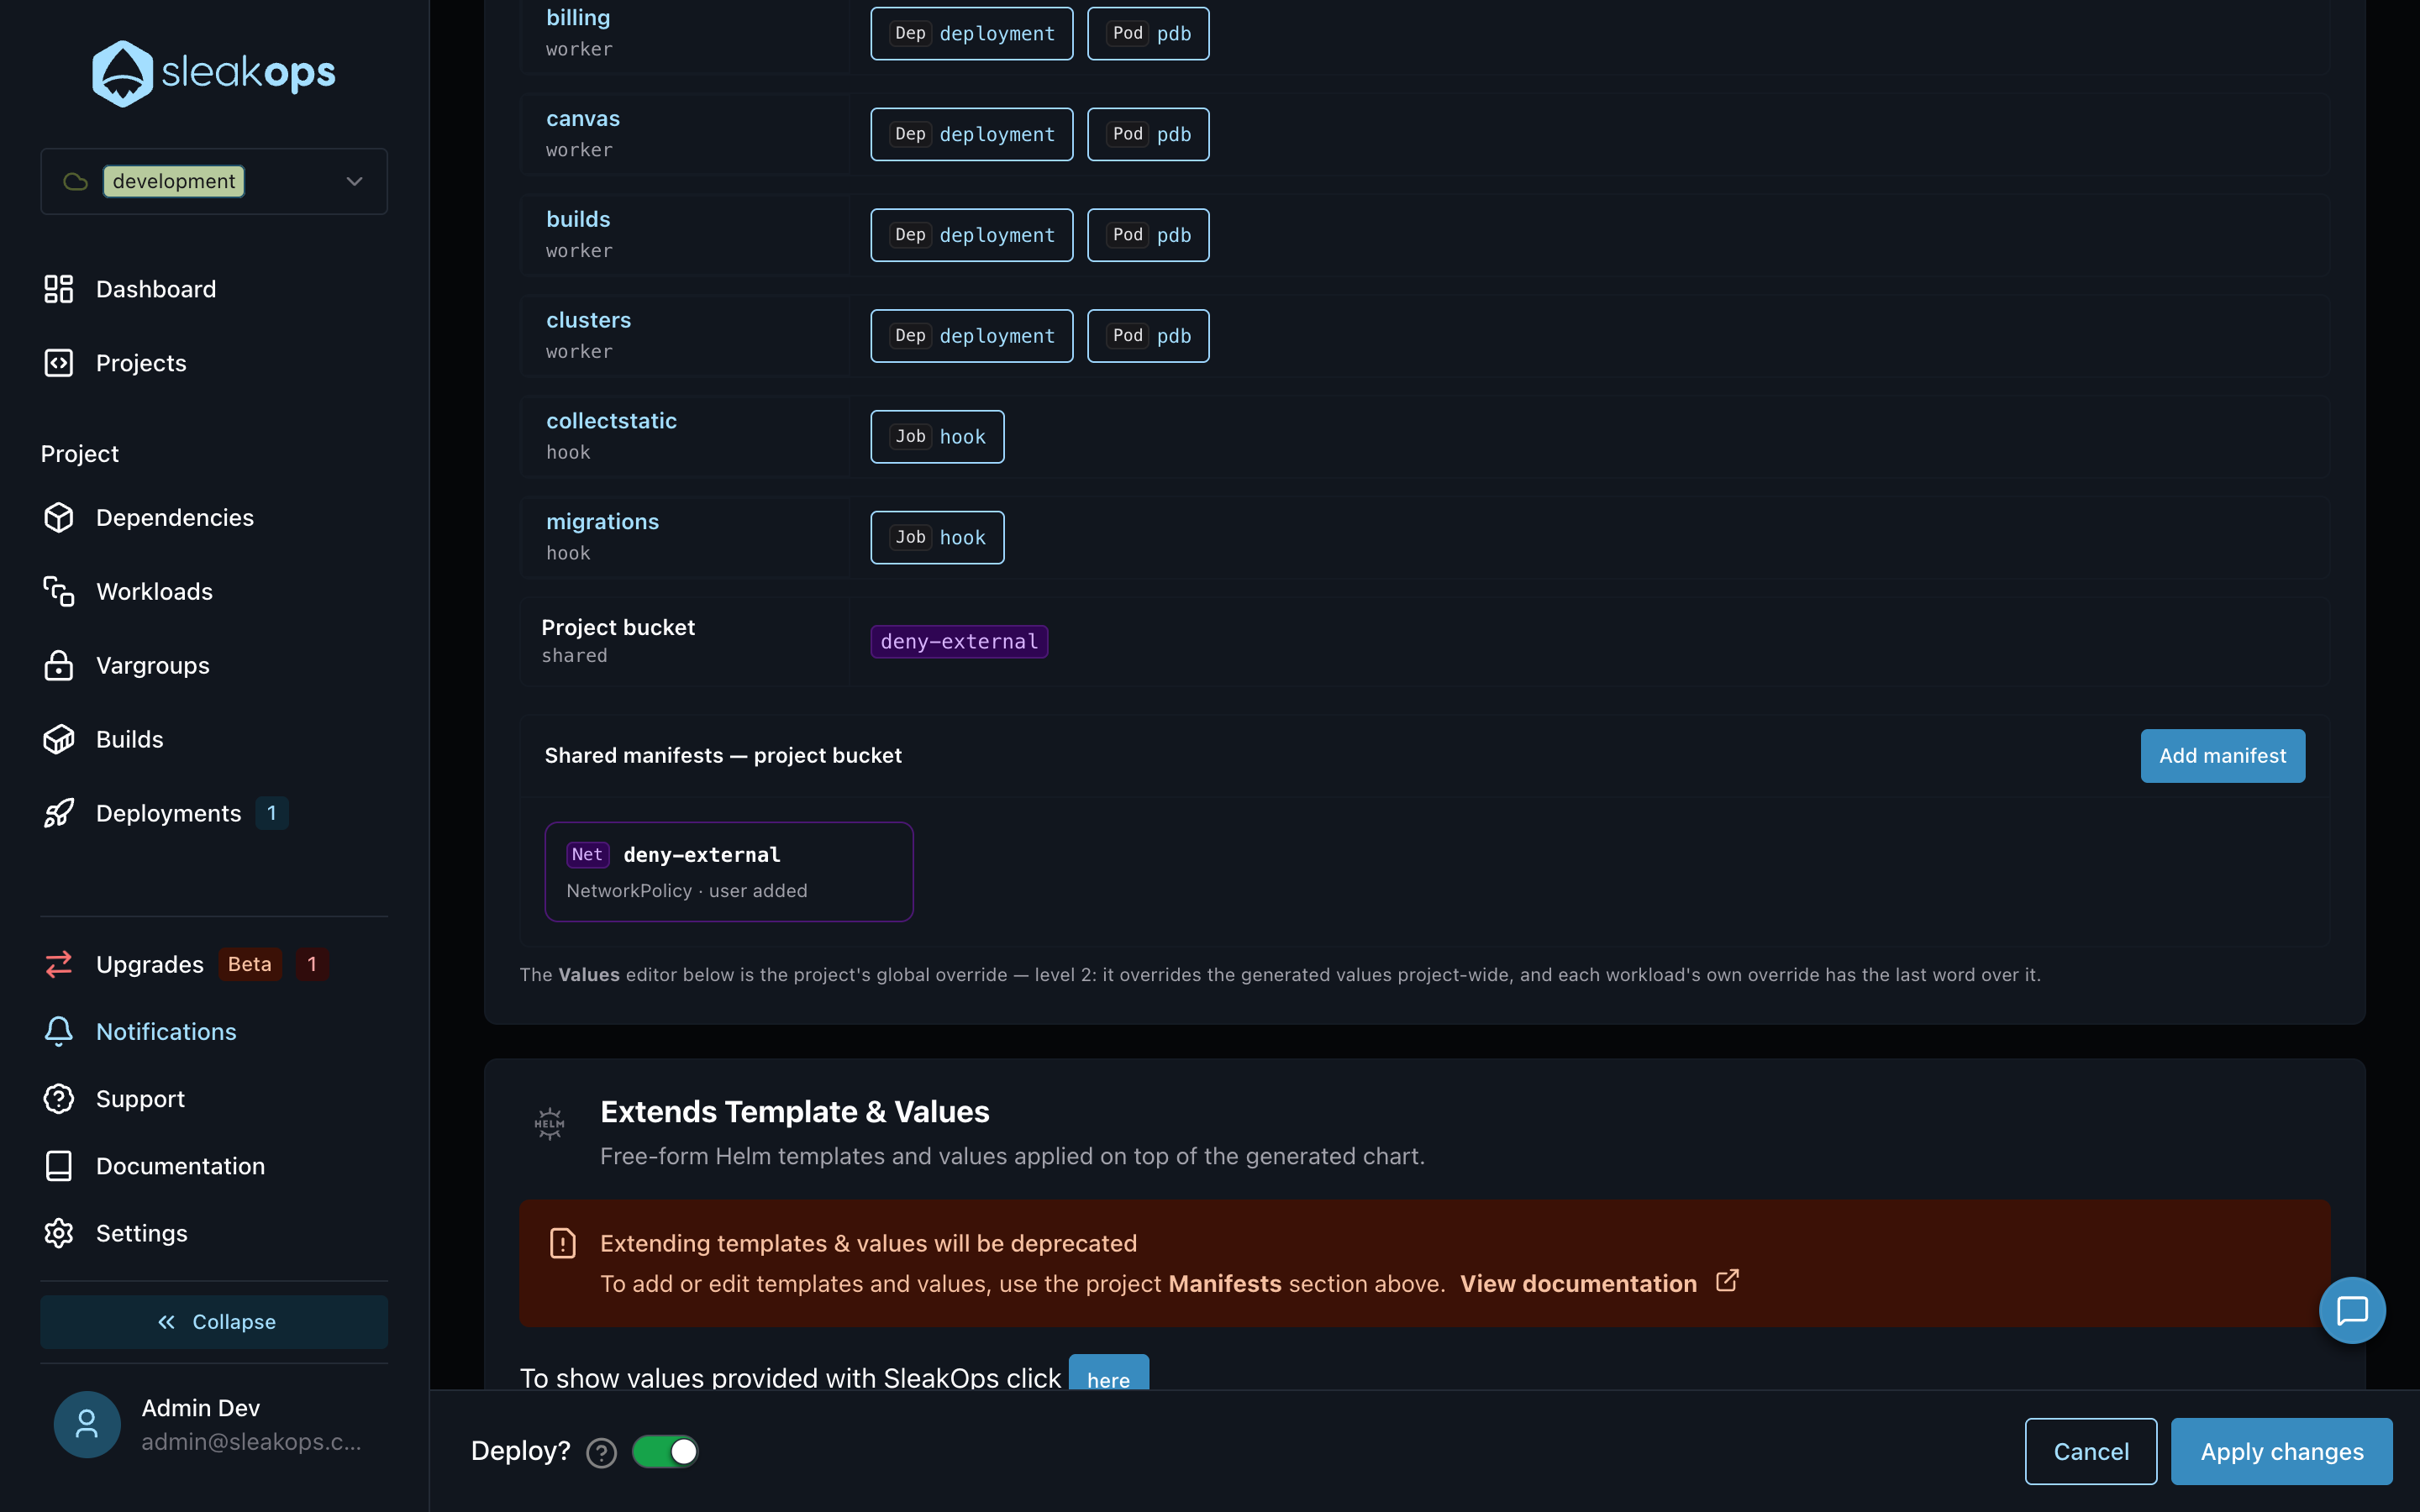
The Explorer at the top of the section lists every Workload of the Project with its manifests, and the project bucket at the end. Use the filter to search by name or kind; clicking a Workload opens its Advanced view, and clicking a manifest opens the editor in place.
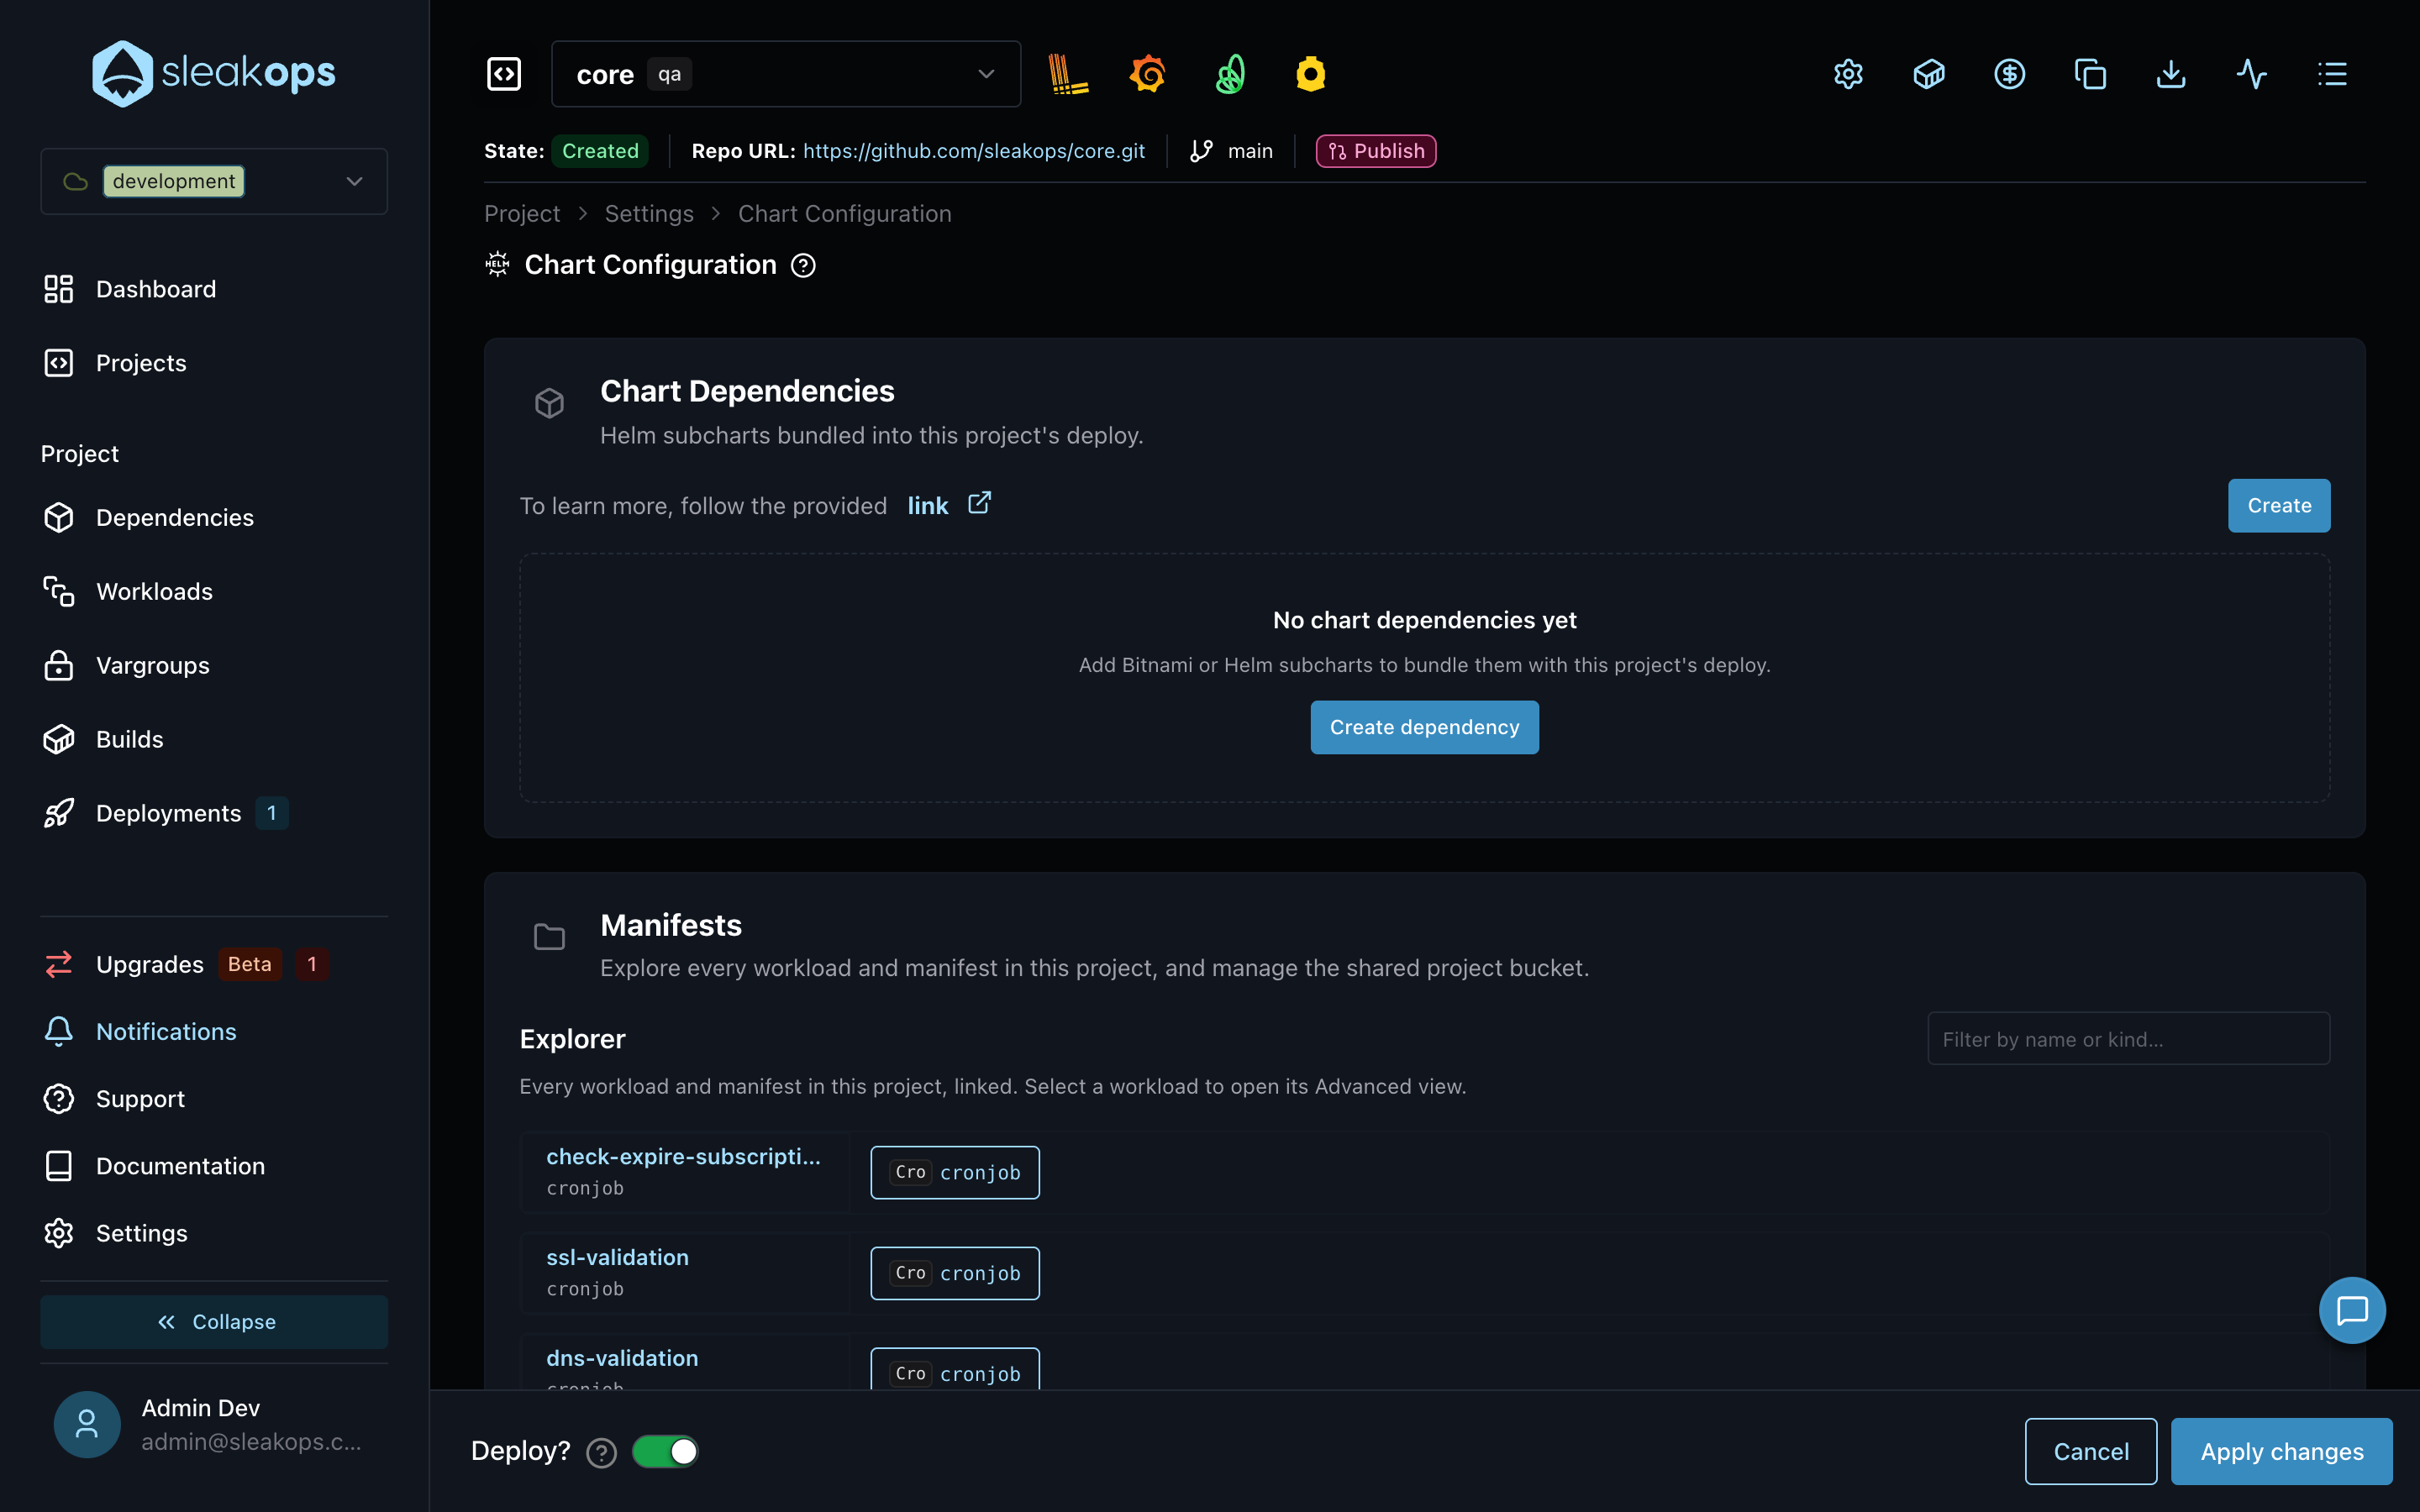
The free-form Extends Template & Values section below Manifests keeps working, but it is deprecated: new custom resources should be added as manifests. See Extra Templates.
Base template updates
When you customize a manifest, your copy is pinned: SleakOps never overwrites it, even when the base template it came from gets improvements. When a newer base version exists, the editor shows an update available badge and a banner with a View diff button:
- Green lines are what the new base adds.
- Red lines are your customizations, absent from the base.
From the diff you can choose Keep my version or Reset to v<new>. Reset to base (also available in the editor header) discards your structural edits, restores the SleakOps base template and turns the manifest back into managed. Form values are not affected — they only fill variables.
Disabling and deleting
- Disable (the Enabled switch): the manifest is skipped on the next deploy but keeps its configuration. If the resource was already deployed, the next deploy removes it from the cluster.
- Delete: the manifest will no longer be deployed, and SleakOps will not re-create it on future seeds or base-template updates. You can add an equivalent manifest back later.
Deploying your changes
Every content change in the Manifests view respects the Deploy? switch on the toolbar:
- On — a deployment is triggered right after each save.
- Off — changes accumulate as pending changes and are deployed when you publish them.
Layout-only actions — dragging nodes or Reset layout — are cosmetic: they never create a pending change or a deployment, regardless of the switch.
FAQs
Can I modify the templates SleakOps generates?
Yes. Open the Workload's Advanced view, click the manifest and edit its YAML. Your copy becomes customized and is never overwritten by SleakOps.
What happens to my existing Extra Templates?
They keep deploying exactly as before. The Extends Template & Values section is deprecated in favor of Manifests, so migrate custom resources to manifests as you touch them — one manifest per resource, with validation and preview instead of one free-form blob.
Can I deploy resources from a CRD?
Yes — choose Custom… as the Kind when adding a manifest and set the CRD's apiVersion/kind. The CRD must be installed in the cluster (for example, Keda's ScaledObject requires the Keda Addon), otherwise the deploy fails with the corresponding Helm error.
Why can't I change the namespace of a manifest?
Each Project environment deploys into its own Kubernetes Namespace. Manifests always deploy to the environment's namespace — a different value is rejected to keep environments isolated.
What's the difference between disabling and deleting a manifest?
Disabling keeps the manifest and its configuration but skips it at deploy time — flip the switch back to re-include it. Deleting removes it for good: SleakOps won't re-create it on future updates, though you can always add a new manifest with the same content.
Who can edit manifests?
Editing follows your platform role: viewers see the graph, the YAML and the previews in read-only mode; editors and admins can customize, add, disable and delete manifests.