Job
Jobs are single-run tasks, typically used for one-off operations like updates, system checks, or maintenance. They run once and then complete, and you can check their progress or results by viewing the corresponding pod’s logs.
FAQs
How can I configure memory and CPU settings for my Job?
You can configure the CPU Request and CPU Limit values to set the minimum and maximum CPU resources each instance in your cluster can use. Similarly, you set Memory Request and Memory Limit for memory allocation per instance.
How can I configure memory and CPU settings for my Job?
You can configure the CPU Request and CPU Limit values to set the minimum and maximum CPU resources each instance in your cluster can use. Similarly, you set Memory Request and Memory Limit for memory allocation per instance.
Why does a Timeout message appear on my Job?
The timeout you see in SleakOps corresponds to a platform monitoring limit (approximately 30 minutes). After that time, SleakOps stops monitoring the Job but does not kill it — the Job keeps running normally in your infrastructure.
How can I verify if my Job completed successfully?
You can validate it through alternative methods: checking the pod logs directly or using tools like Lens to monitor the status in real time.
My Job gets cut off before finishing — what's causing this?
If the Job doesn't complete, it's most likely that the pod was terminated because it was running on a spot node. Spot nodes are cost-efficient but not suited for long-running workloads, as they can be interrupted at any time. You can verify this by checking the Karpenter pod logs for that time window.
What can I do to avoid this issue?
If you continue using spot nodes, the recommendation is to split the workload into smaller batches and run them across multiple pods in parallel. You can even automate this using a CronJob.
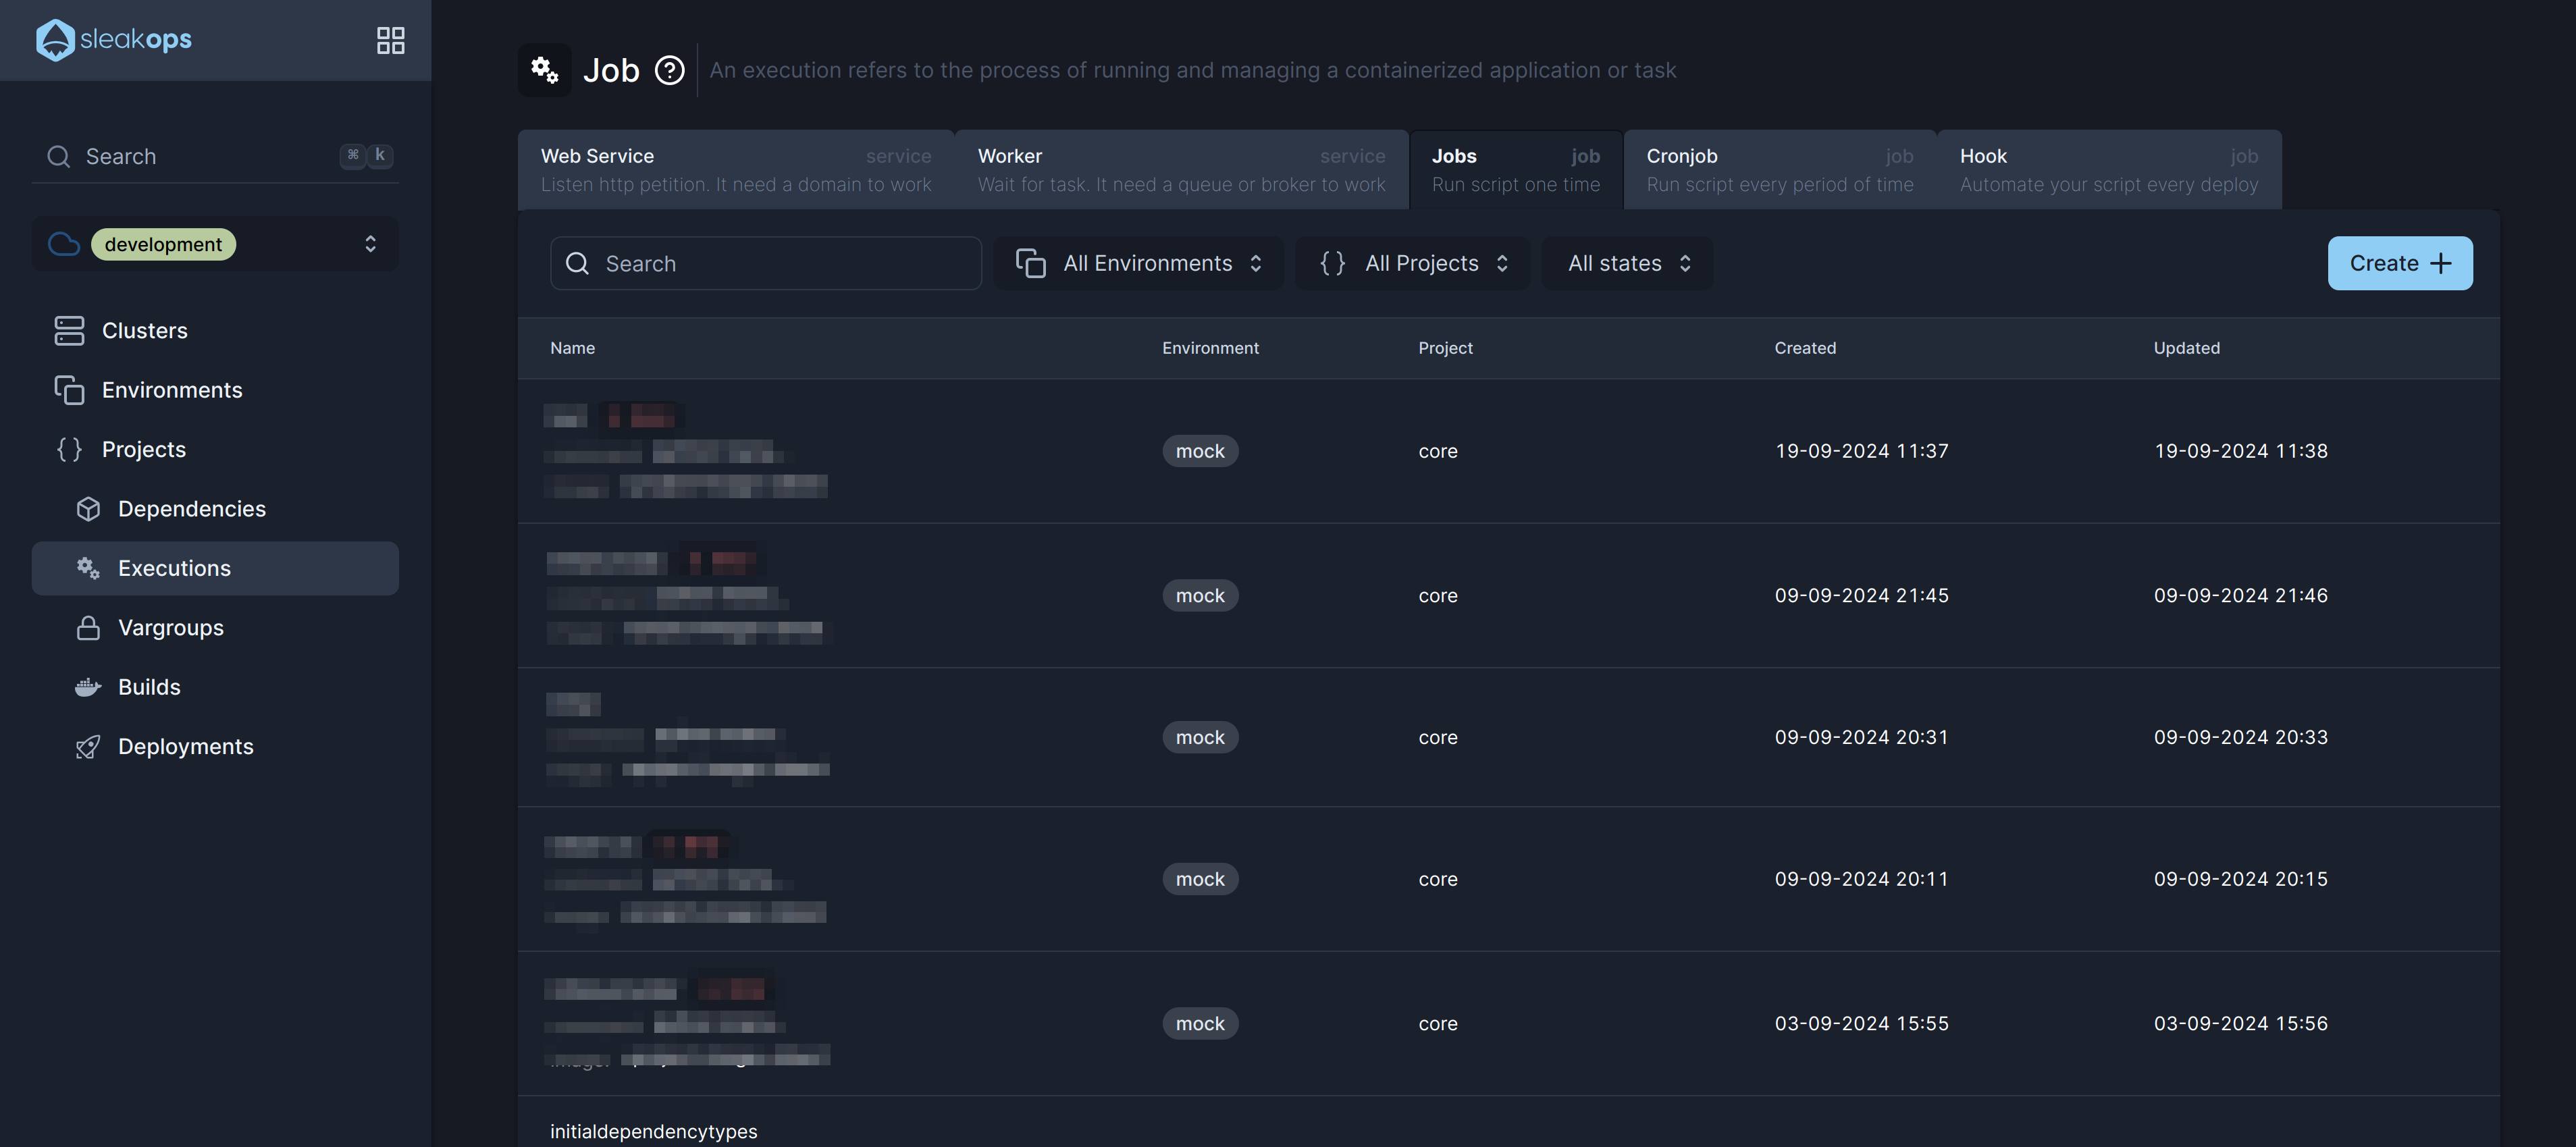
Lets add a Job for your Project
1. Navigate to create Job section
Into the Left Pane, access Workloads. Then select the Job tab and then, at the top right corner, click on the Create button.
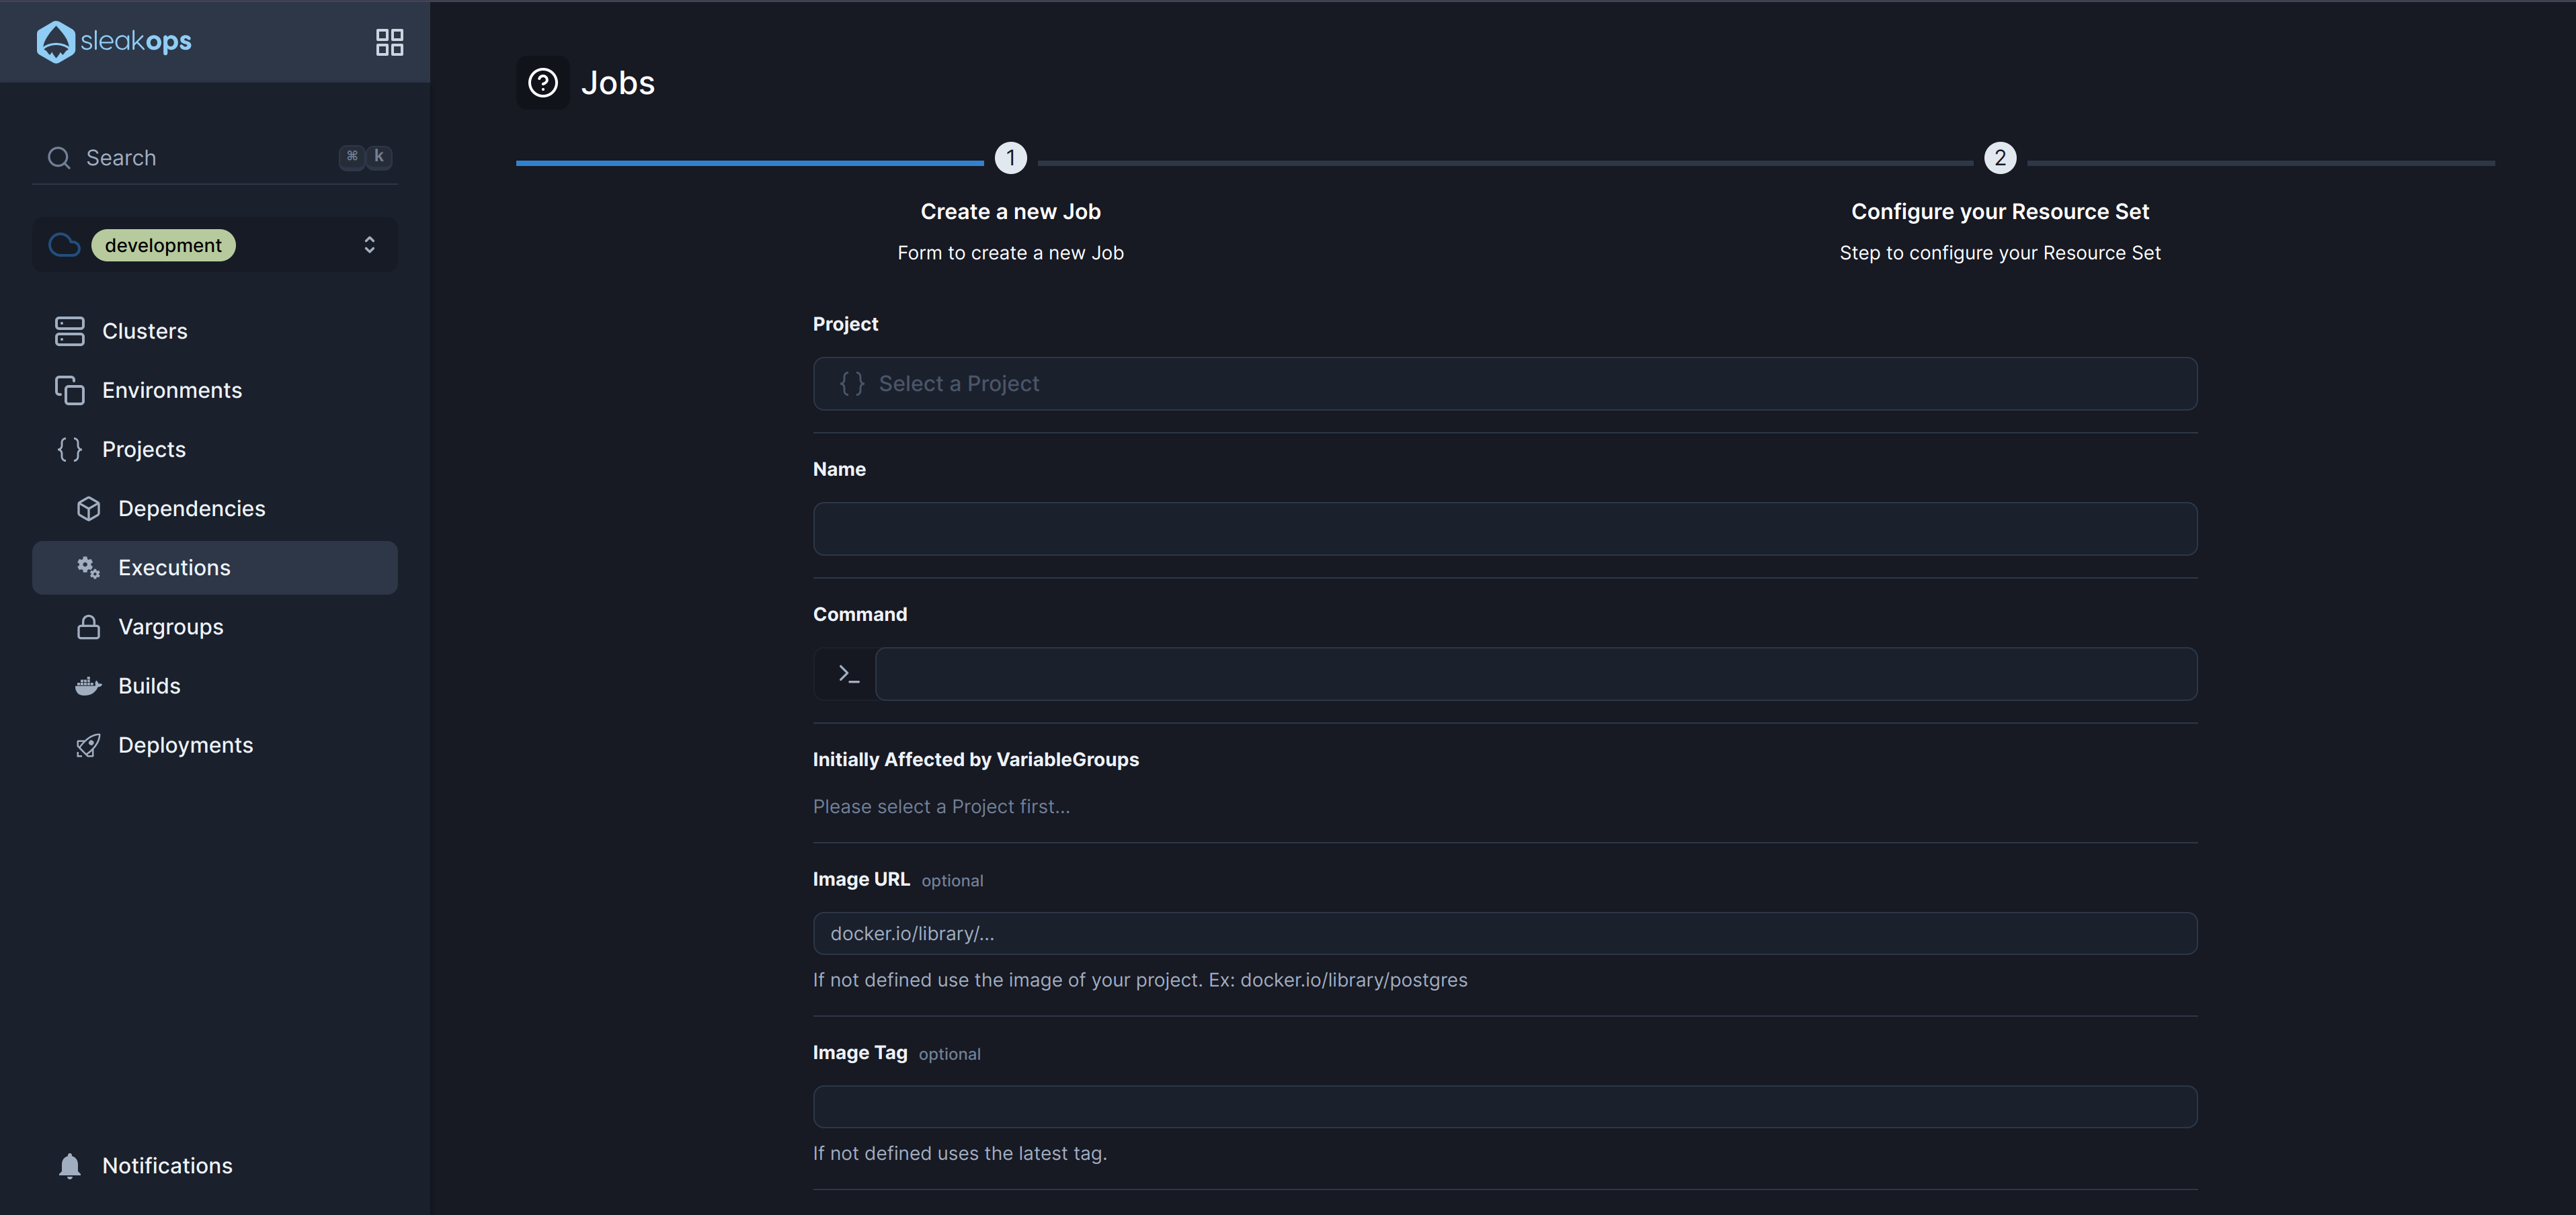
2. Select a Project and a Name for the job
Start with the basic information, complete these attributes and click Next to continue.
| Attribute | Description |
|---|---|
| Name | Identify your job. |
| Project | Select between the existent projects. |
| Command | The command that runs the job. |
| Image | By default the job usage the image of your project, but you can override that with another |
| Image tag | You can specify the tag of image. |
Once those attributes are completed, click the Next button to move forward.
3. Finish the set up
This step outlines the key attributes for configuring the resources of a Job in SleakOps, allowing for flexible management of CPU, memory, and scaling behaviors.
| Attribute | Description |
|---|---|
| CPU Request | The minimum amount of CPU resources allocated for each instance in the cluster. This ensures that each instance always has this amount of CPU available. |
| CPU Limit | The maximum CPU resources that each instance in the cluster can use. This cap helps prevent any single instance from consuming too much CPU. |
| Memory Request | The minimum amount of memory allocated for each instance in the cluster. This guarantees that the instance has enough memory to operate efficiently. |
| Memory Limit | The maximum amount of memory each instance in the cluster can utilize. It limits the memory usage to prevent any single instance from overconsuming resources. |
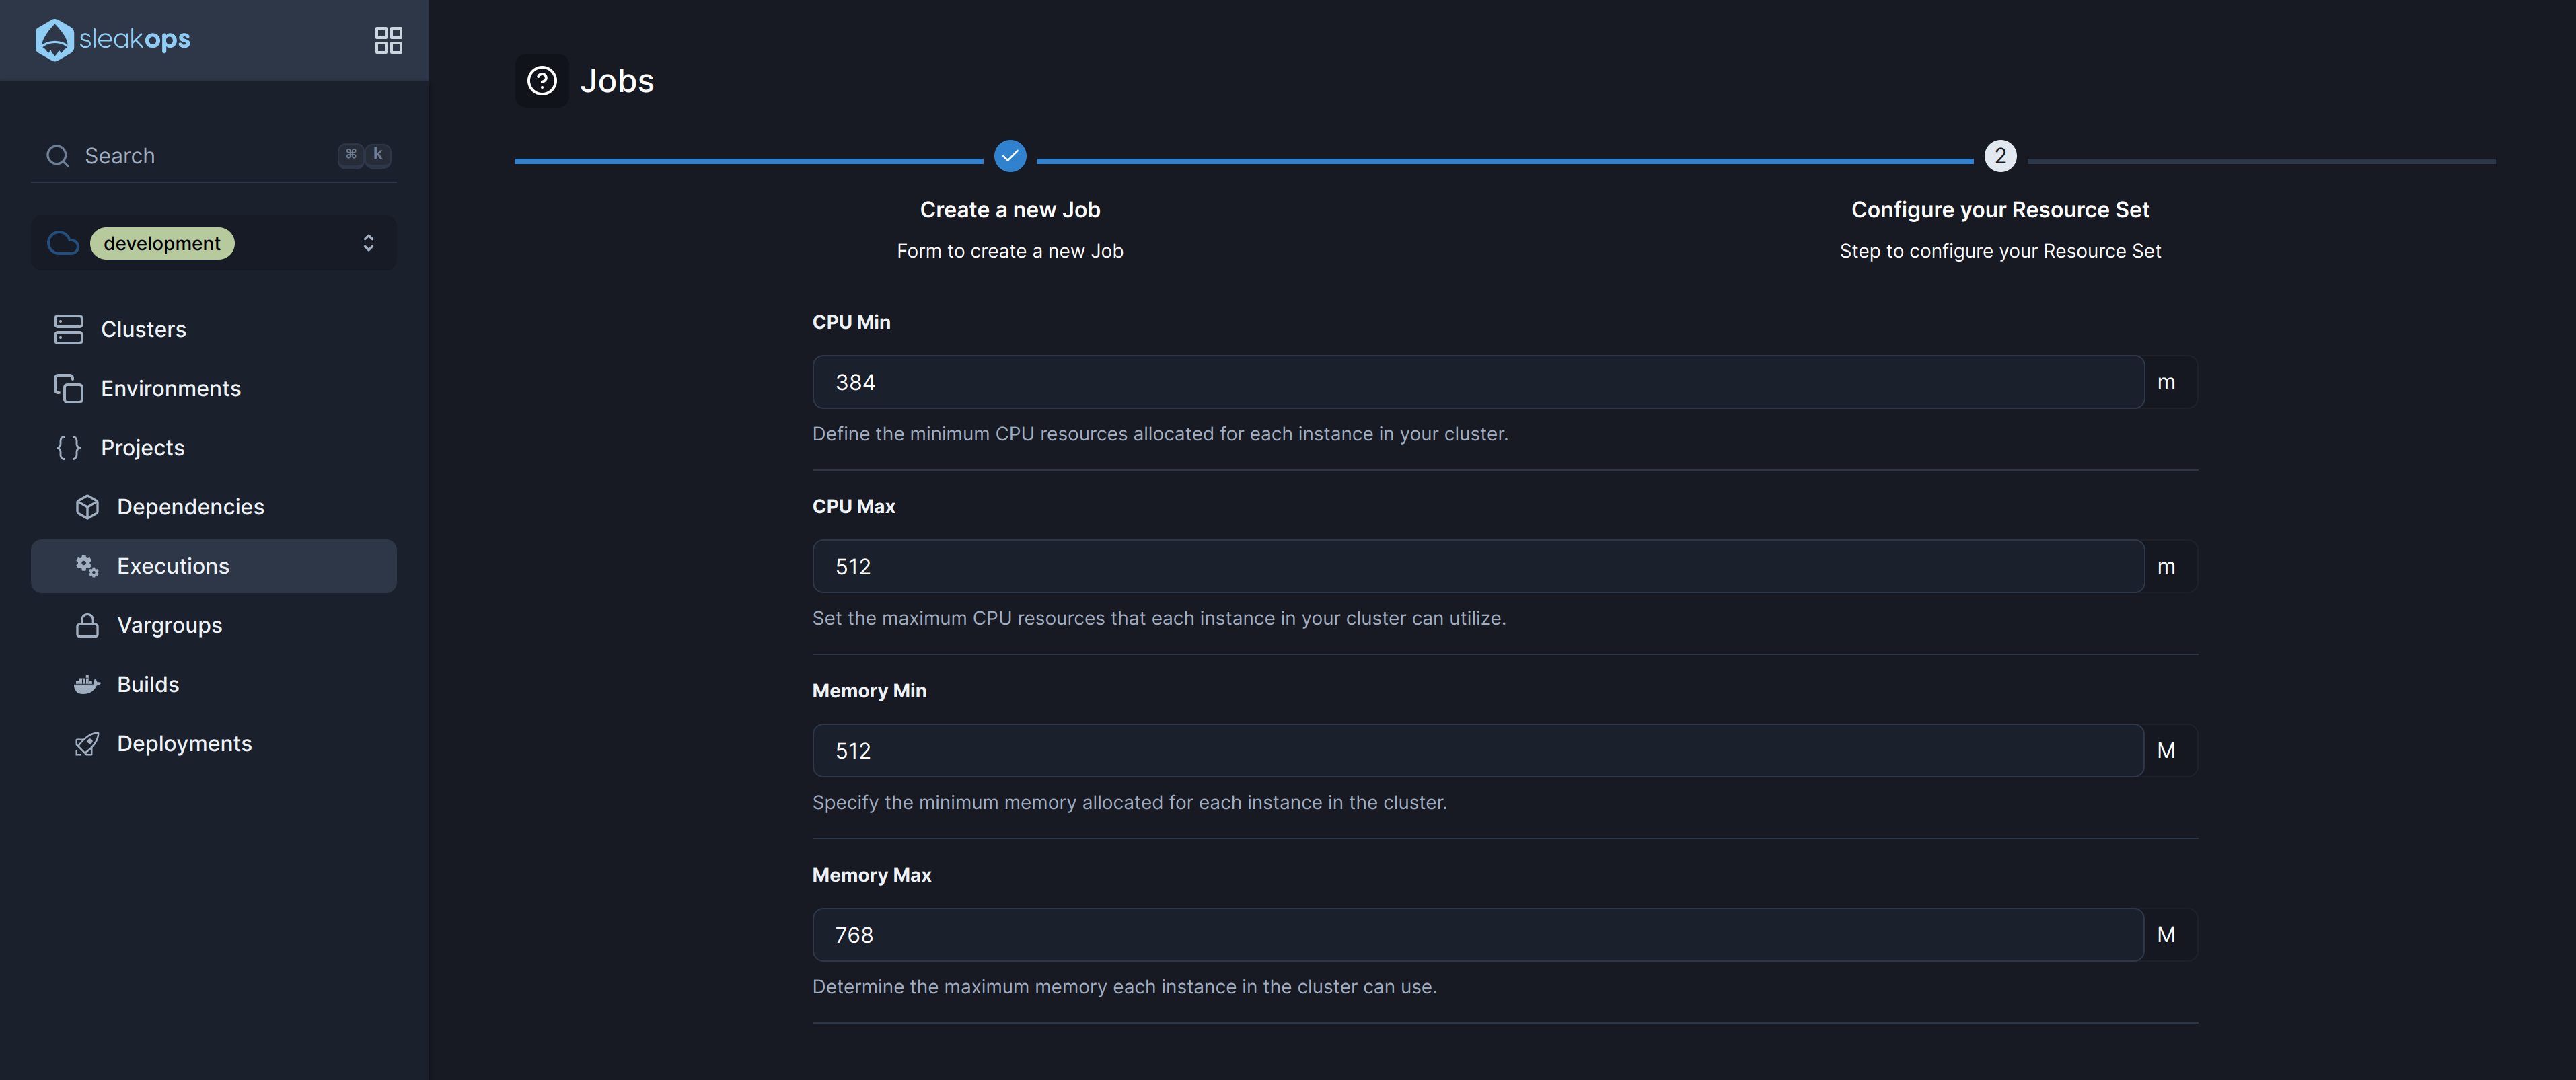
Submit to create and Deploy your job.