Make RDS Database Public
Try to avoid this method as it exposes your data source.
Introduction and Current Case
Currently, all databases deployed with SleakOps have the same access configuration:
- Publicly Accessible ❌
- Allocated in a SubnetGroup composed of "Persistence" subnets created in the SleakOps VPC.
Under this configuration, there is no direct way to make the database publicly accessible, so a small workaround must be performed.
Why can't a database be made public directly?
- A SubnetGroup of RDS cannot be edited.
- AWS does not allow editing the SubnetGroup associated with an RDS without a VPC change. Therefore, it forces us to do it using an external VPC.
Solution with Workaround
Prerequisites:
-
Approximately 30 minutes.
-
Have the default VPC created with Subnets where the DB will be located. If you don't have it, you'll need to create a new one from scratch on your own, as well as subnets within it that will be used for this change. Let's call it "transitory".
-
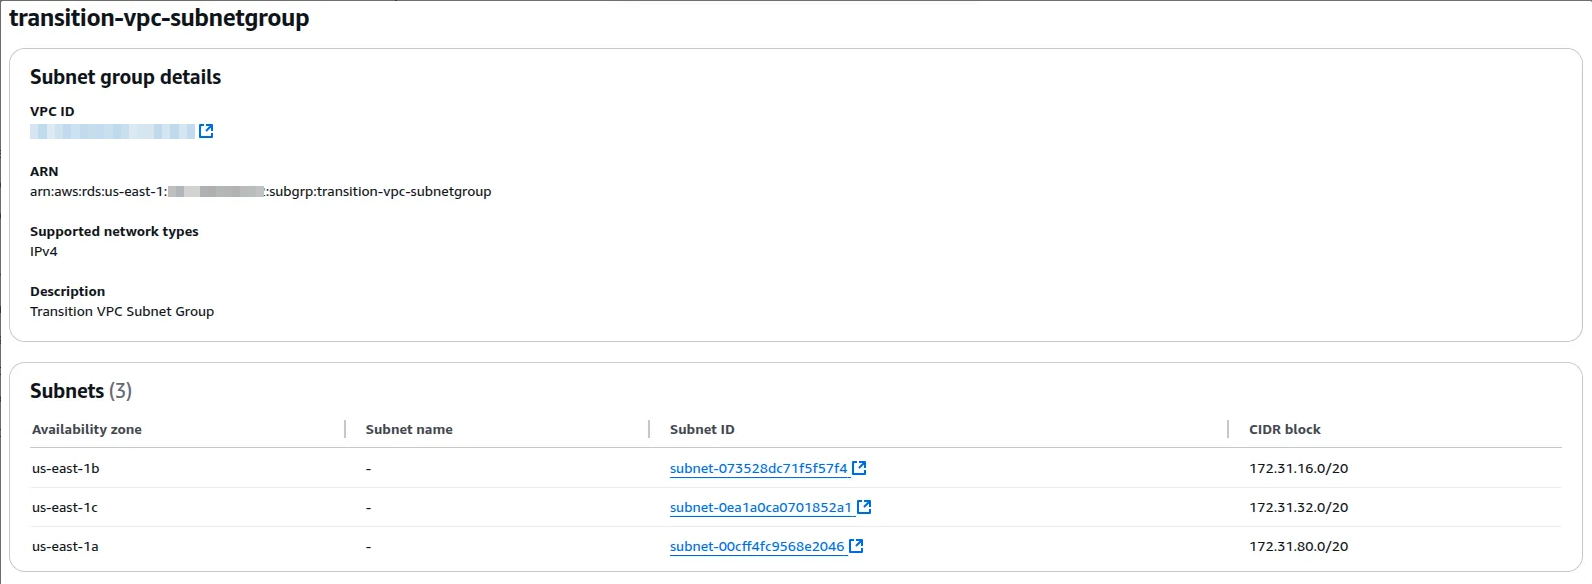
Create the SubnetGroup that uses Subnets from the transitory VPC. It doesn't matter which subnets it uses. It is used to migrate to the other VPC.
In my case, I created the following. Note that both the VPC and the Subnets are from the Default VPC.
-
Create the SubnetGroup that uses the Public Subnets from the VPC deployed by SleakOps. This is the one the DB will use at the end of the flow.

-
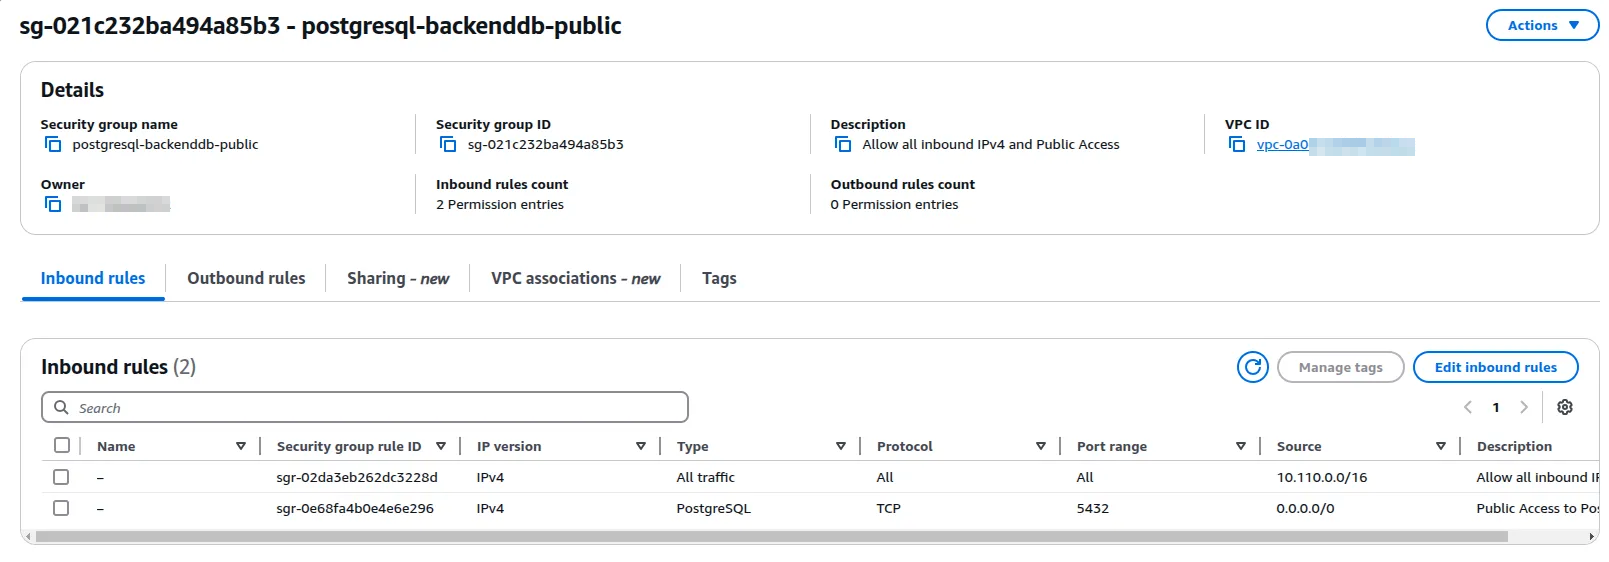
Create a SecurityGroup that allows public access, or edit the existing one. In both cases, it must belong to the VPC where the Database is located.
In my case, I created the following.
Step by Step:
With the prerequisites completed, only perform the modifications to the configurations.
-
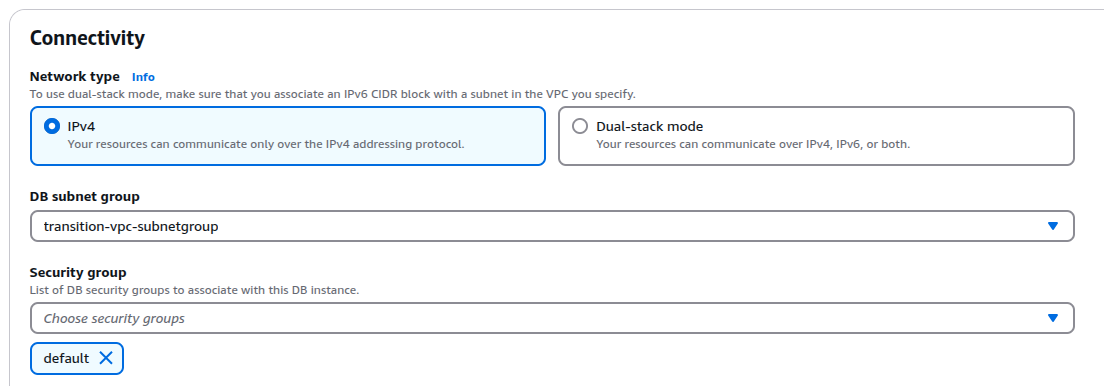
Change the SubnetGroup to the one corresponding to the Transitory VPC and remove the current SG.
-
Click next and review the changes. Make sure to select 'Apply Immediately'.
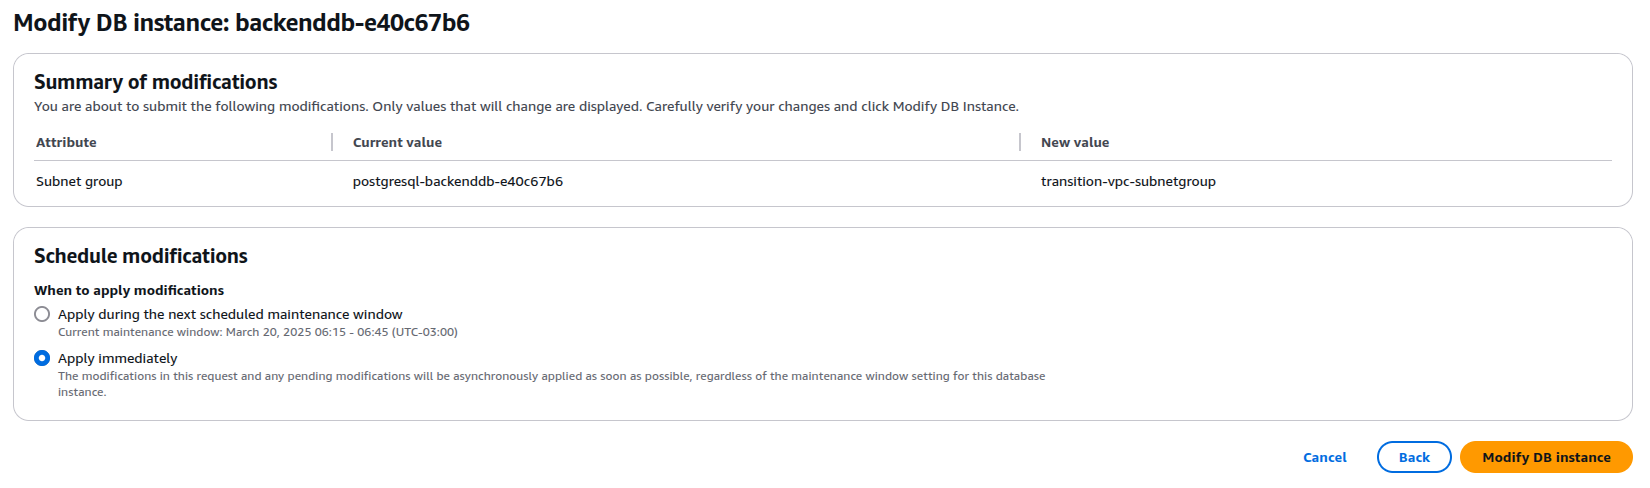
Once this is done, you must wait for the change to be applied before continuing with the following steps where we return to the initial VPC, which is the one created by SleakOps.
-
After the VPC change is completed. Change the SubnetGroup to the public one that was created, which is composed of the Public Subnets from the SleakOps VPC. Again, remove the default SG that is automatically linked.
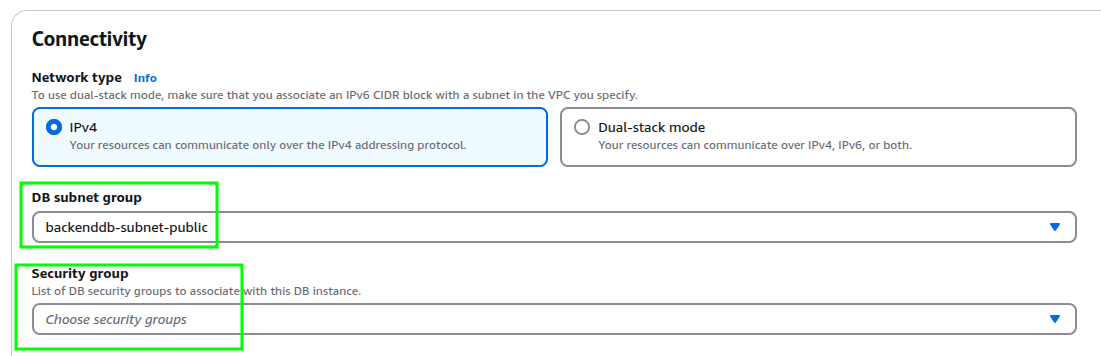
-
Make the DB
Publicly Accessible.
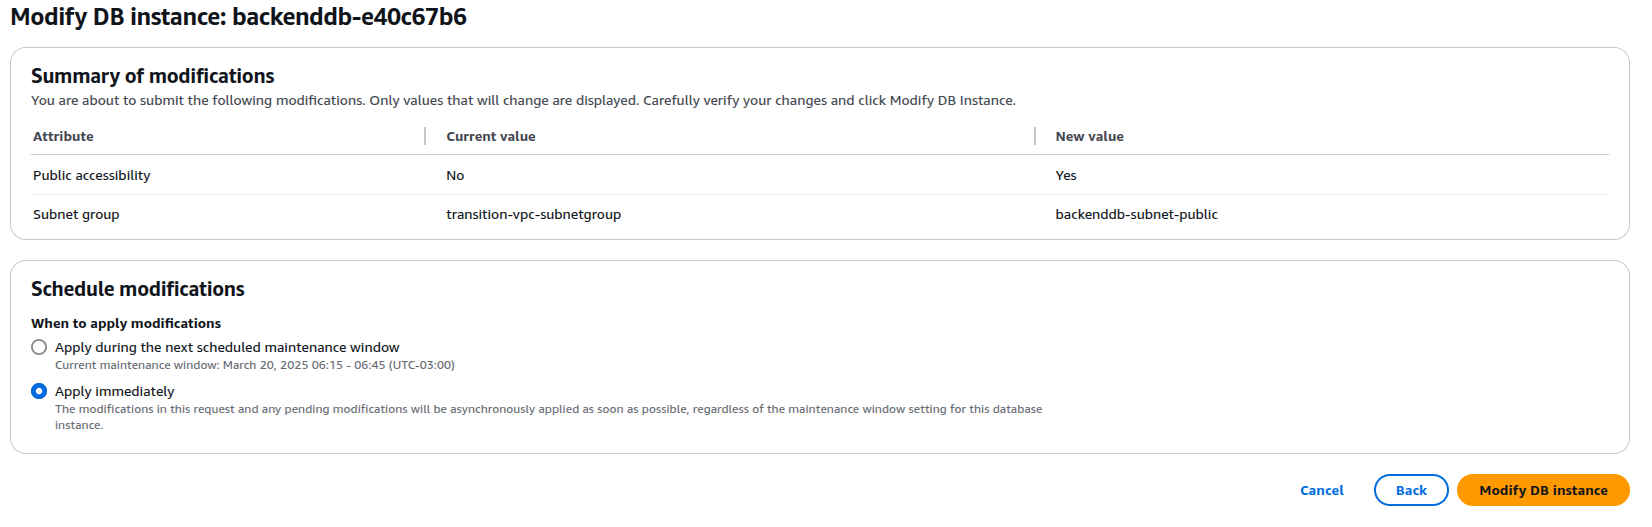
-
Review the changes. They should be as follows. Click next and Apply Immediately.
Wait again for the change to complete for the last step:
-
Add the SecurityGroup created in the prerequisites.
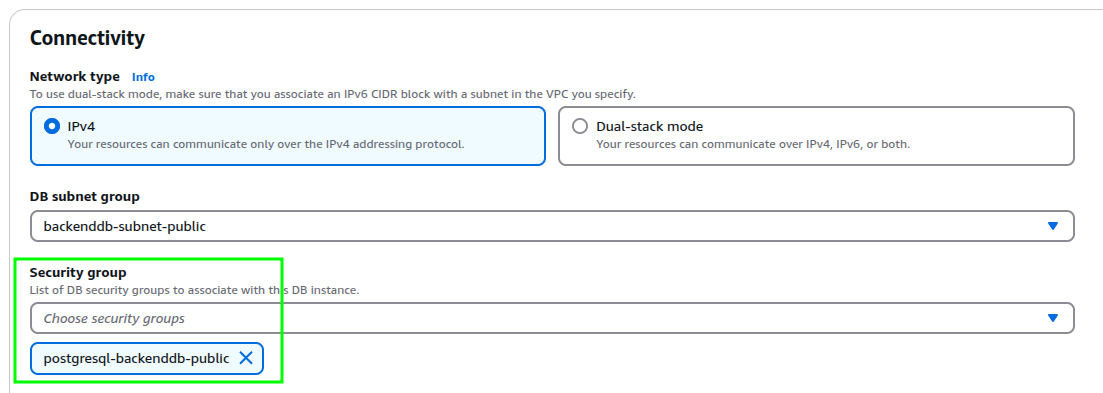
-
Review the change. Click next and Apply Immediately again.
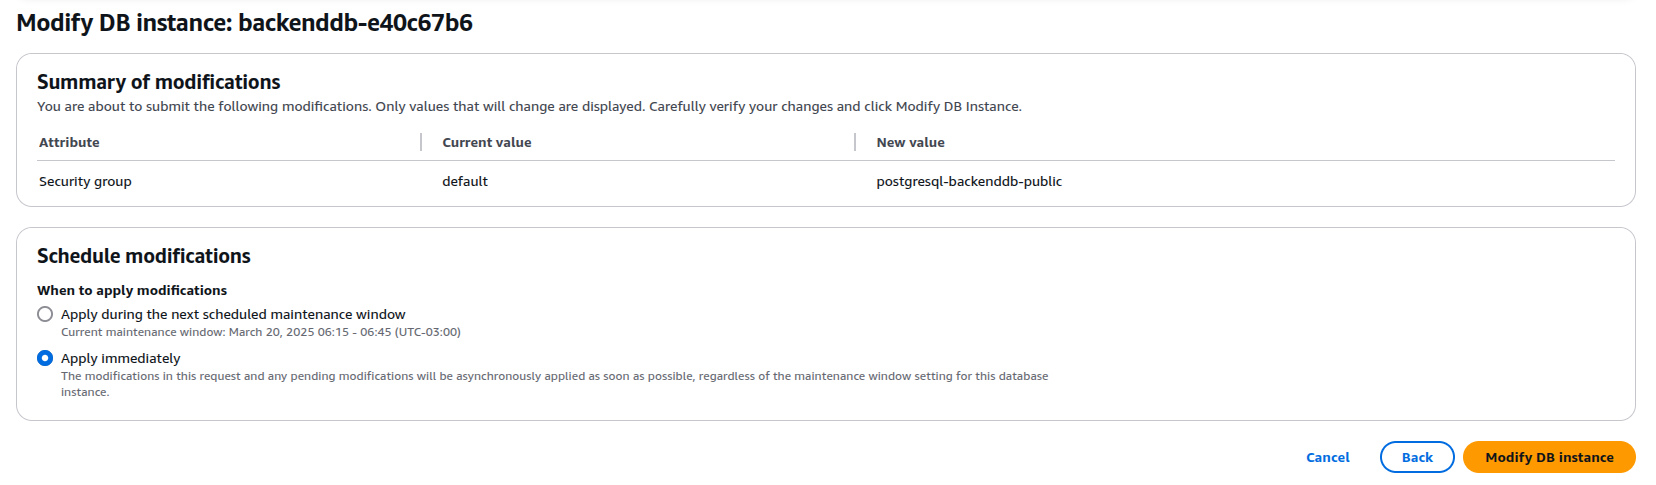
Conclusion
With this, our DB is completely public for all requests on the port used by the DB. For PostgreSQL, this is port 5432.