Delegate Domains
One critical aspect of working with SleakOps is ensuring proper domain delegation. Domain delegation is essential for seamless integration and functionality, as it determines how your domains and subdomains are managed and how they interact with your AWS environment. Depending on your specific needs, there are several scenarios for domain delegation with SleakOps:
1. Navigate to the providers section
This is the simplest option, where the NS record of the main domain is pointed to your AWS Hosted Zone. All subdomains will be handled automatically, ensuring effortless management.
2. Delegating Only Subdomains
If you prefer to keep your principal domain managed by your current DNS provider—perhaps because it hosts core services like email—this option allows you to delegate only the necessary subdomains. You'll need to set the NS records for each subdomain you wish to delegate.
2. No Delegation of Main Domain or Subdomains
If you prefer to keep your principal domain managed by your current DNS provider—perhaps because it hosts core services like email—this option allows you to delegate only the necessary subdomains. You'll need to set the NS records for each subdomain you wish to delegate.
3. No Delegation of Main Domain or Subdomains
In this case, you maintain full control over your domain and subdomains, without delegating them to AWS. To ensure SleakOps functions correctly, you must:
- Add a CNAME record to validate the SSL Certificate..
- Add an additional CNAME record for each web service you manage.
4. Using a Different Domain or Multiple Domains for the Same Service
If you want to use a domain other than the principal one or have multiple domains pointing to the same service, you'll need to create an ALIAS:
- If the ALIAS belongs to a domain managed by SleakOps, it will be handled automatically.
- If not, you'll need to manually create:
- A CNAME record to validate the SSL Certificate.'
- An additional record for each ALIAS.
By understanding and applying the appropriate domain delegation strategy for your environment, you can ensure that SleakOps integrates smoothly with your AWS infrastructure, providing optimal performance and security.
Set up your domains
1. Access to the domain or subdomain information
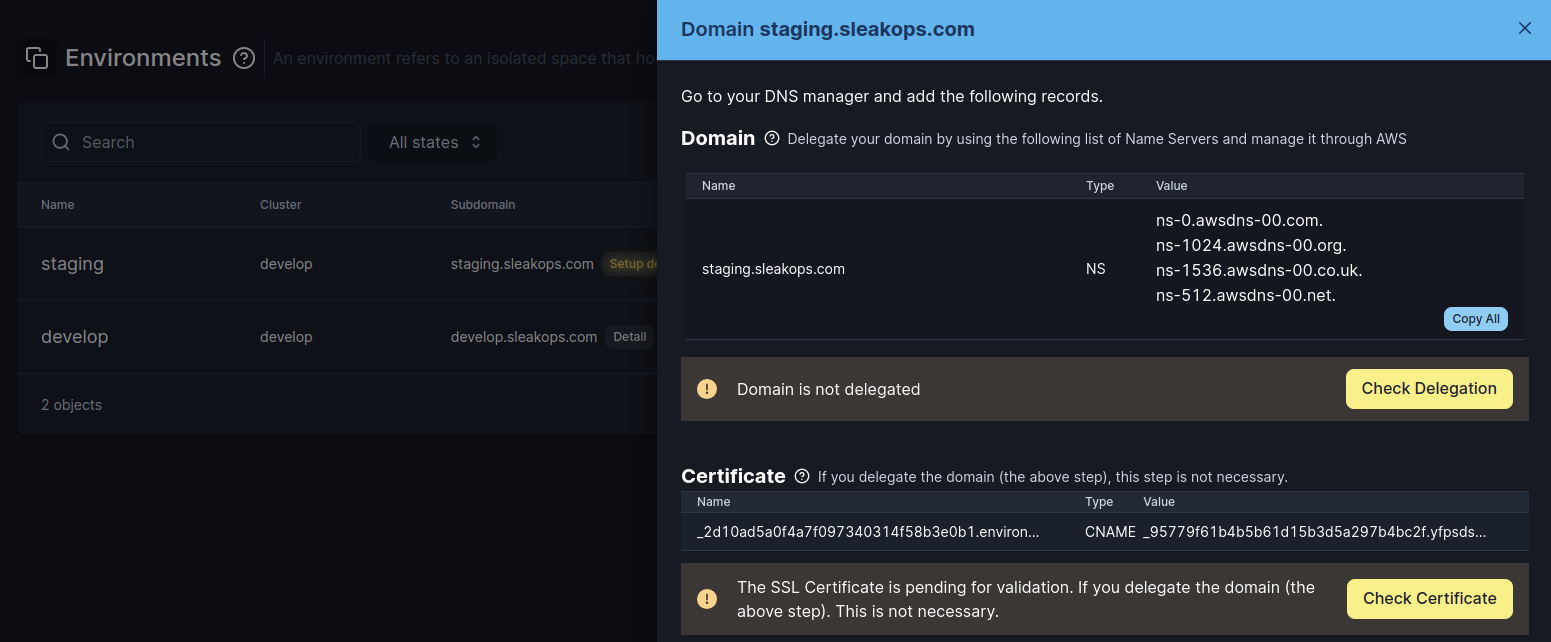
SleakOps provides a detailed information regarding domains, subdomains and alias. That looks like:

To access it, there are are different ways, based on what you need to do:
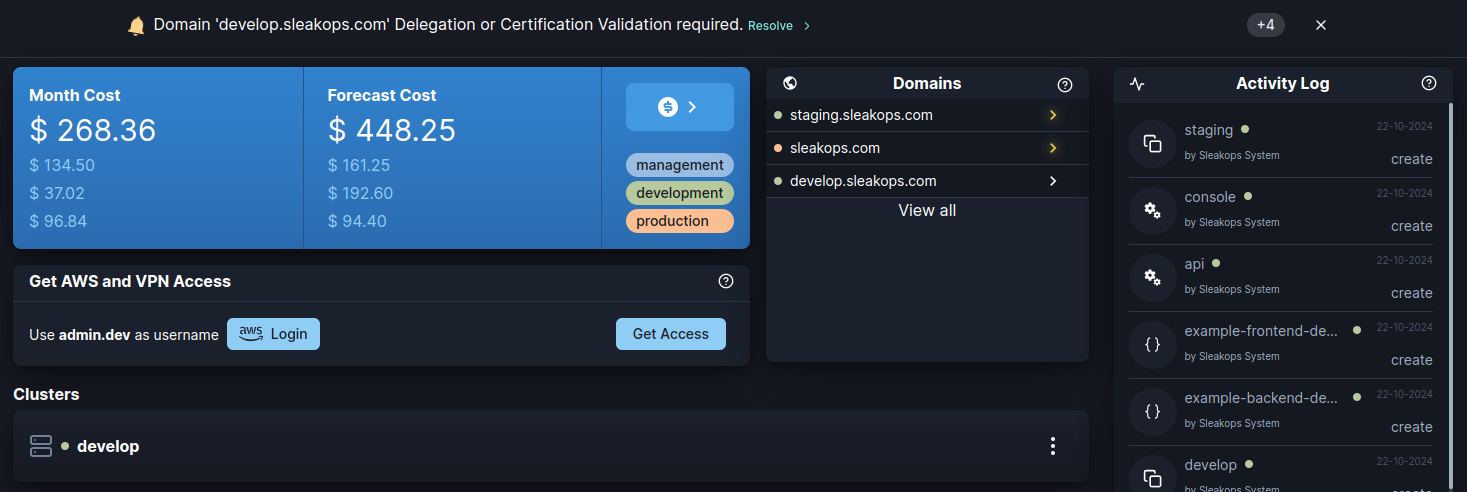
If you want to delegate your main domain
a. Access the Dashboard and look for the domain widget. b. Click on the desired domain to display the detail.

To delegate an environment’s subdomain
a. Access the Environment’s list and select an Environment. b. Click on the Cloud icon to display the domain detail.
Create an Alias for a web service workload and delegate it
a. Access the Workload’s list and then, the Web services section. b. Select and Workload and click on the Three Dots button. c. Choose the Detail option d. Create the Alias if it doesn’t exist by clicking the Associate new Domain and completing the form. e. Click on the Alias domain to display the detail.


2. Update Name Servers with Domain Registrar
- Log in to the account where your domain is registered (e.g., GoDaddy, Namecheap, etc.).
- Locate the DNS settings for your domain.
- Replace the existing records with the ones provided.
3. Update Name Servers with Domain Registrar
- It may take some time for the DNS changes to propagate globally (usually within a few hours).
- SleakOps periodically checks it but, if you want to manually verify it, you can click the yellow button Check Delegation to trigger the process.
