Django + Celery
Learn how to deploy your Django + Celery project using Sleakops.
Prerequisites
- Account in Sleakops
- A Cluster in this account. If you don't have it, here is the documentation on how to do it.
- A Environment configured. If you don't have it, here is the documentation on how to do it
- Django project configured with celery (This project needs to have docker).
Let's Start
For this example, we are going to use this project . It is a Django project with Celery that already has Docker configured to run. We are also going to configure a Postgresql database, S3 bucket and Rabbitmq needed for this project.
Create a project
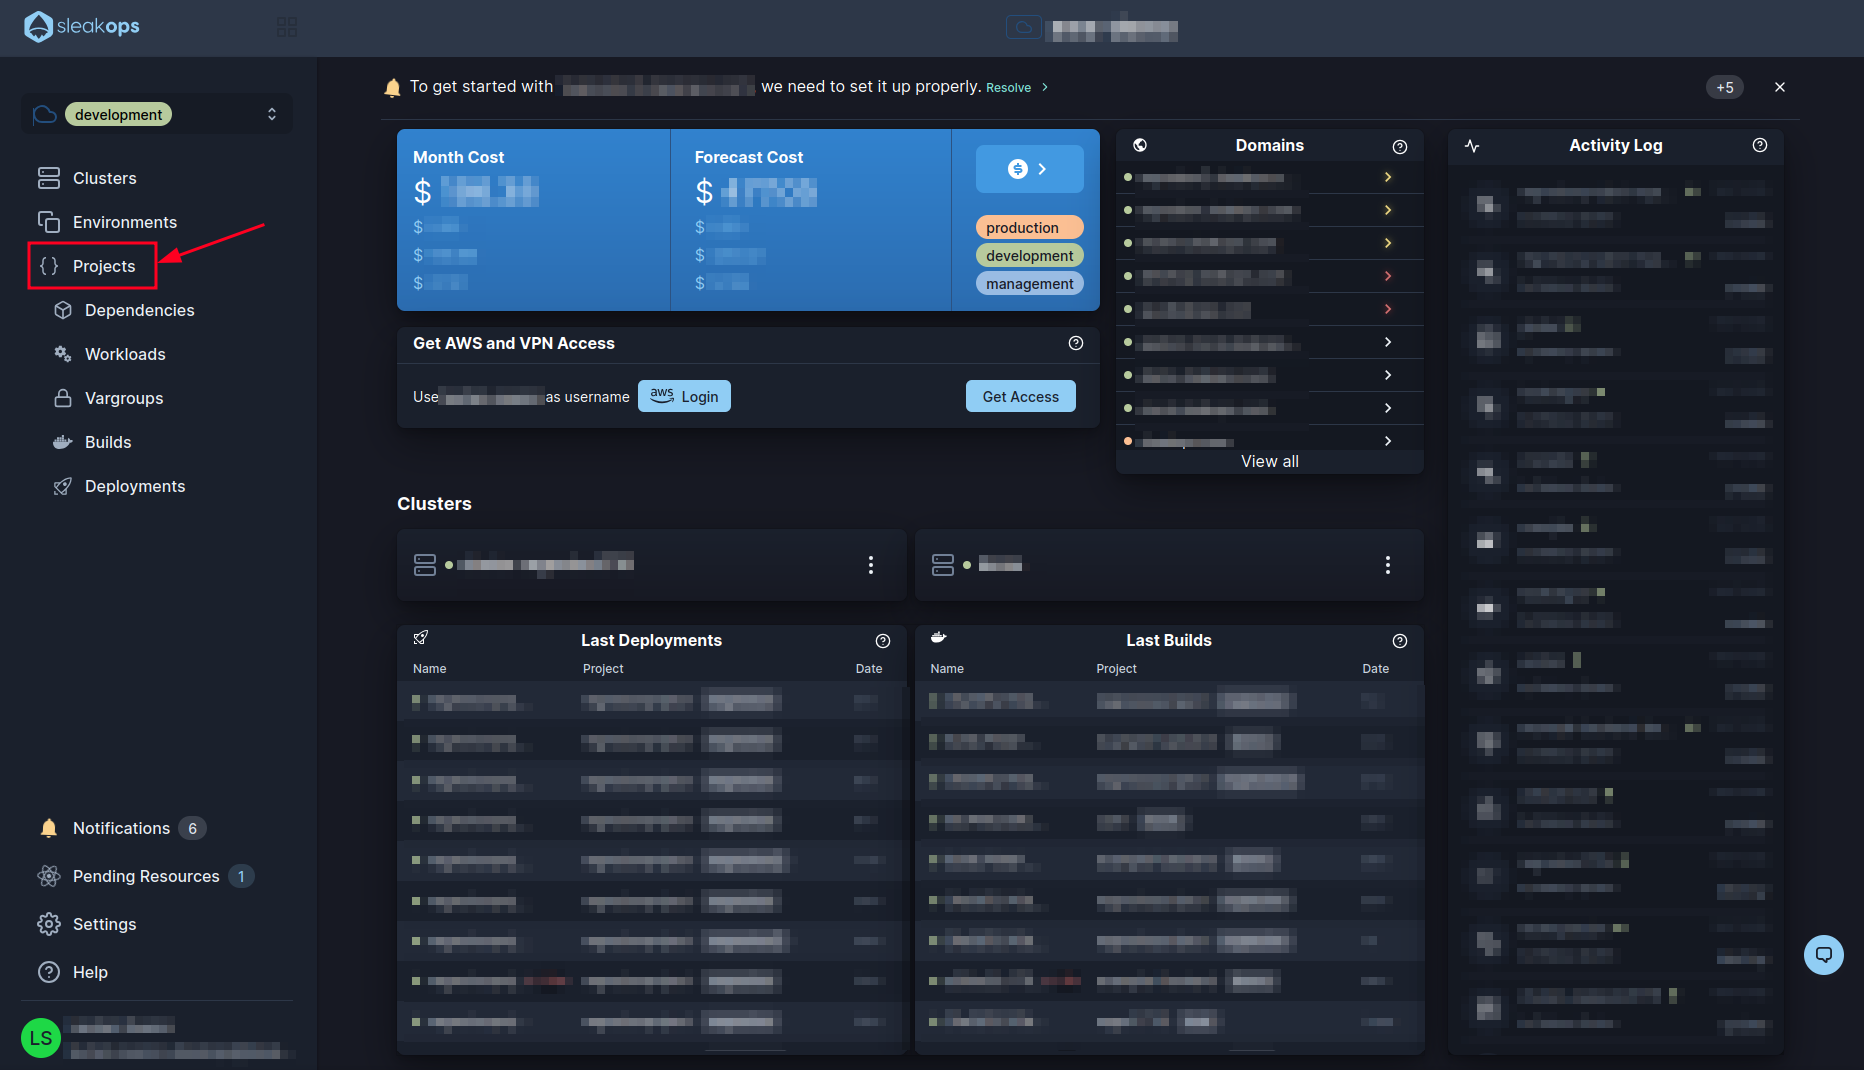
To start, we are going to create a new project. To do this, click the "Projects" button in the left panel:
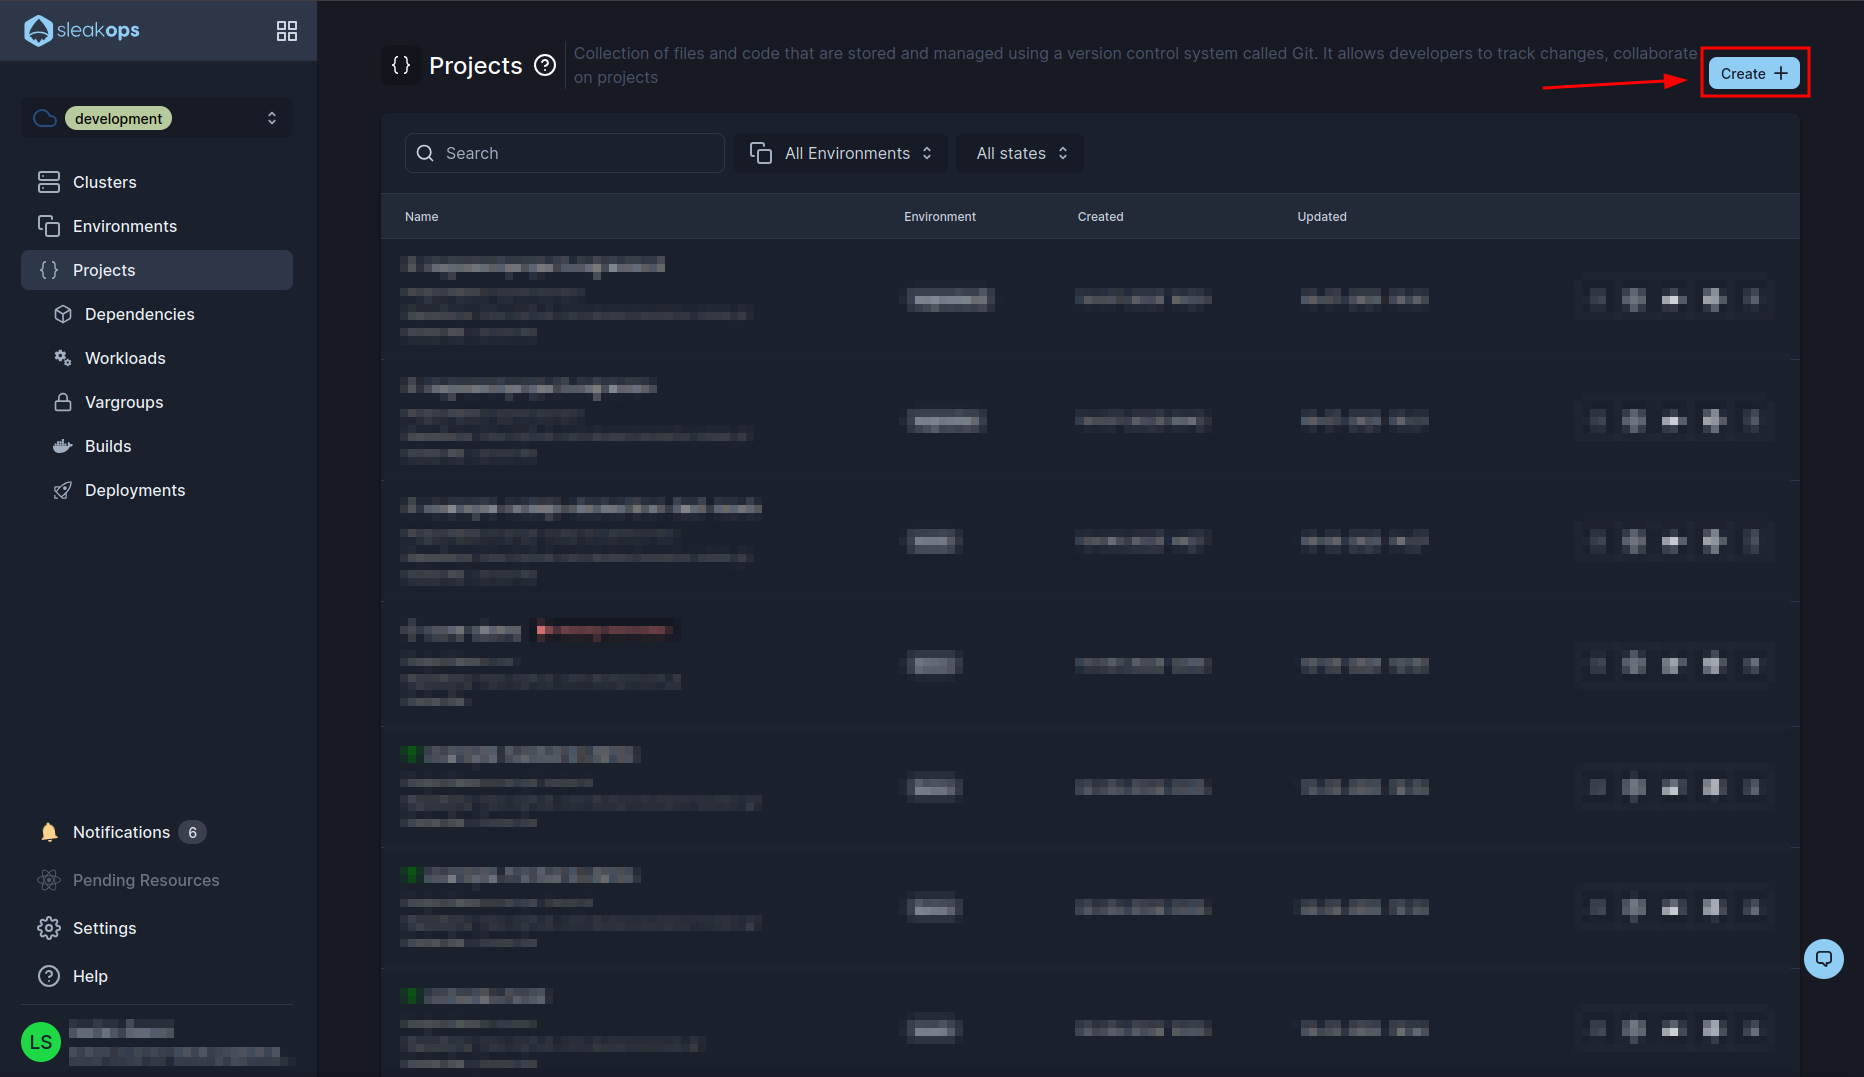
Inside the Projects panel you will be able to see all the projects you have and manage them from here. We want to create a new one so let's click on the “create” button at the top right:
In the project creation screen we have the following fields:
| Setting | Description |
|---|---|
| Environment | We have to select the previously created environment. |
| Nodepool | We will leave the default one. |
| Repositories | We will select our repository that we want to deploy. In our case example-django-celery. |
| Project Name | We can define a project name. For the example we will leave the default. |
| Branch | It has to coincide with the one we have in our project. In our case it is “Main”. |
| Dockerfile path | It is the relative path to the dockerfile in your project. |
Once configured all that we create the project with the “Submit” button at the bottom right:

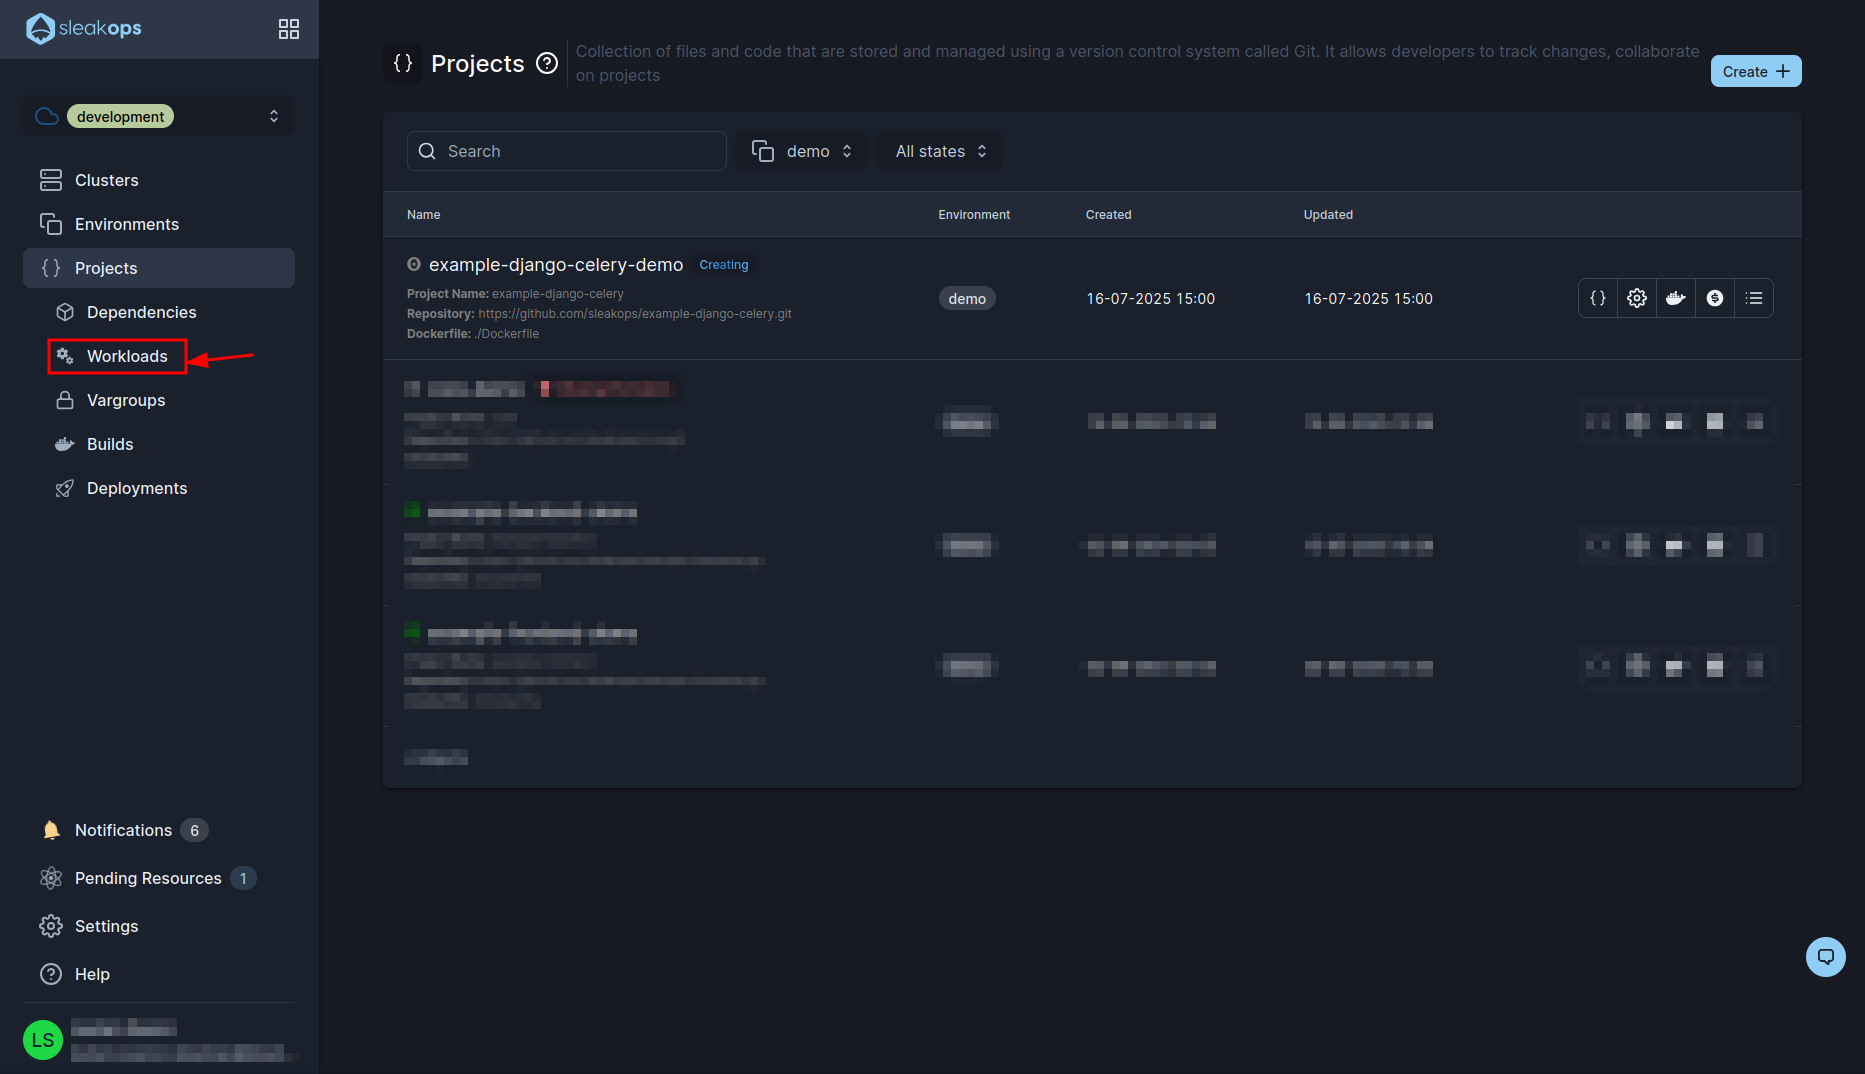
With that, the project begins to be created. In the meantime we go to the workloads with the “Workloads” button in the left panel:
Create a Web Service
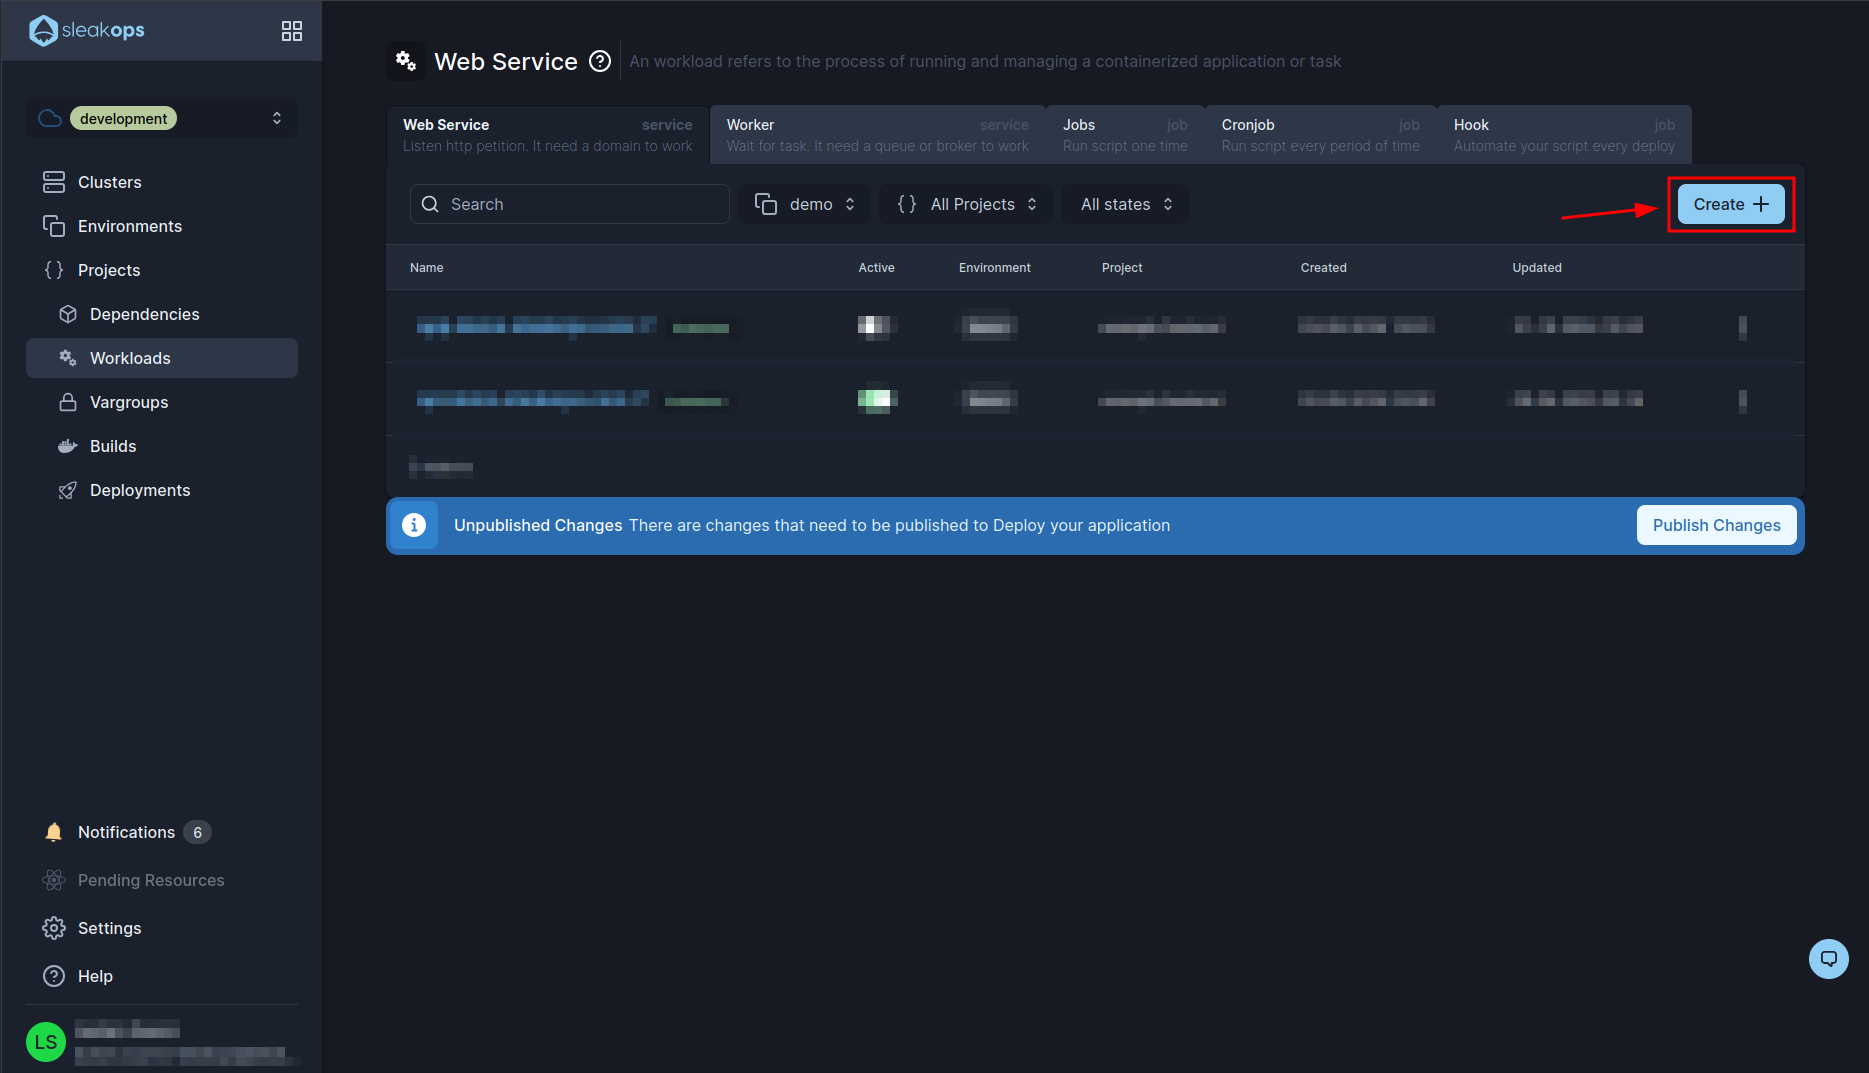
Here what we are going to do is to create a web service so we go to the web service section and create one:
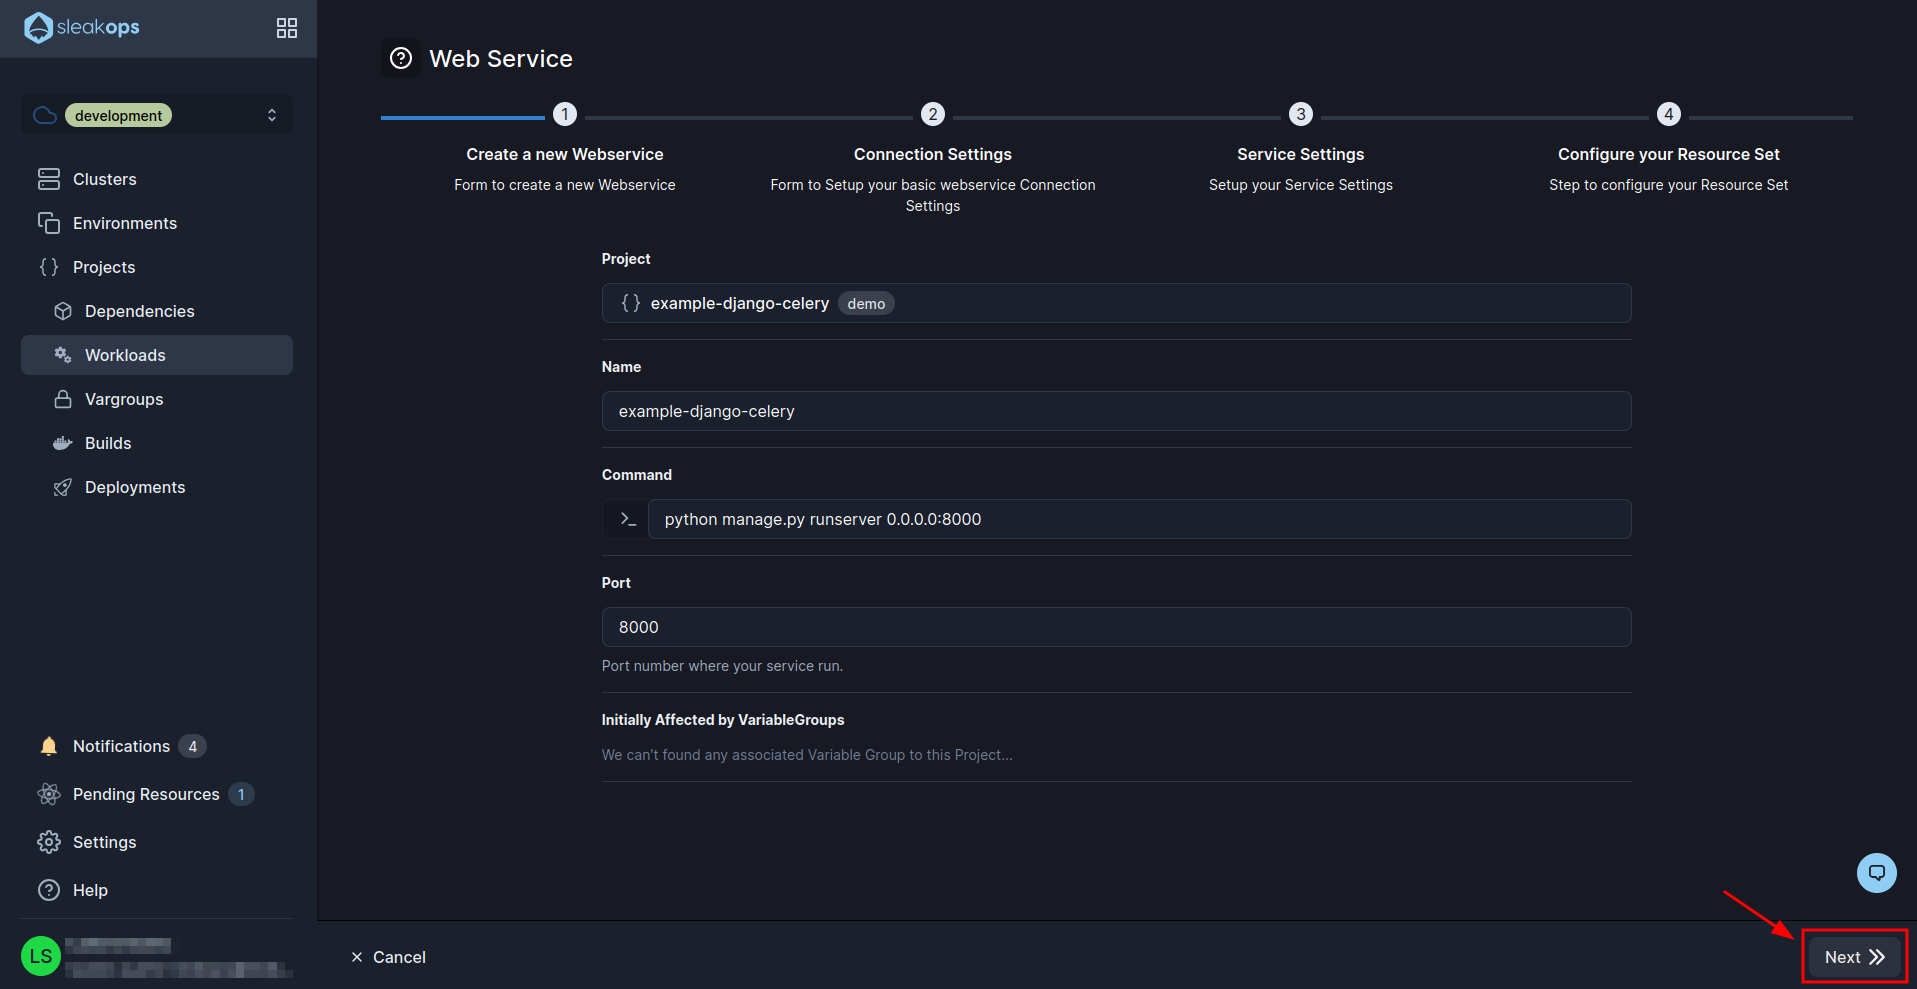
In this page we are going to complete the first form with the following fields:
| Setting | Description |
|---|---|
| Project | We select the project we created previously, in our case “example-django-celery”. |
| Name | We define a name for the web service. |
| Command | By default this will take the value that is in the dockerfile, in our case this is fine. |
| Port | The same as the command. |
Then we continue by clicking on the “Next” button up to step 3:
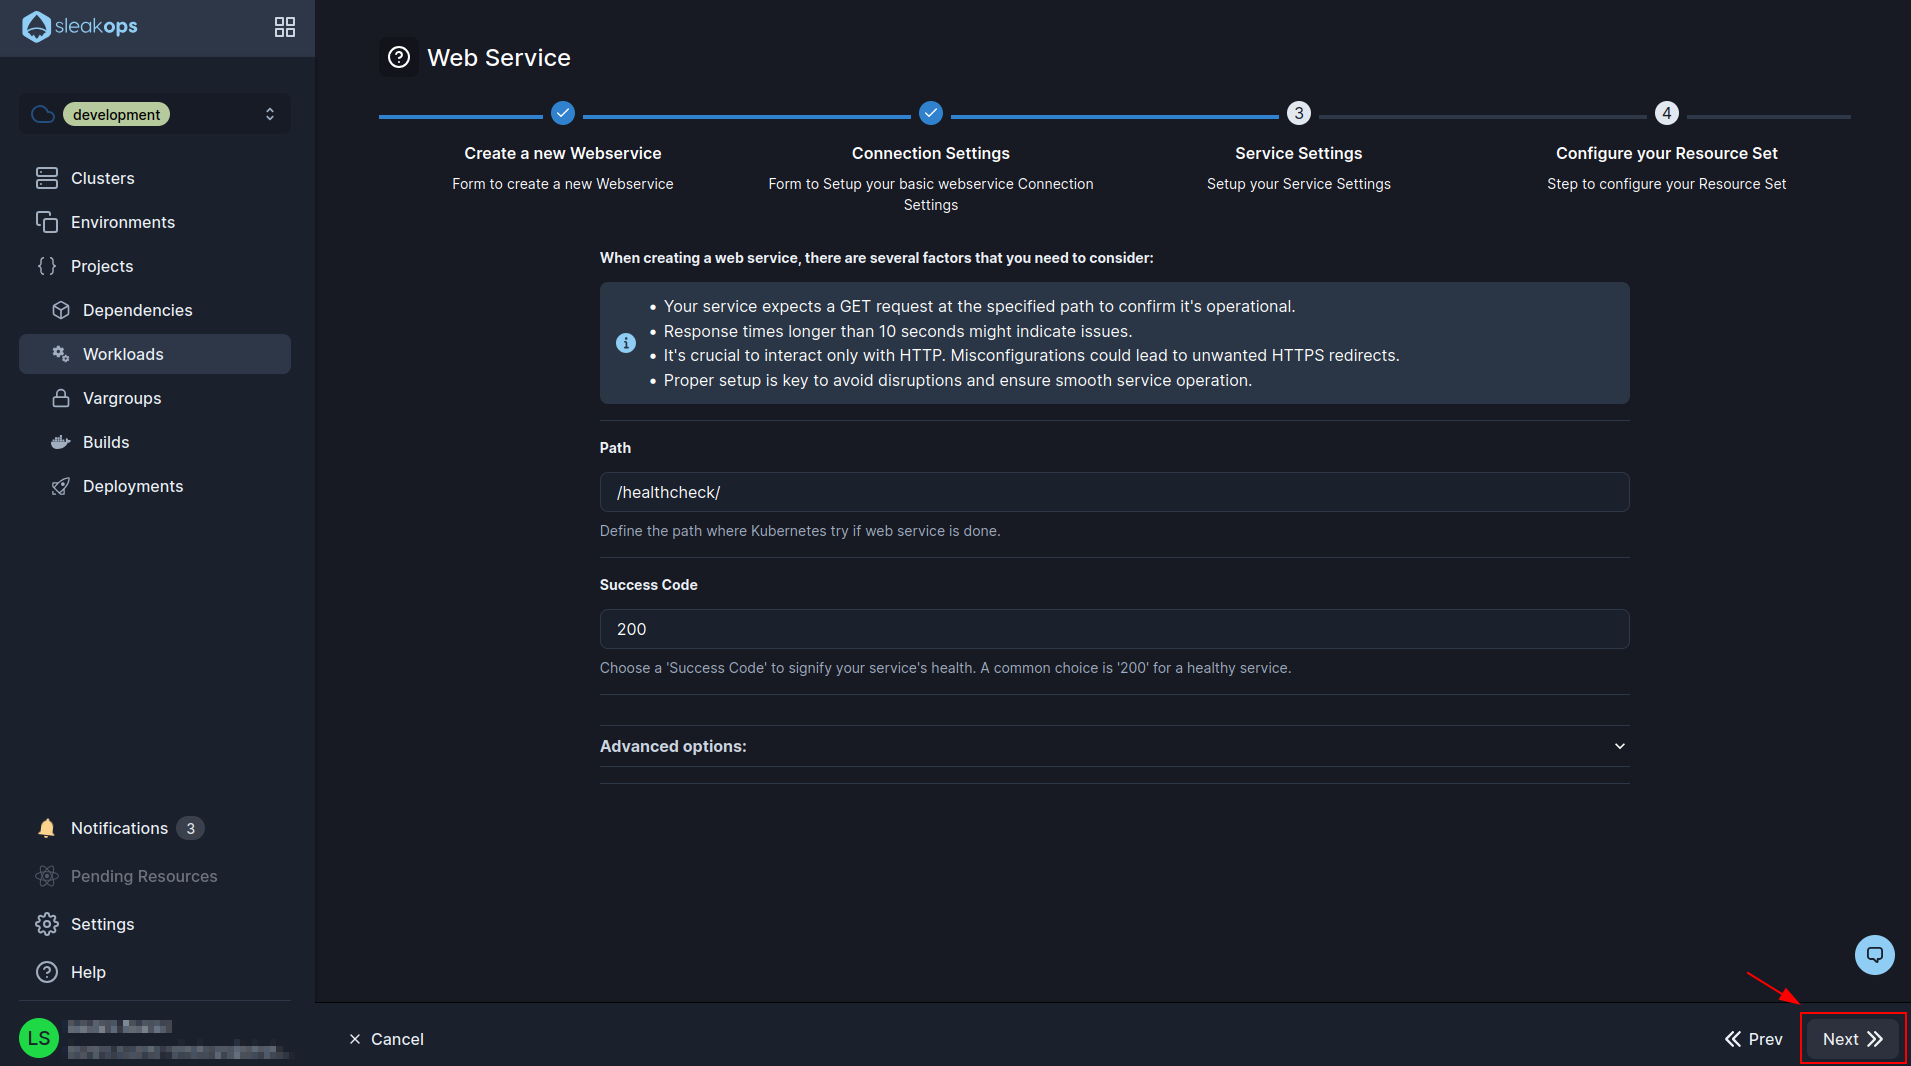
In step 3 we have to edit the path field and put the endpoint of healthcheck which in our case is “/healthcheck/”. Then click on the “Next” button until the web service is created:
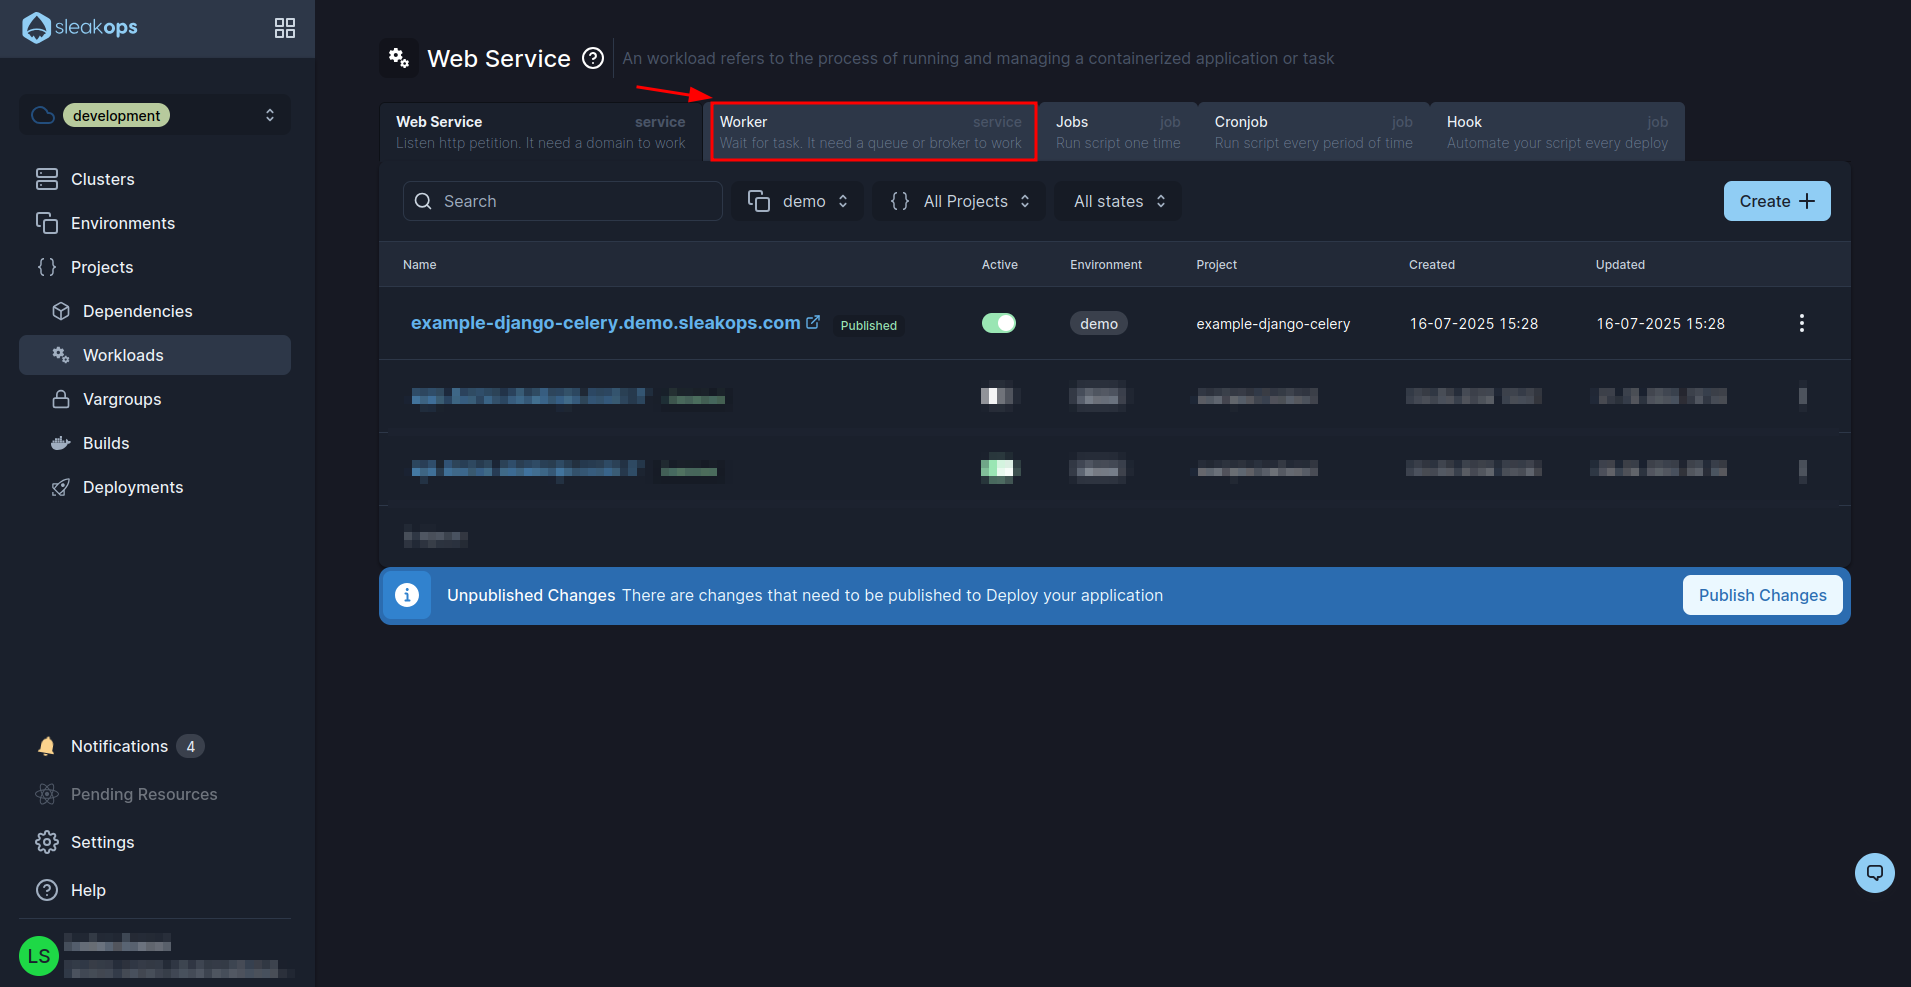
Deploy celery worker
Well, with this we can see our web service deploying. Now we are going to deploy the celery. For this we have to go to the workers section inside the same workloads screen:
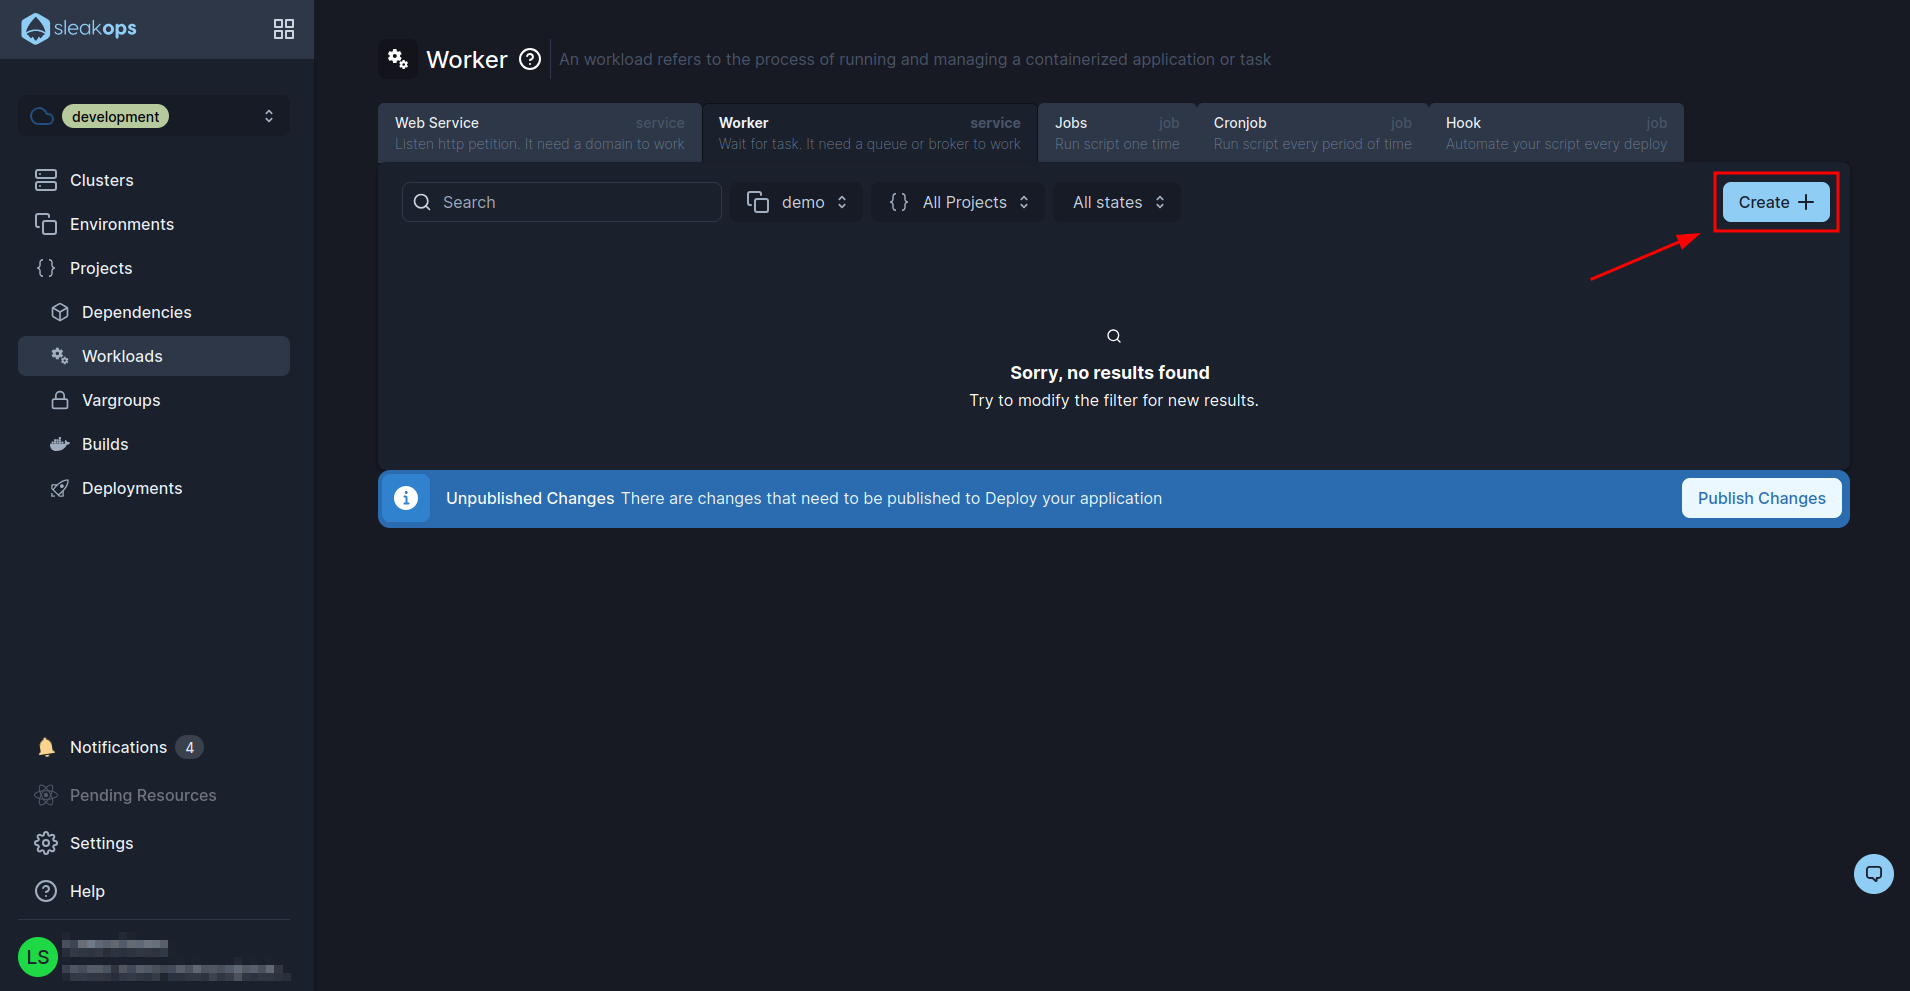
And click on the “Create” button to create a new one:
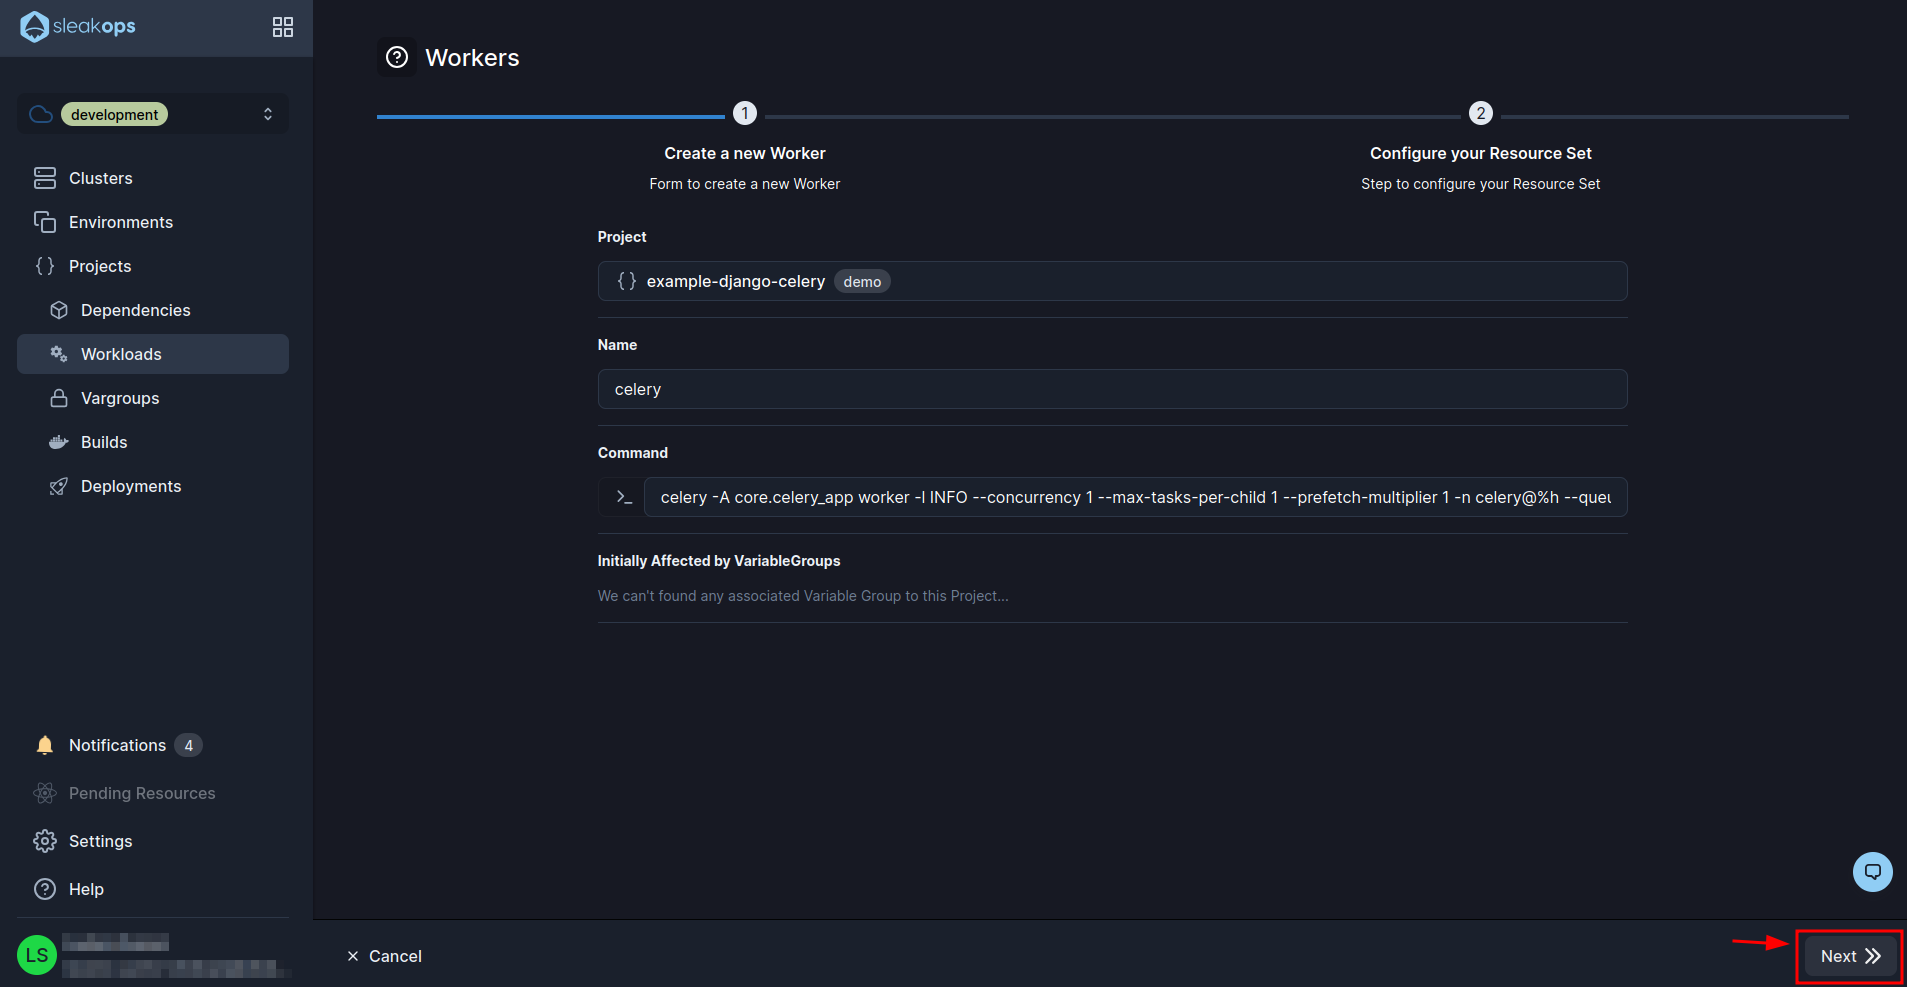
In the workers creation screen we will have to complete the following fields:
| Setting | Description |
|---|---|
| Project | Select the previously created project. In our case “example-django-celery”. |
| Name | We define the name that we are going to give to the worker. In our case “celery”. |
| Command | Here we set the command to run celery, in our case it is: bash celery -A core.celery_app worker -l INFO --concurrency 1 --max-tasks-per-child 1 --prefetch-multiplier 1 -n celery@%h --queues default,build,deployment,cluster,canvas,billing |
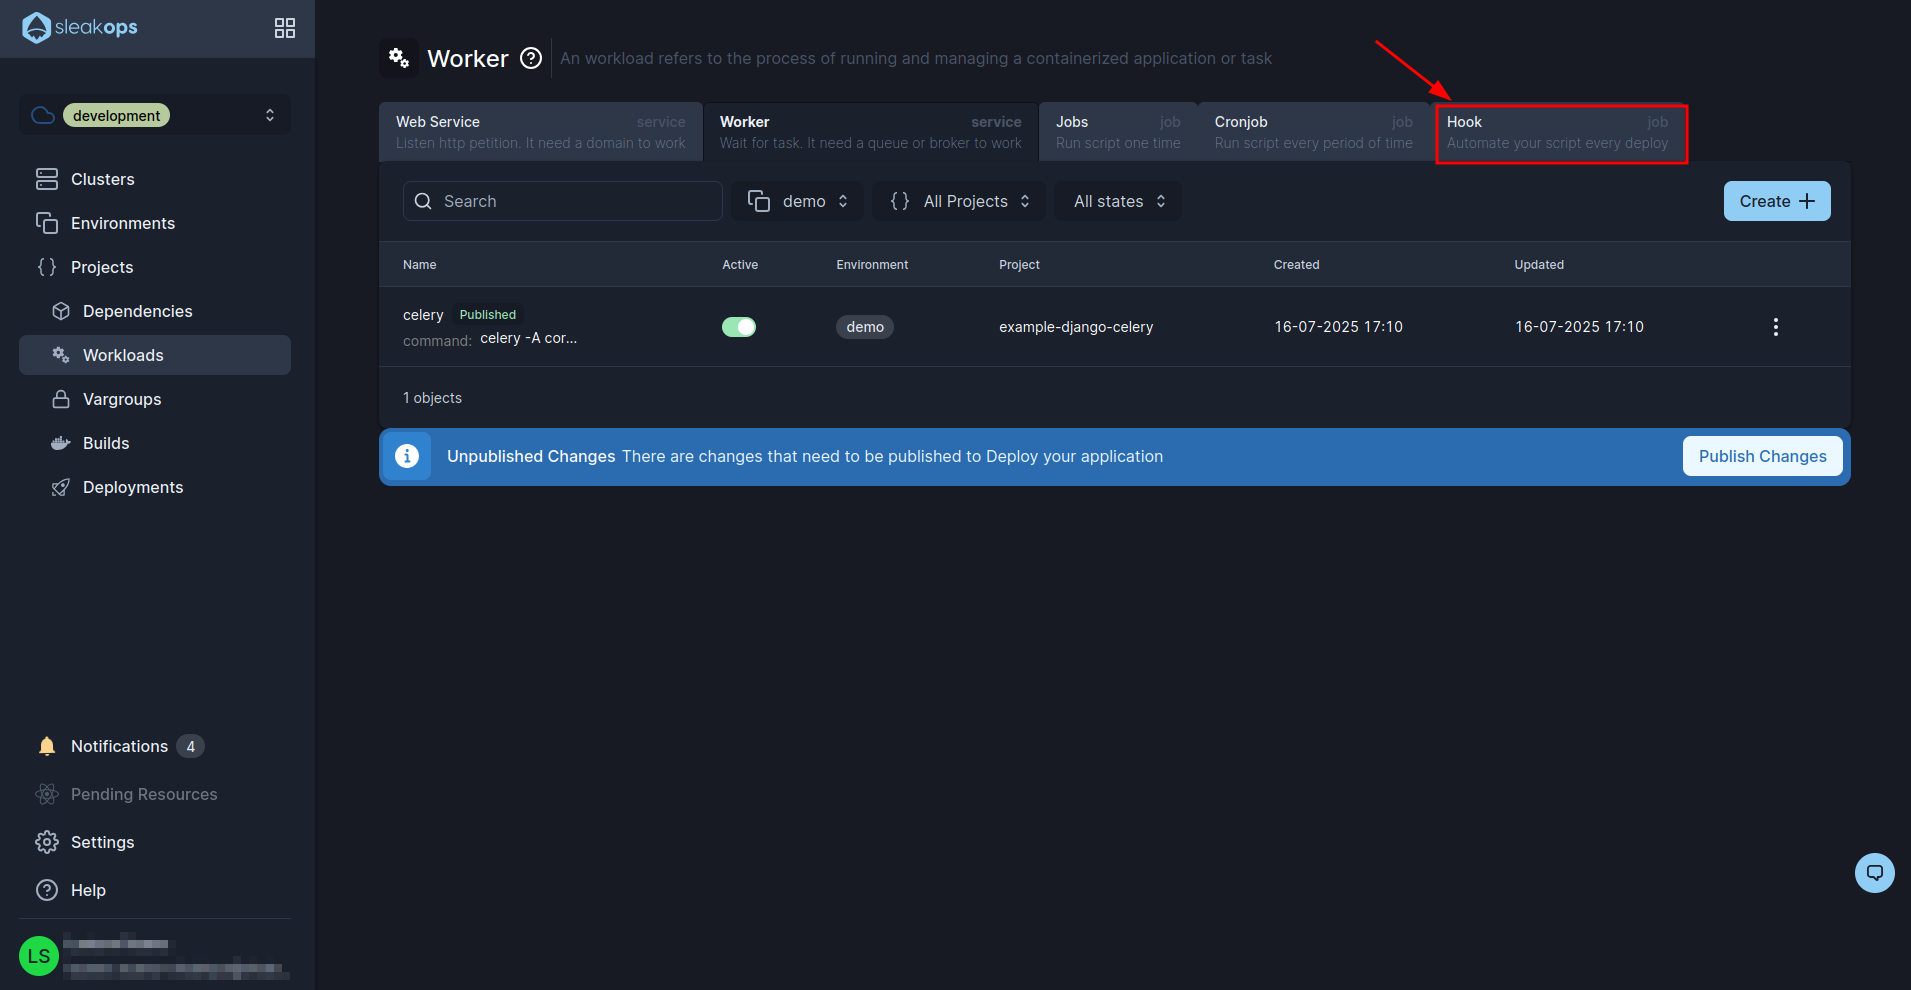
With these fields filled in we will click on the “Next” button at the bottom right and then “Submit” as we do not need to edit anything else:
With this we will see our celery published. Now we have to configure the hooks. For this we go to the hooks section:
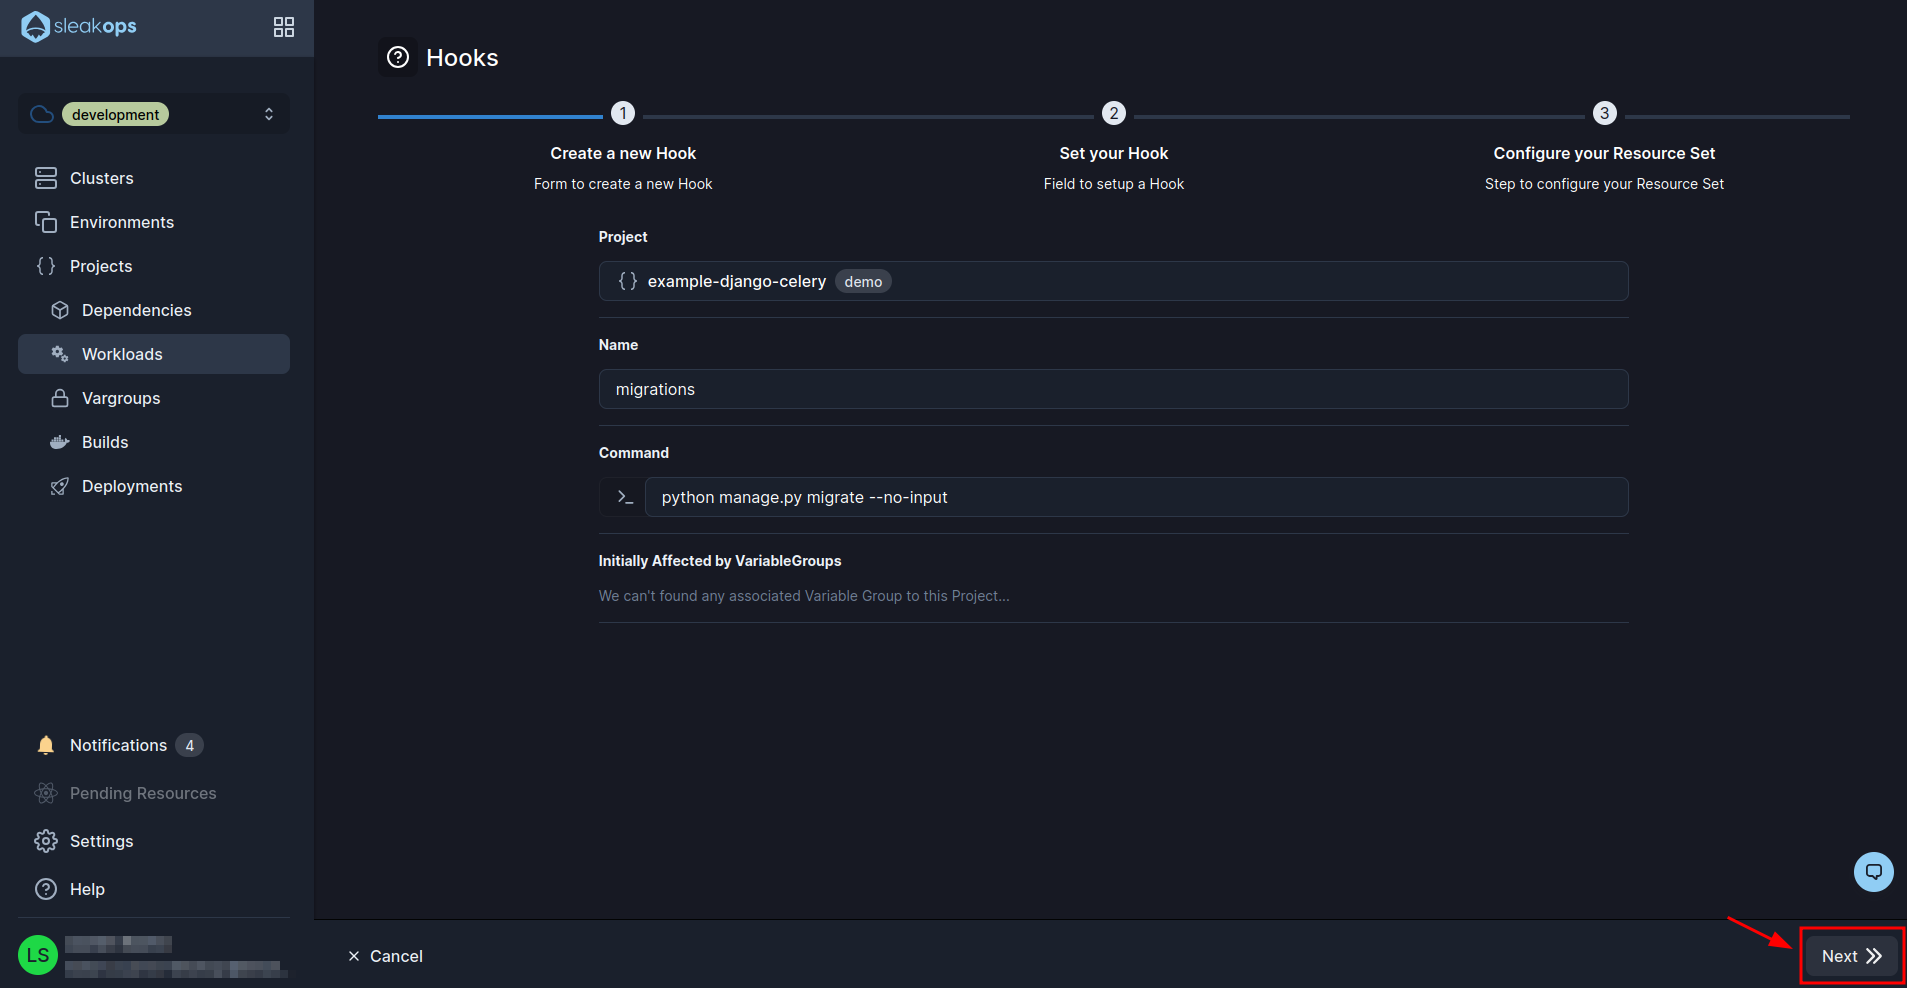
Create a migration hook
In the hook creation screen we will have the following fields:
| Setting | Description |
|---|---|
| Project | Select the previously created project. In our case “example-django-celery”. |
| Name | We define the name that we are going to give to the worker. In our case “migrations”. |
| Command | Here we set the command to run celery, in our case it is: bash python manage.py migrate --no-input |
With these fields filled in we will click on the “Next” button at the bottom right and then “Submit” as we do not need to edit anything else:
Create a collect static hook
Now we proceed to create another hook that we need for the statics:

In this form we are going to do the same as the previous one but modifying the command. We click next until we create the hook (without modifying anything else):

The command we use is as follows:
python manage.py collectstatic --no-input
Create a Postgresql Database
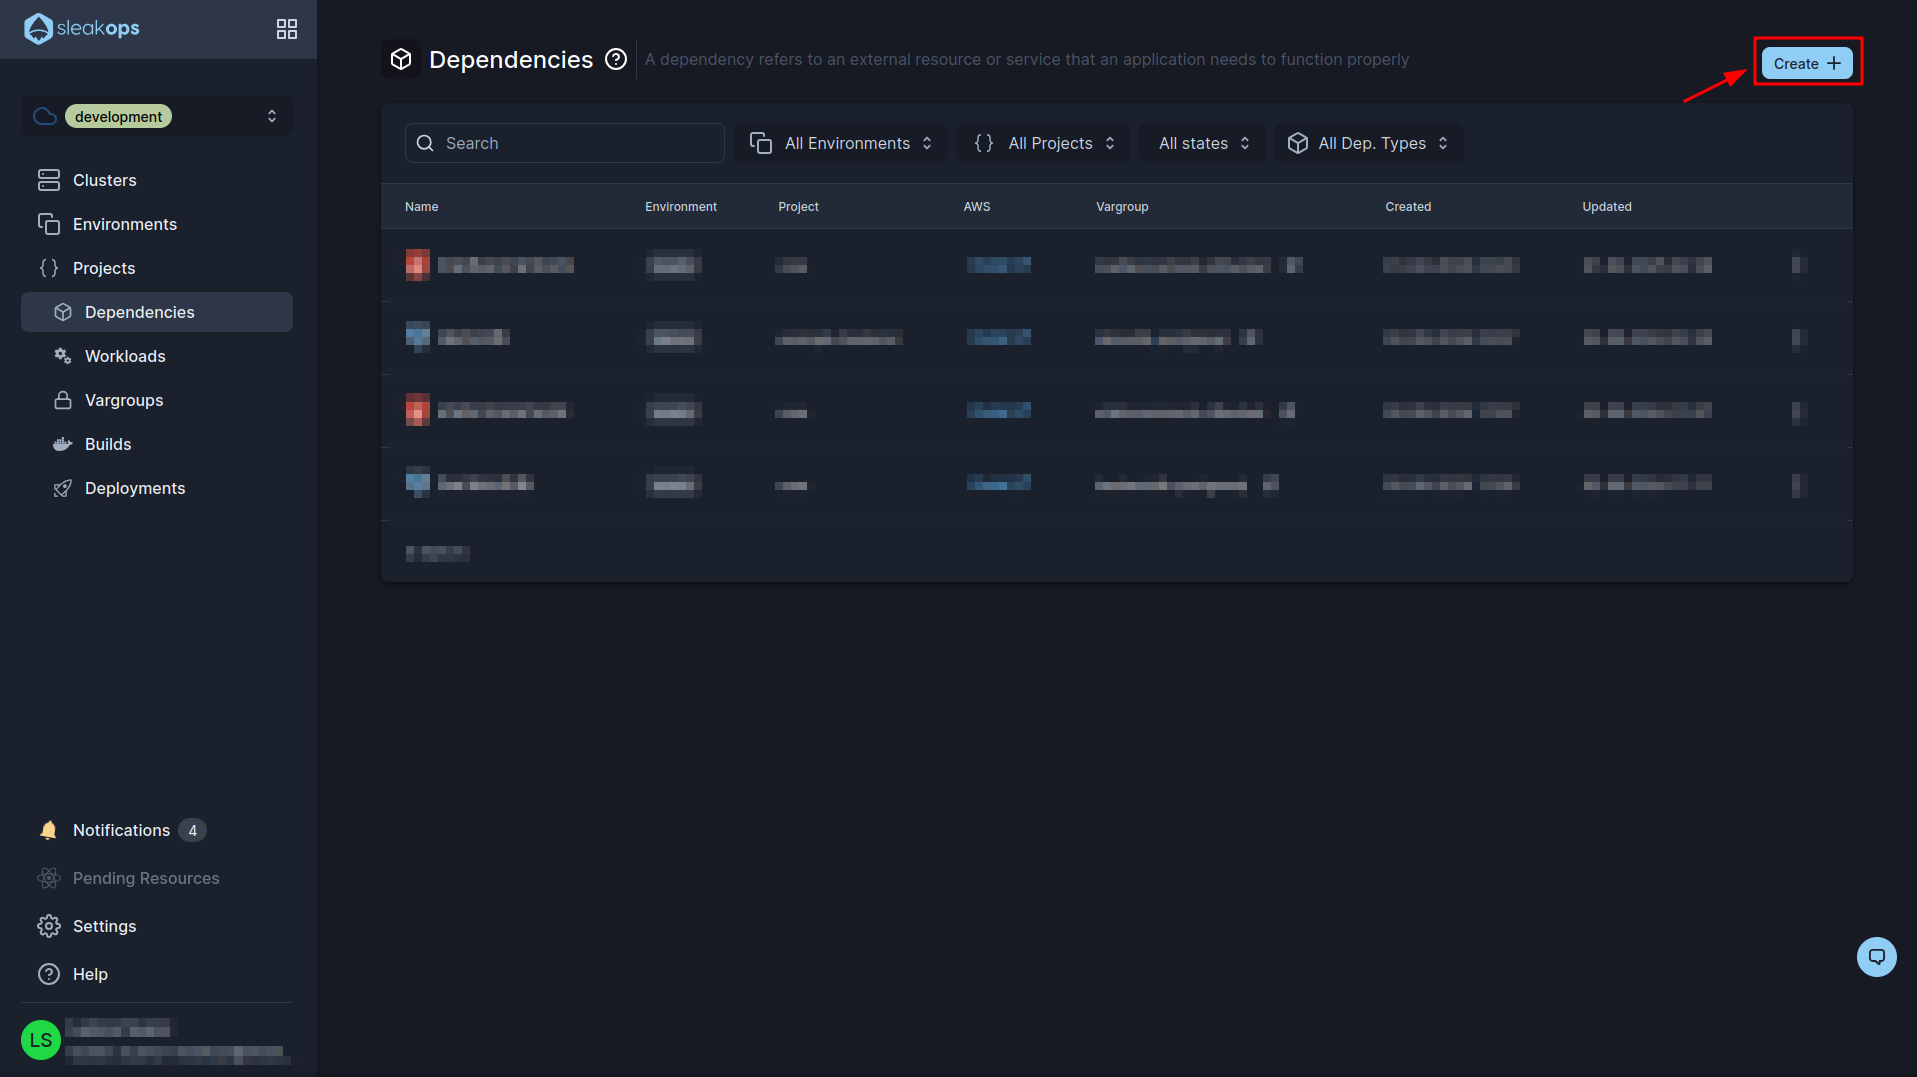
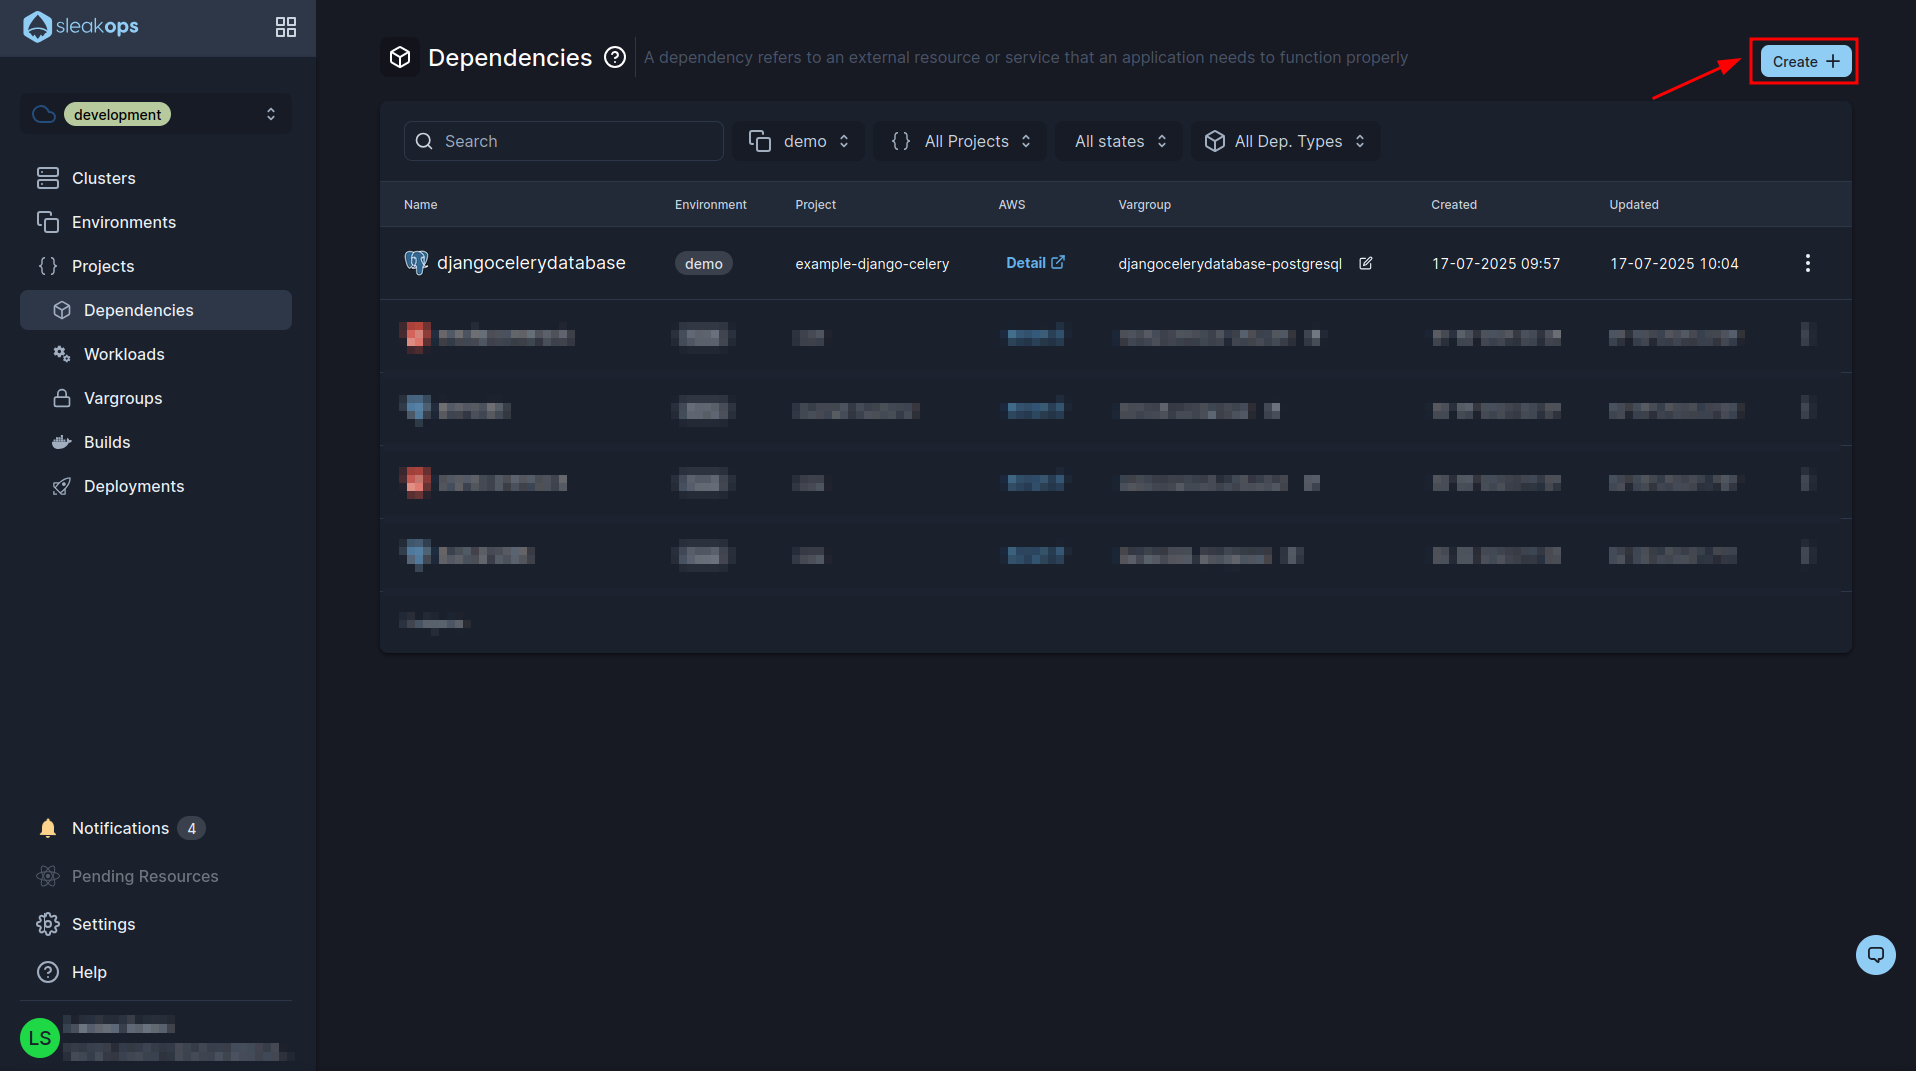
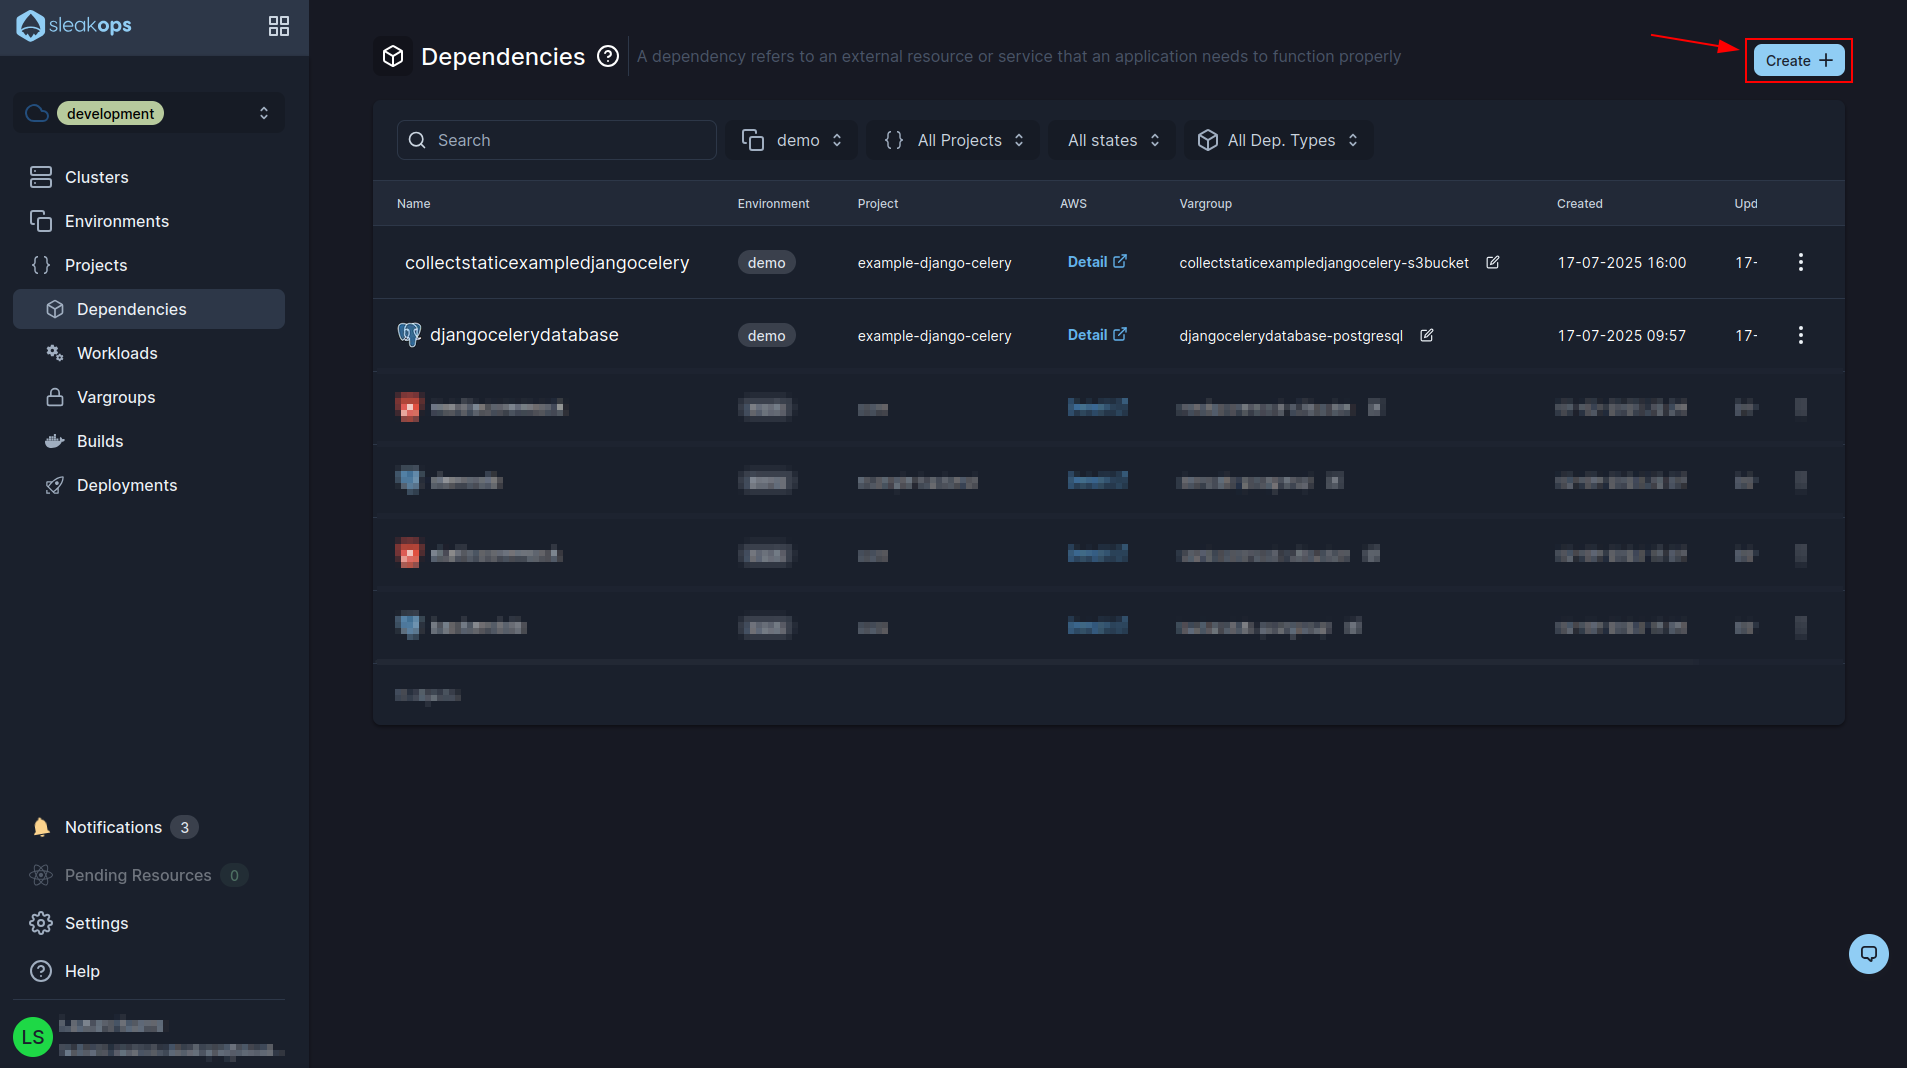
Once we have created the hooks we have to go to create our database. To do this we go to the “Dependencies” section:
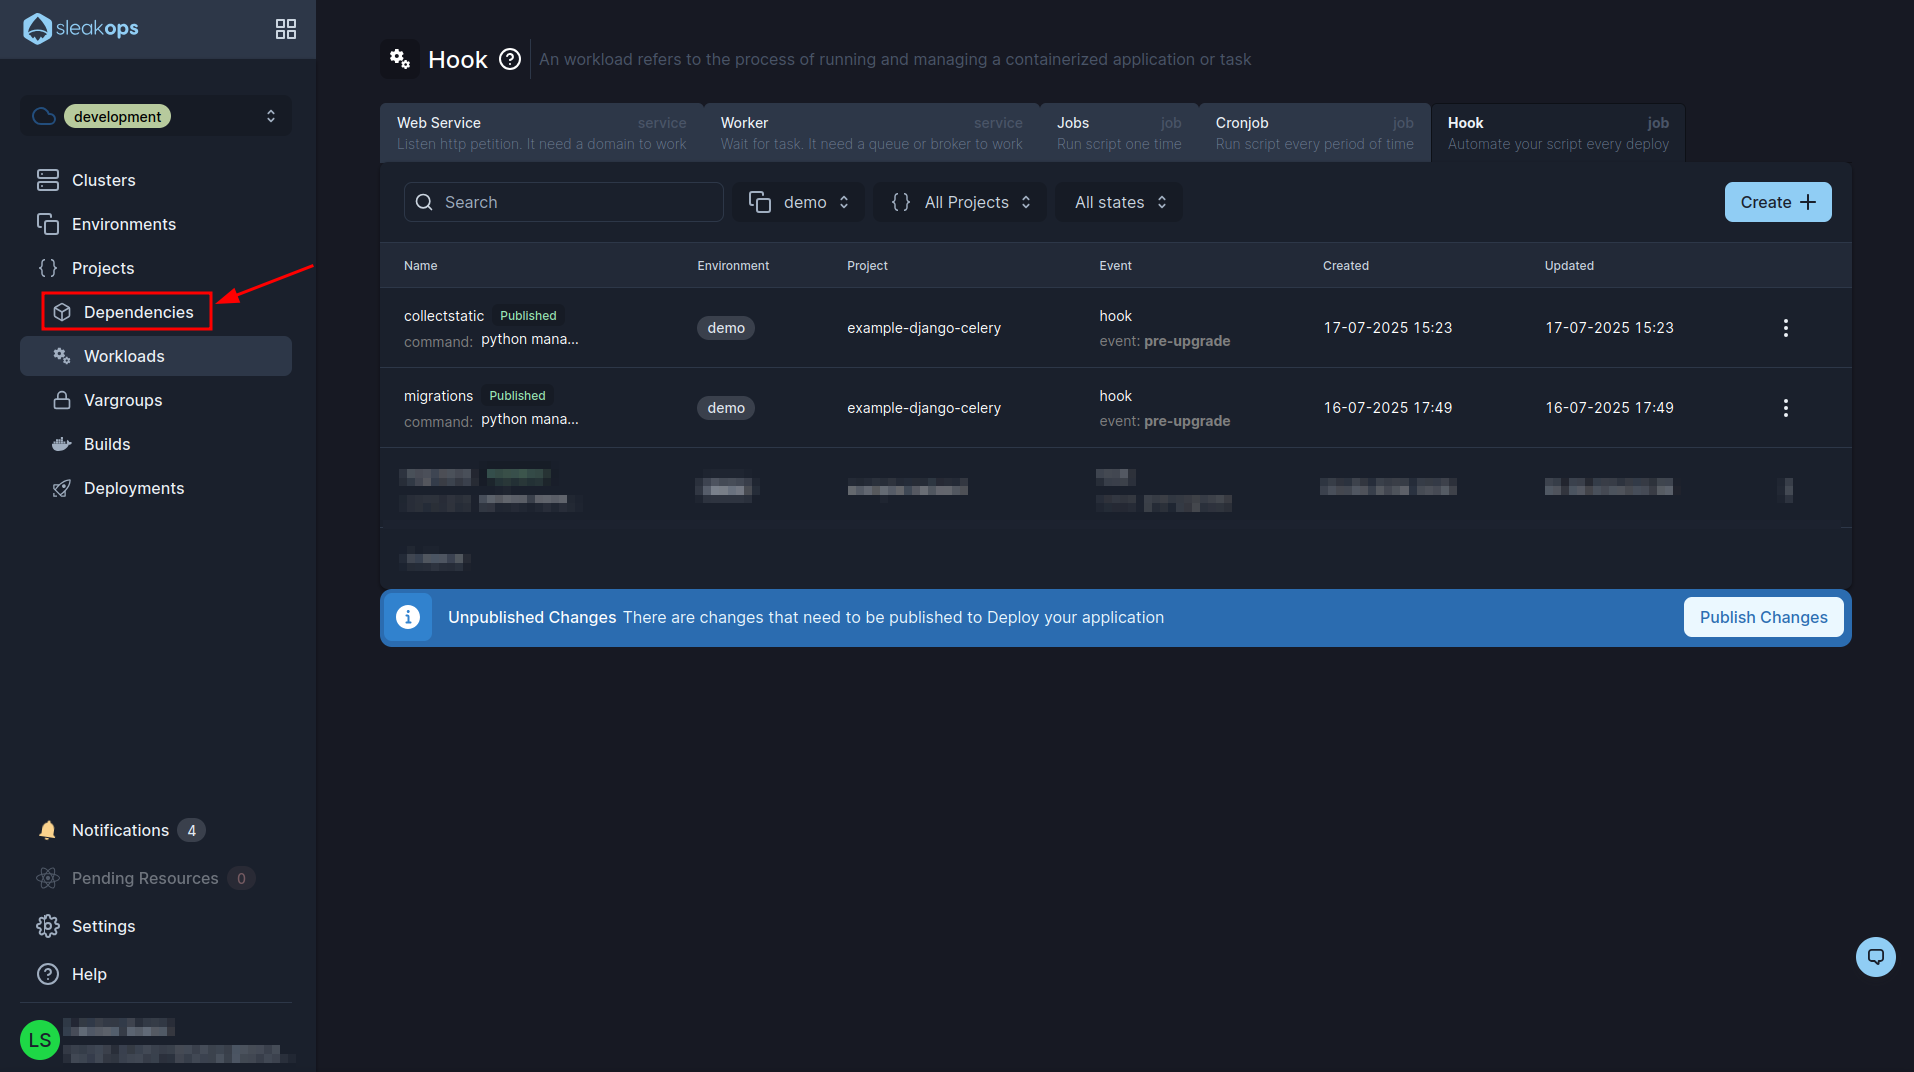
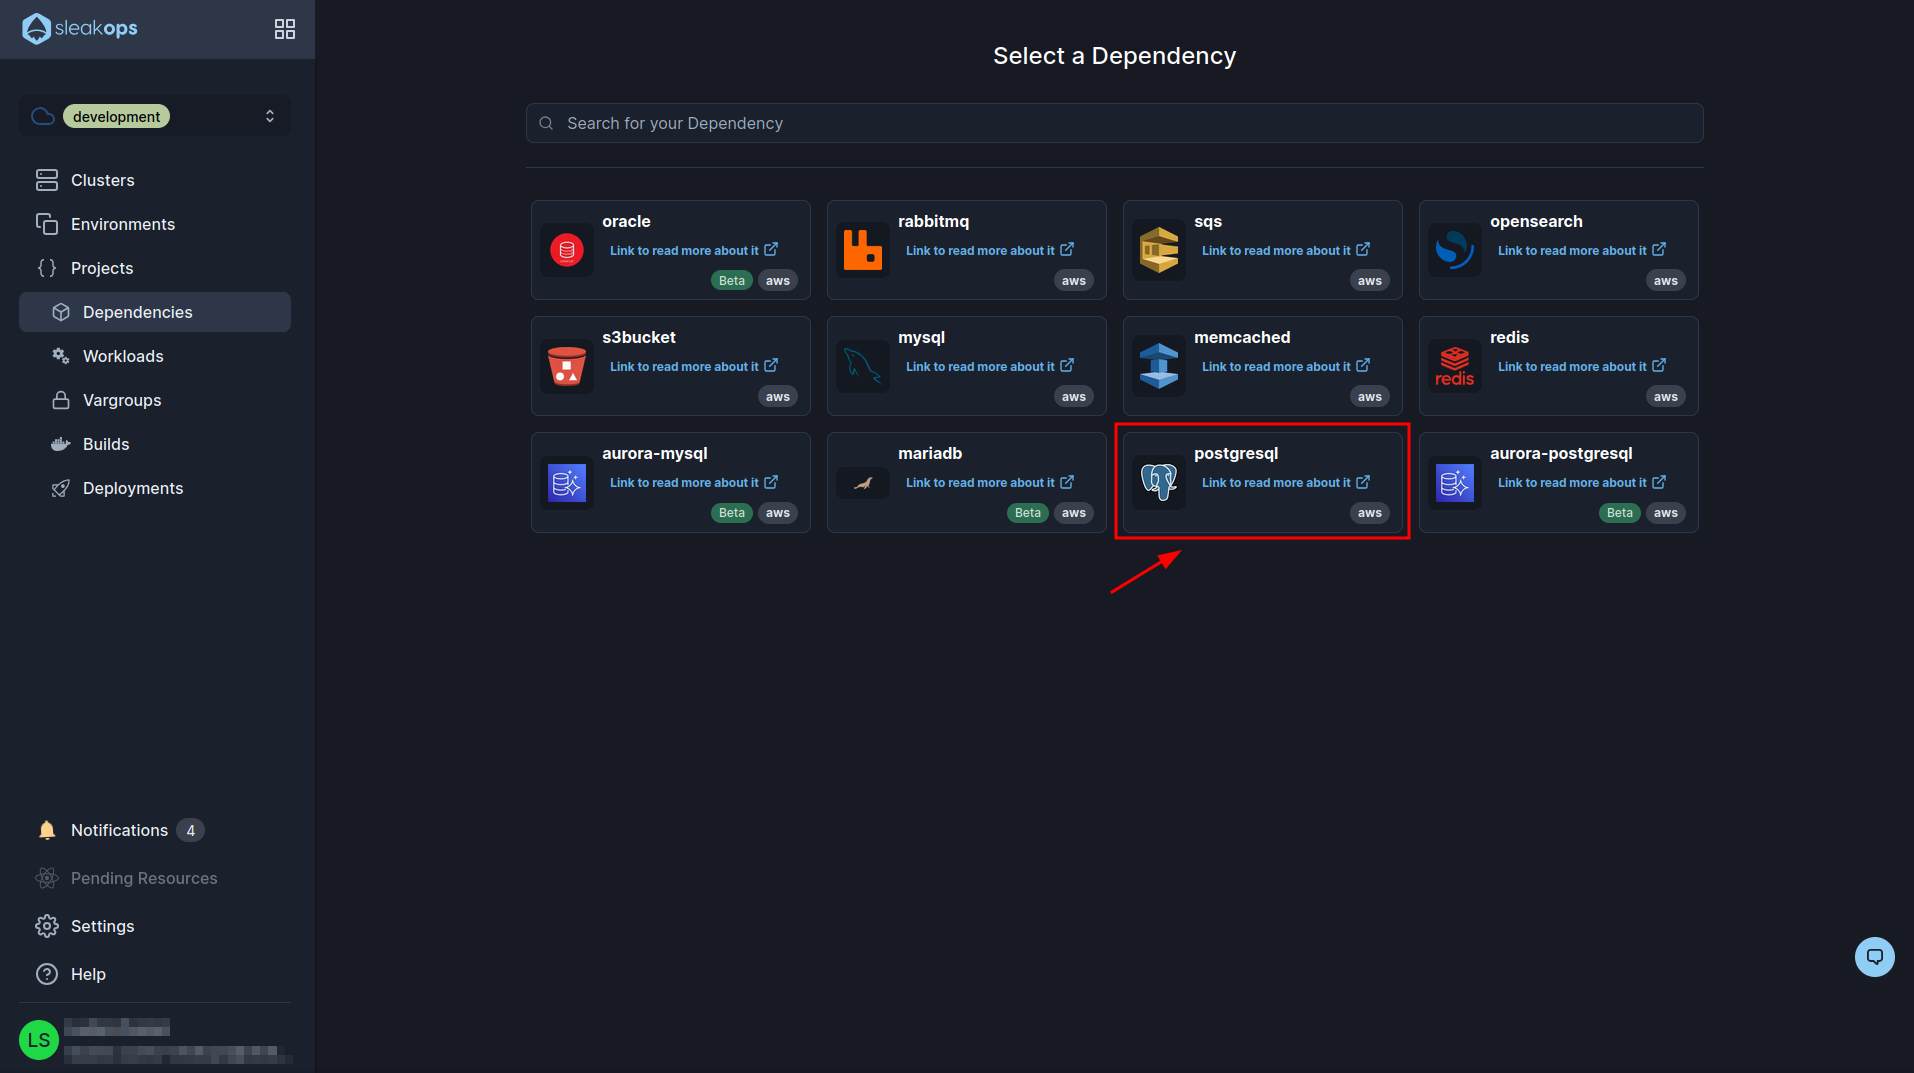
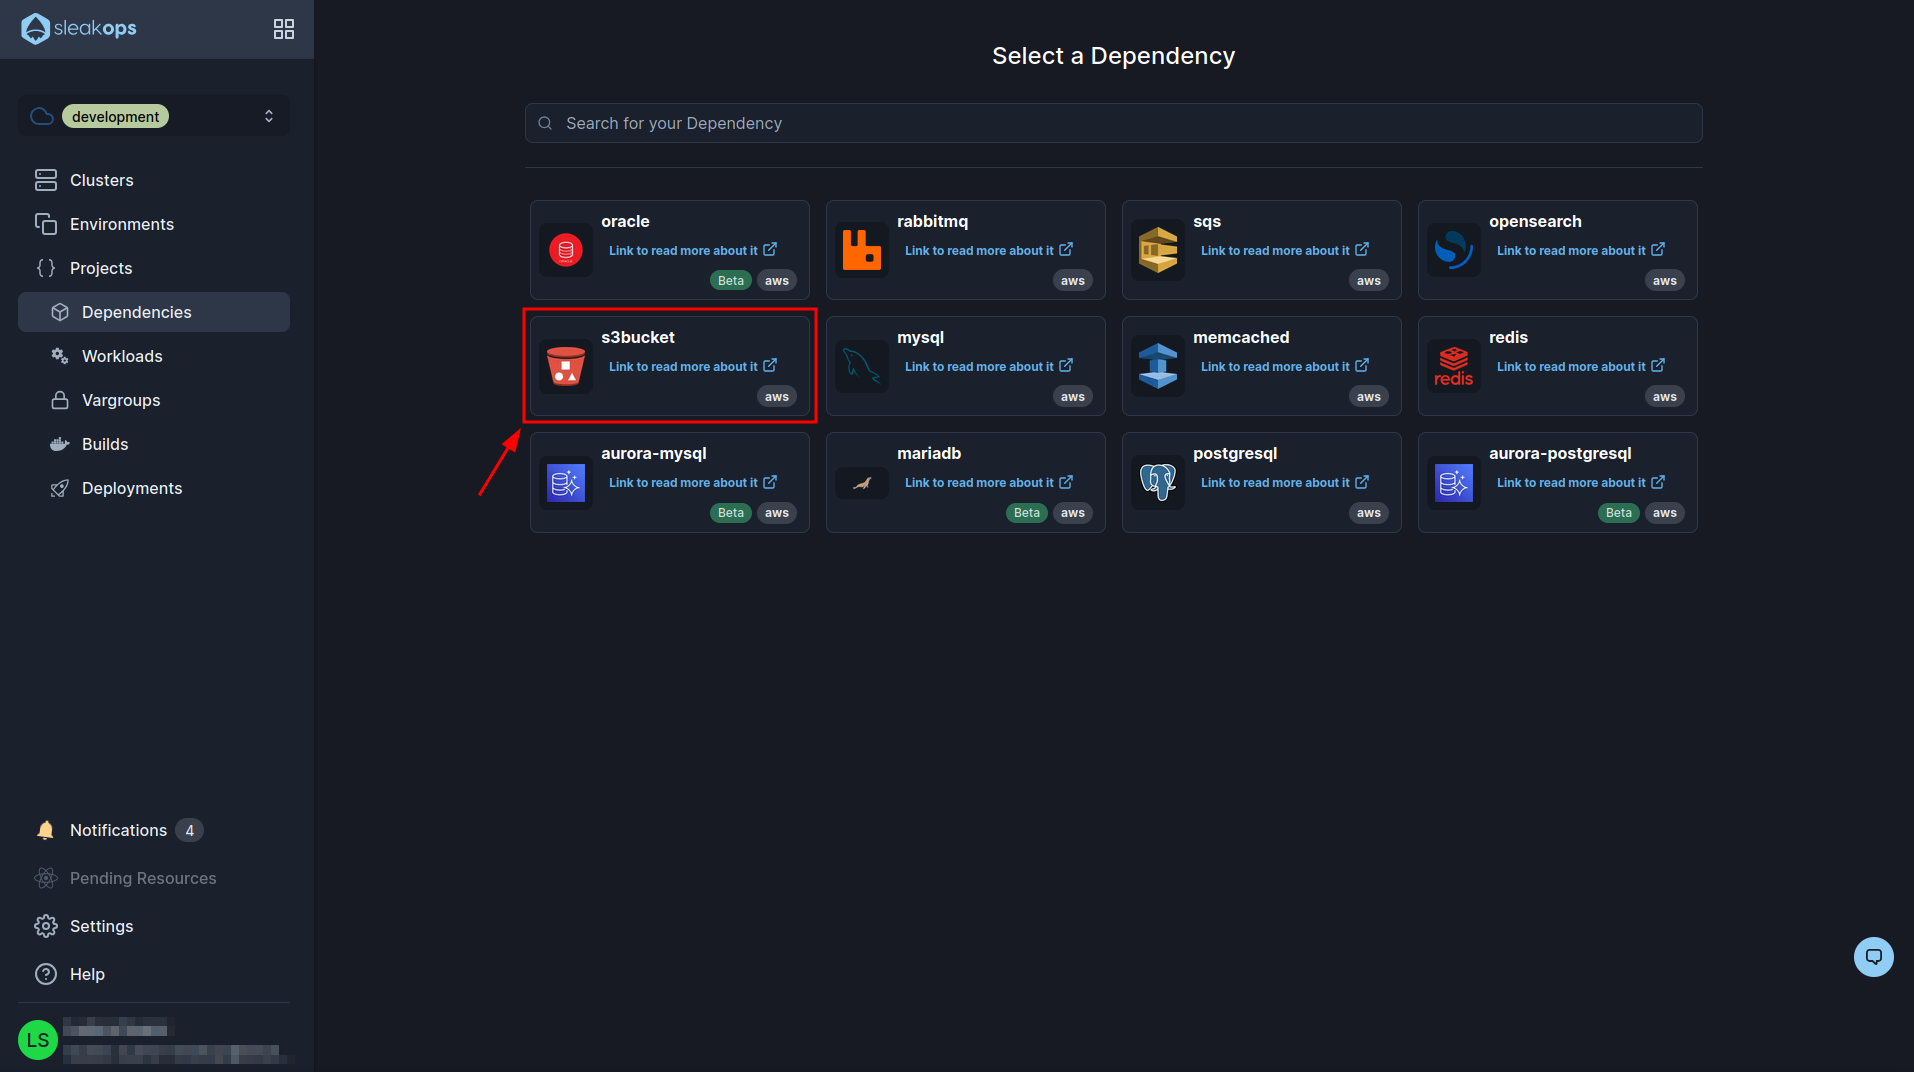
Inside this section we click on the “Create” button at the top right and then select “Postgresql”:
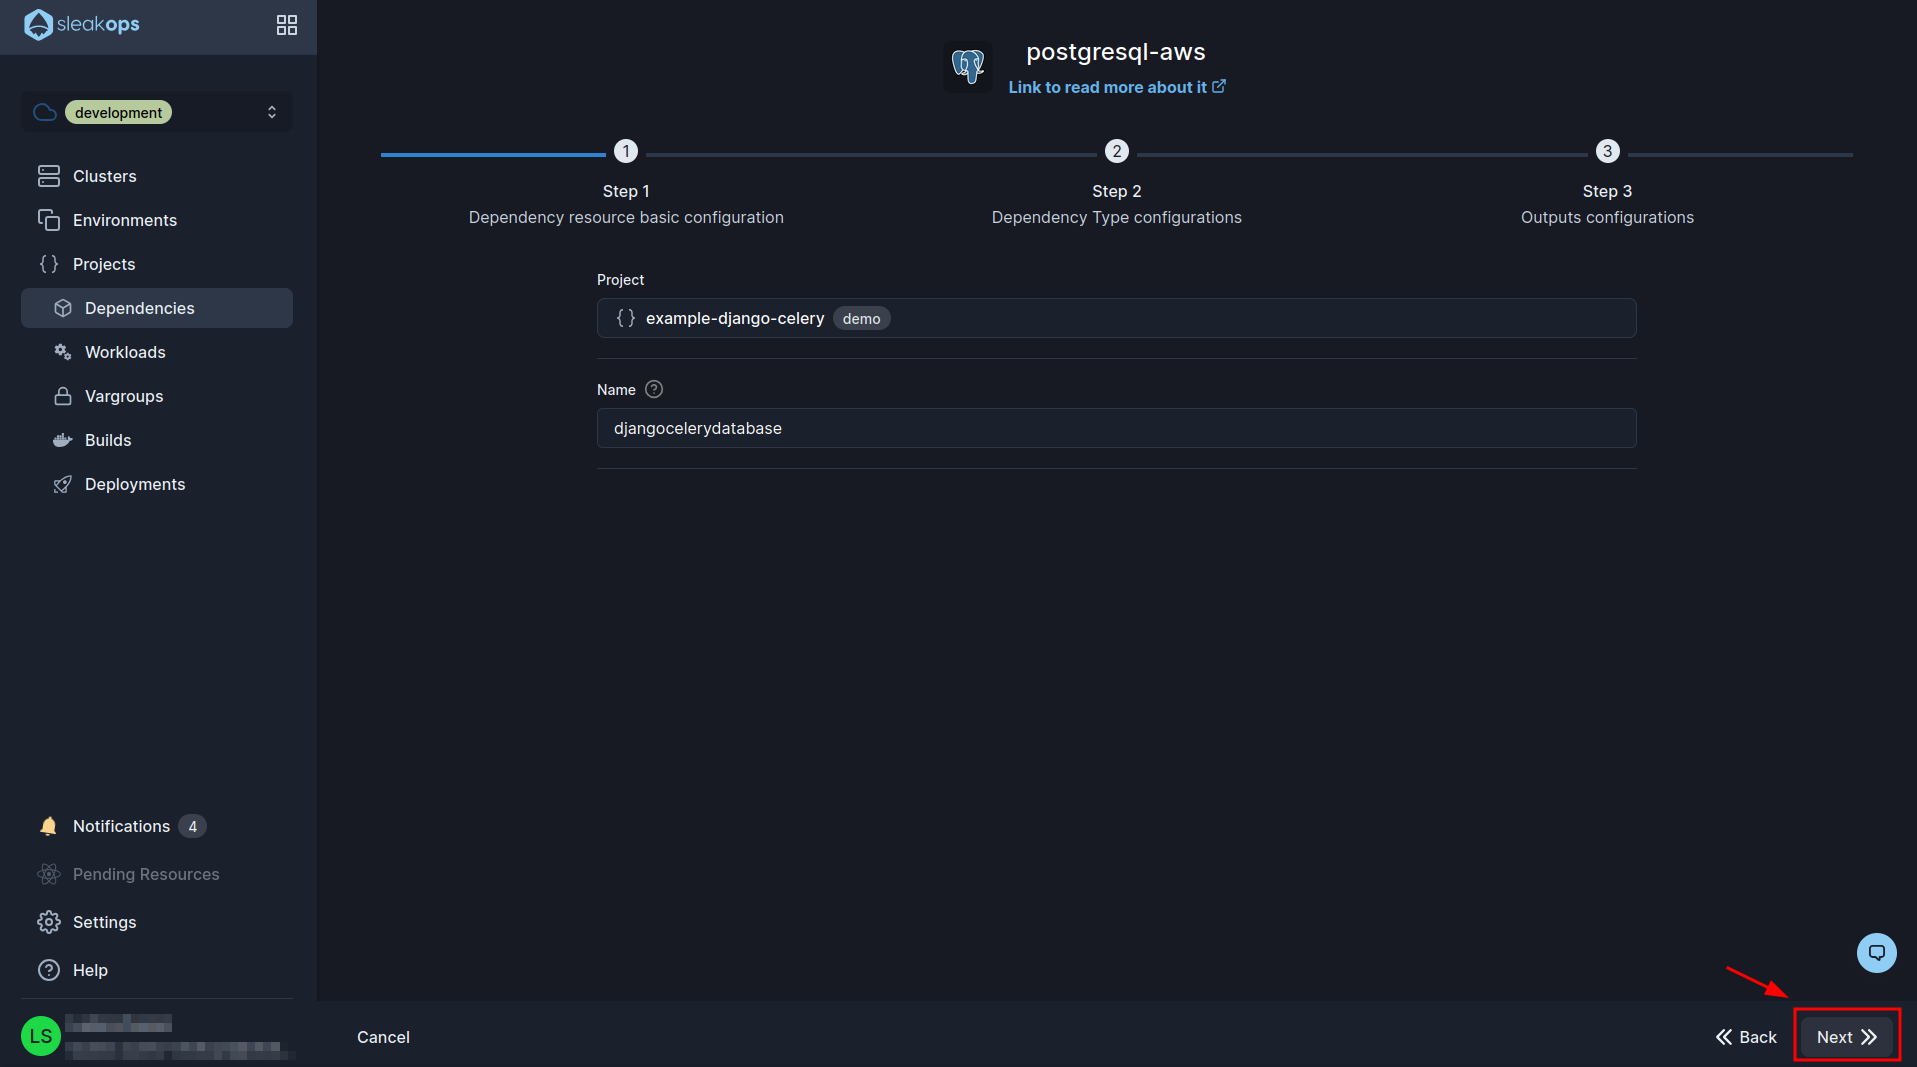
In the 1st postgresql creation form we will have to select our previously created project and define a name for it, then click on the “Next” button at the bottom right:
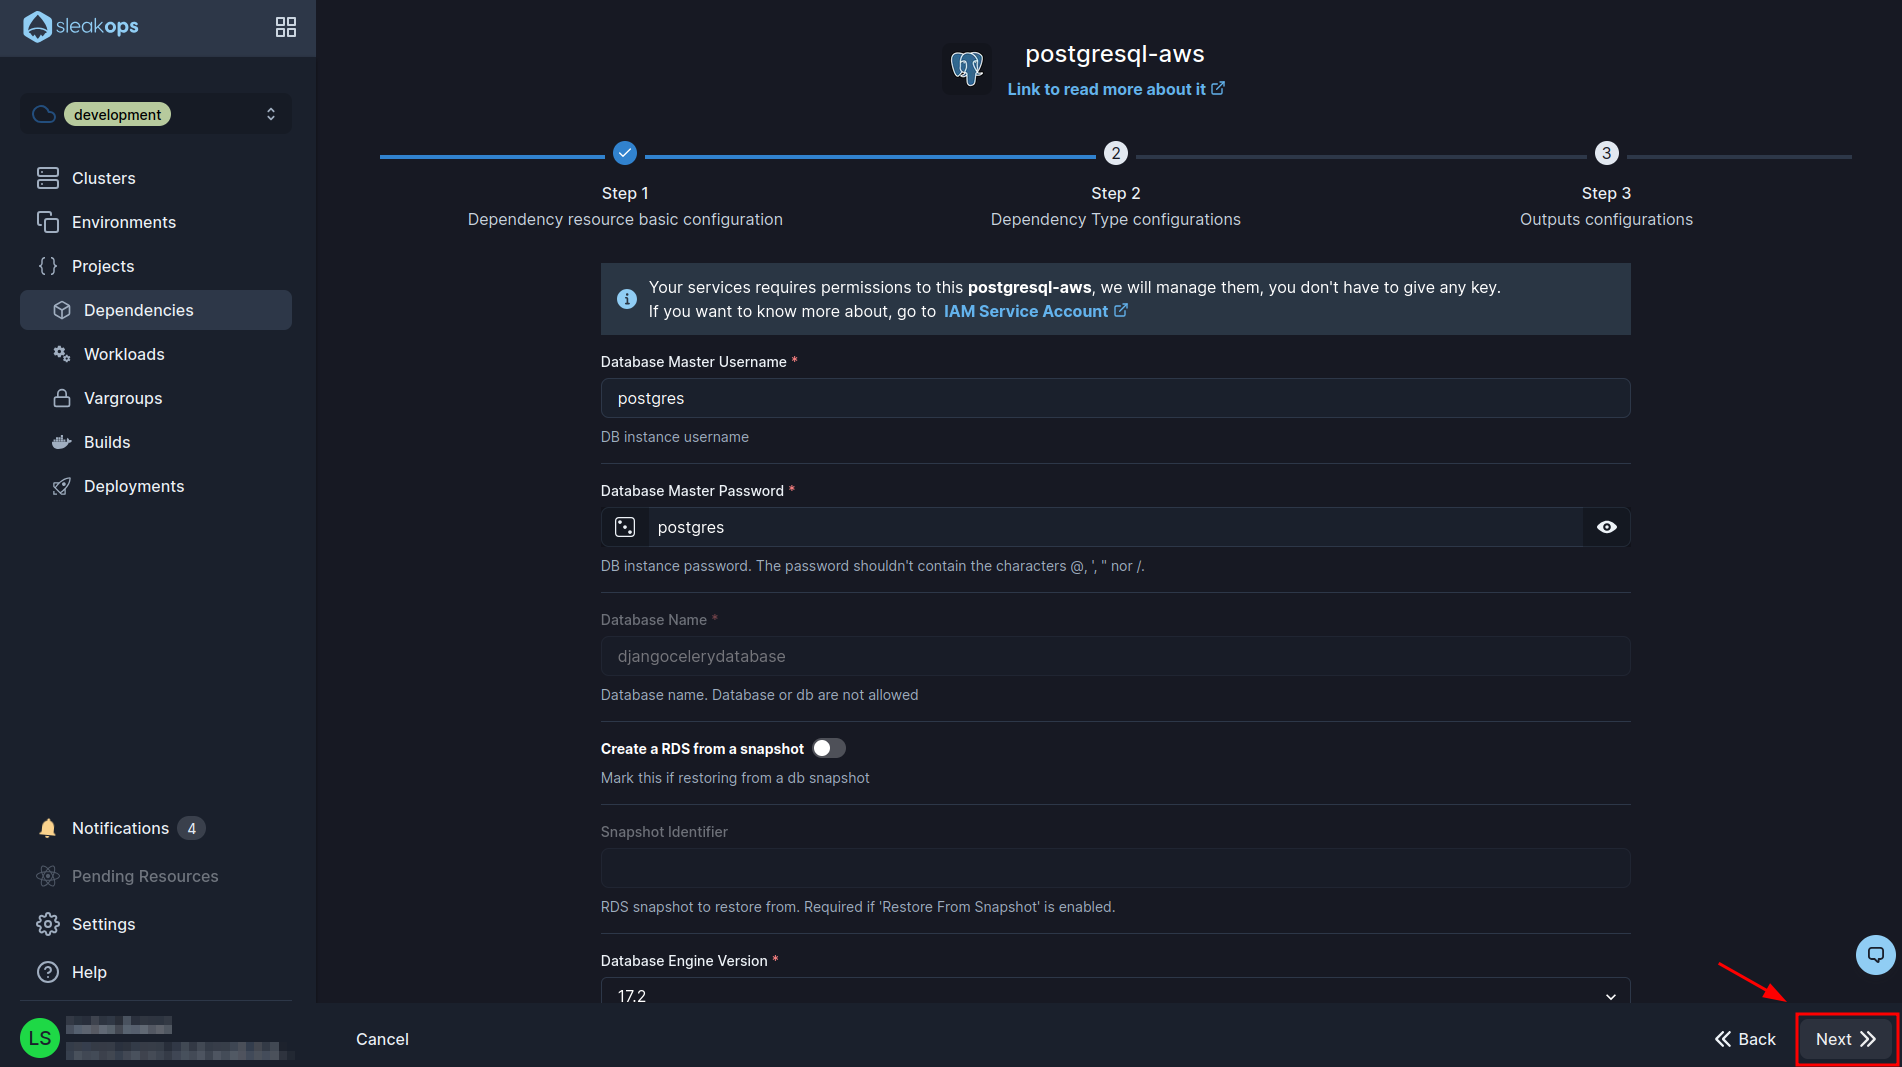
In the 2nd form we are going to have a lot of fields, the only ones that matter to us are the following:
| Setting | Description |
|---|---|
| Database Master Username | Here we assign a root user name to our database. |
| Database Master Password | A password for this root user. |
With these fields filled in, we are ready to move on. Click on the “Next” button at the bottom right to proceed to the third form:
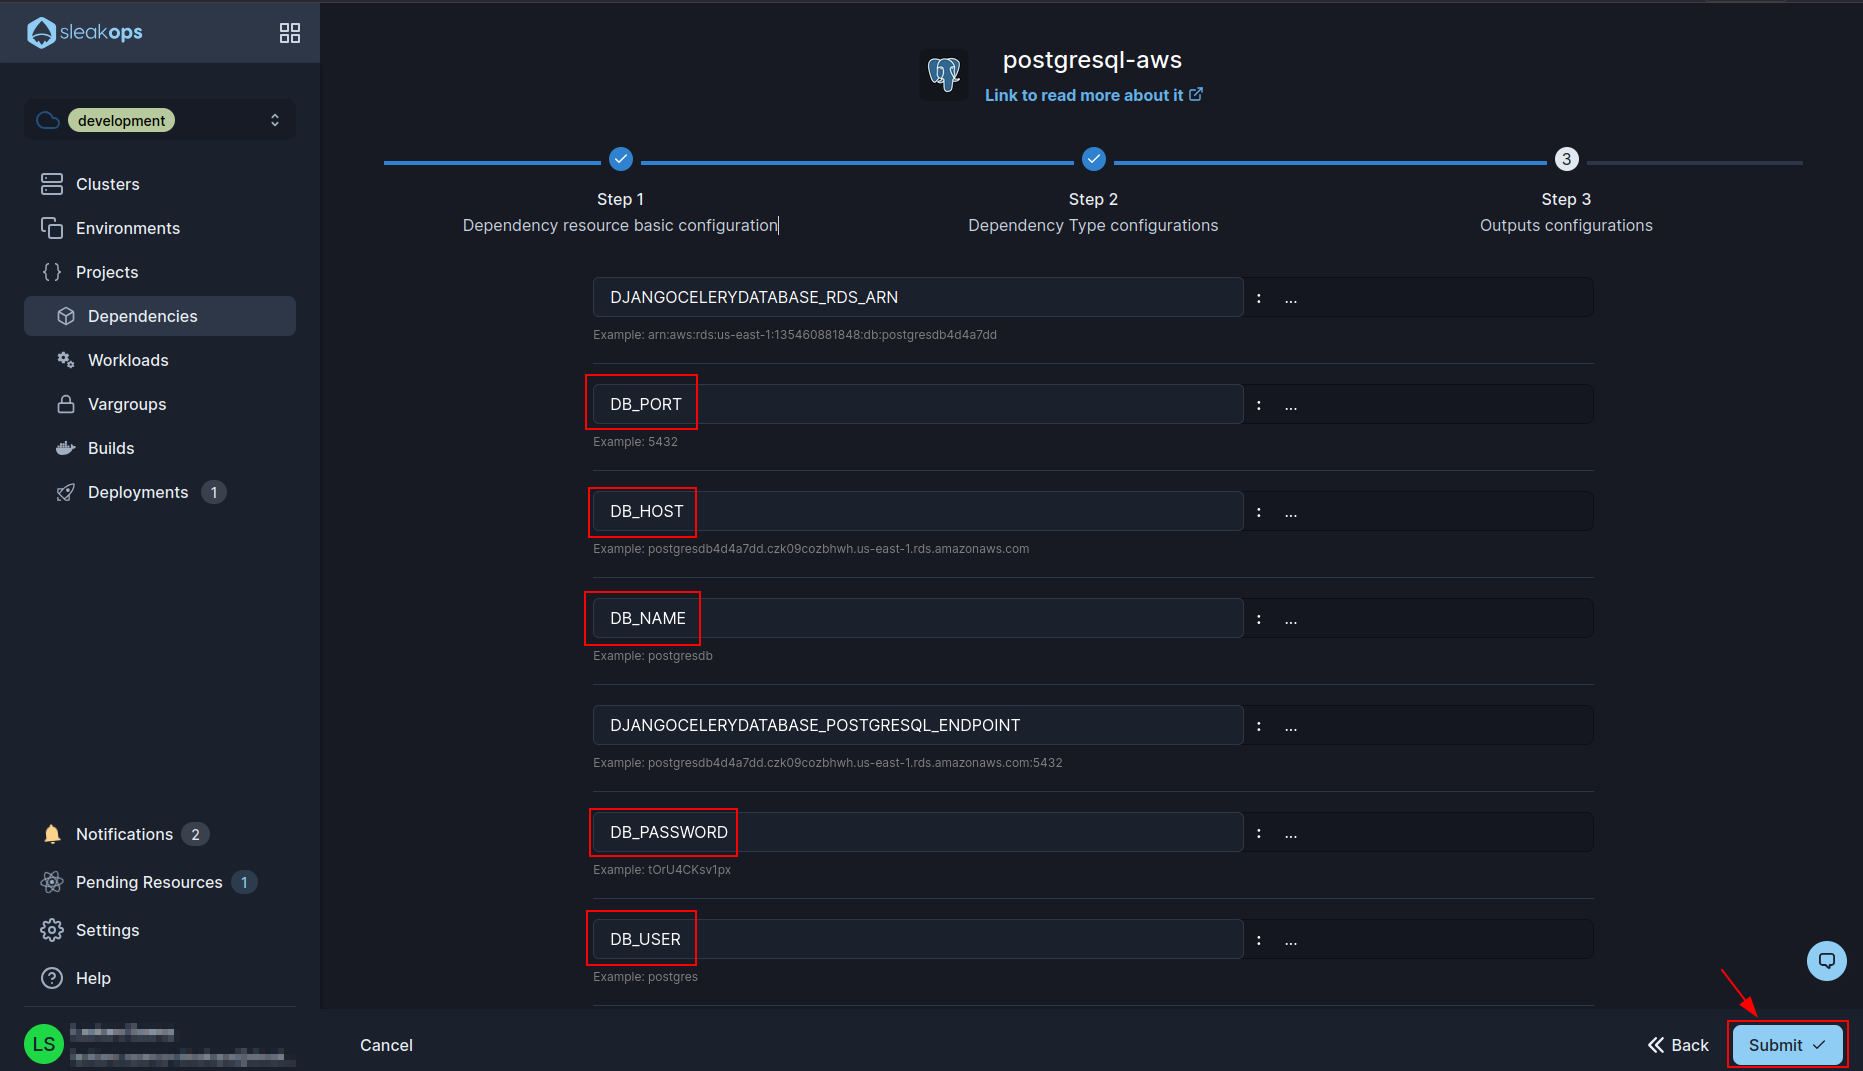
In this last form, we are going to adjust the environment variables we have in our project with respect to the database. To do this, we need to change the following variables to our own:
| Before | After |
|---|---|
| *_POSTGRESQL_NAME | DB_NAME |
| *_POSTGRESQL_USERNAME | DB_USER |
| *_POSTGRESQL_PASSWORD | DB_PASSWORD |
| *_POSTGRESQL_ADDRESS | DB_HOST |
| *_POSTGRESQL_PORT | DB_PORT |
It should look something like the image below. Then click on the “Submit” button and your database should be created:
Create S3 Bucket
In the same page of dependencies we have to create our s3 bucket, for it we are going to go to the “Create” button again:
And select S3 Bucket:
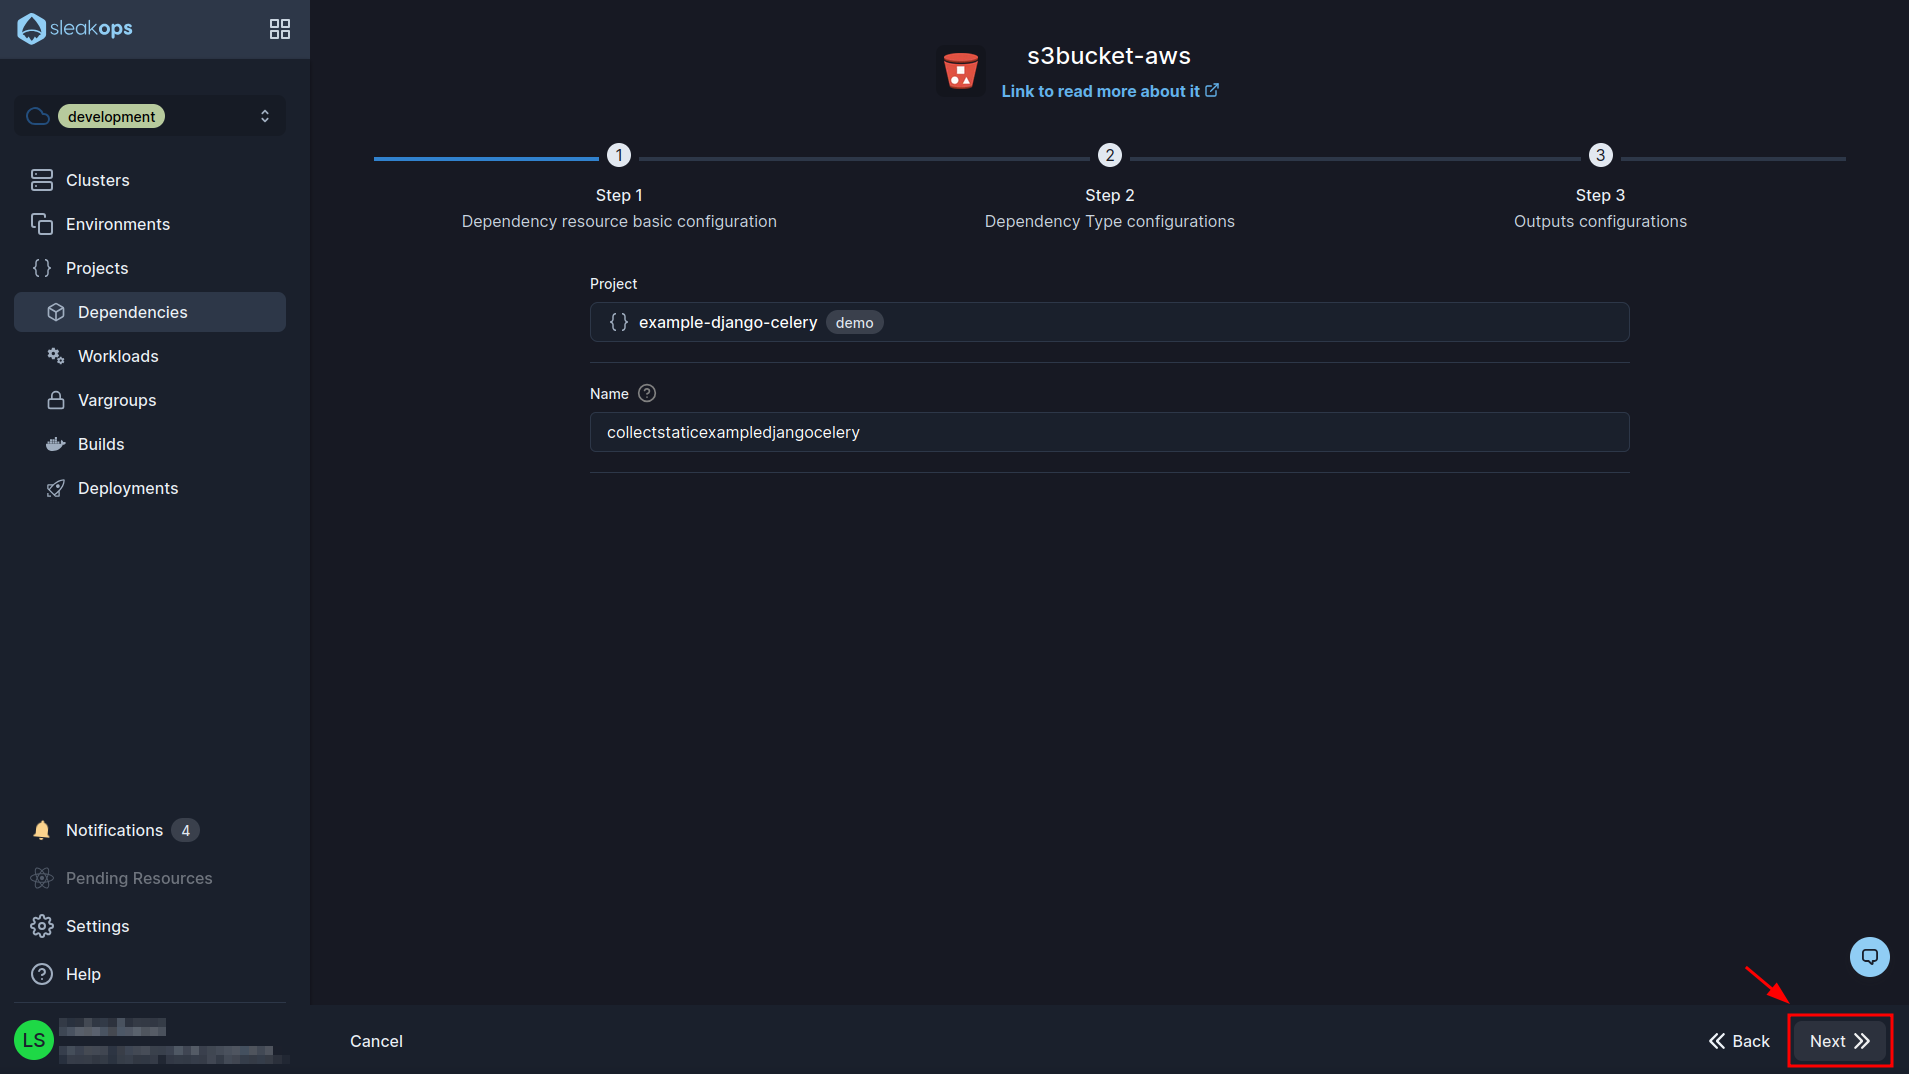
In the first form we have to select our previously created project and define a name for the bucket, we have to take into account that the name of the bucket is global so it has to be unique. Now click on the “Next” button and go to step 3:
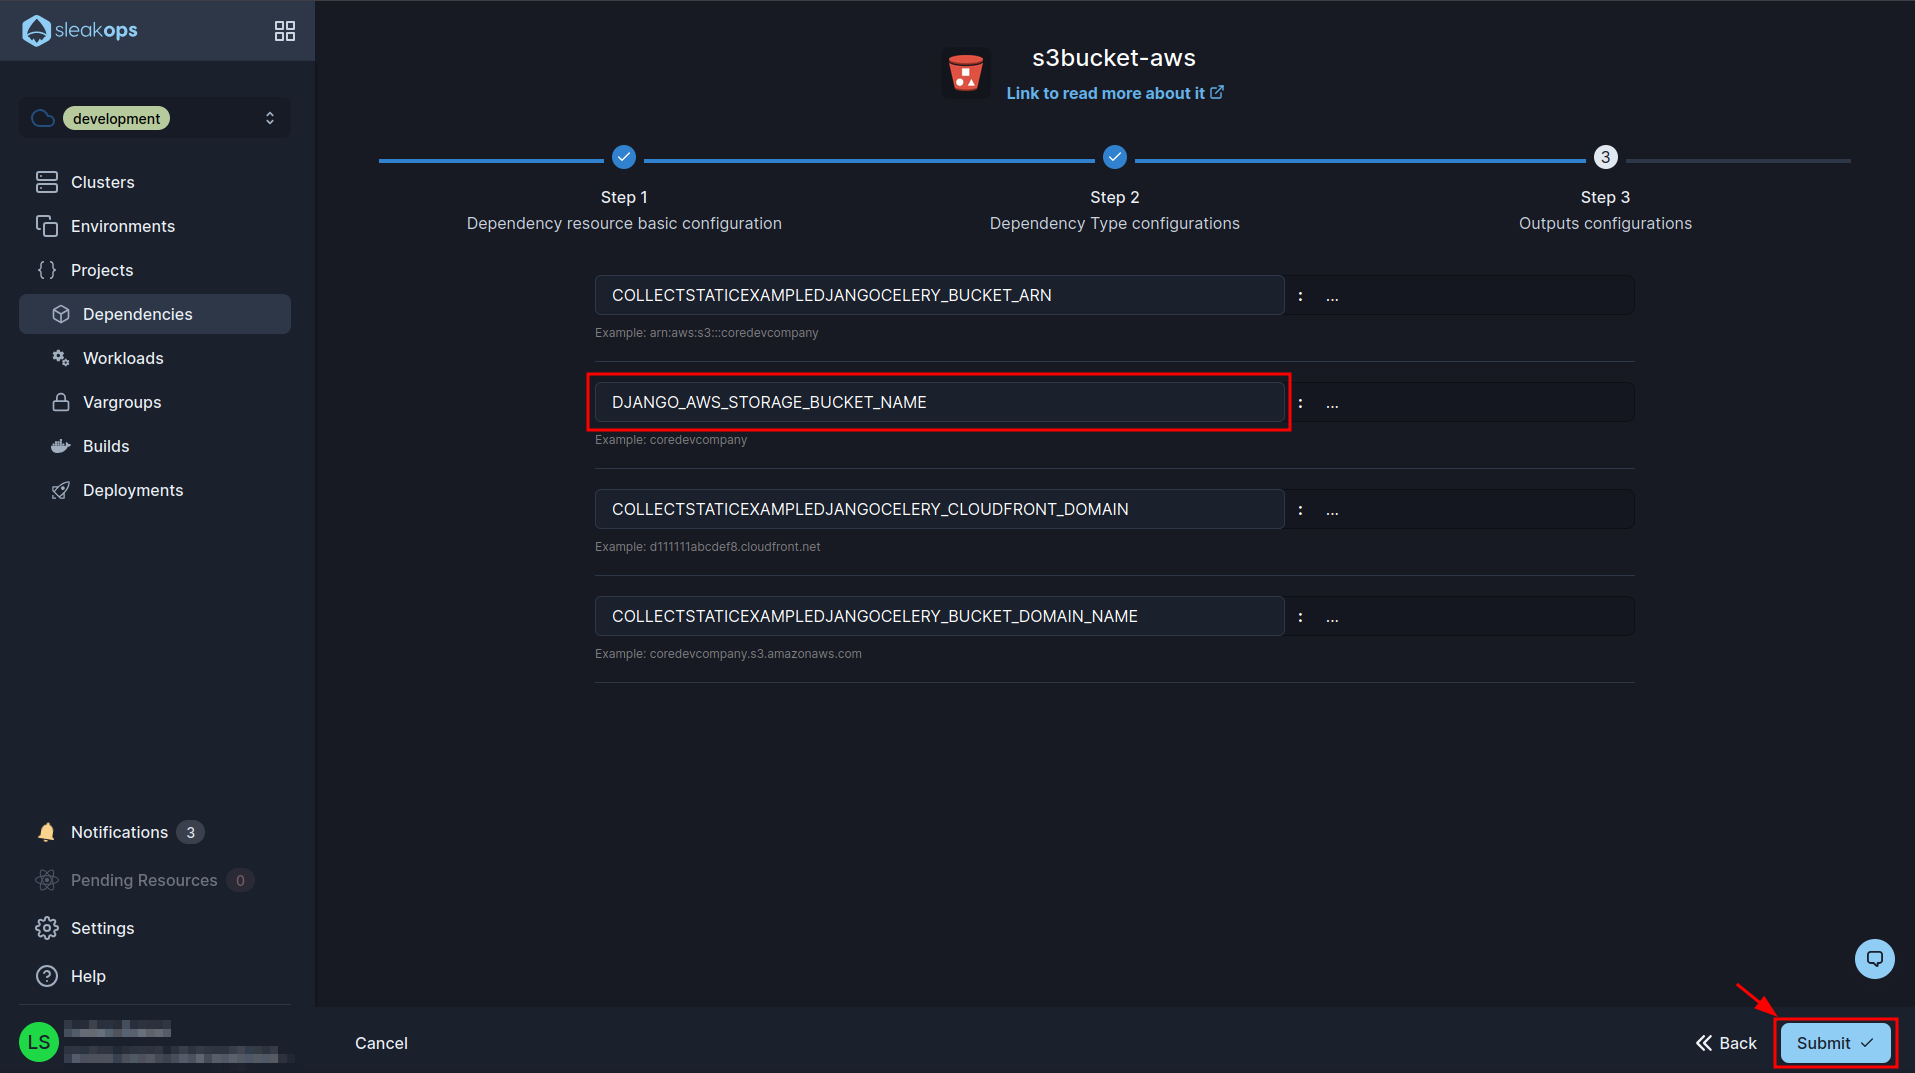
Here we are going to see some environment variables defined for the bucket. We are going to edit the one that says COLLECTSTATICEXAMPLEDJANGOCELERY_BUCKET_NAME and we are going to call it DJANGO_AWS_STORAGE_BUCKET_NAME. With this simple change we click on the “Submit” button at the bottom right to finish creating the bucket:
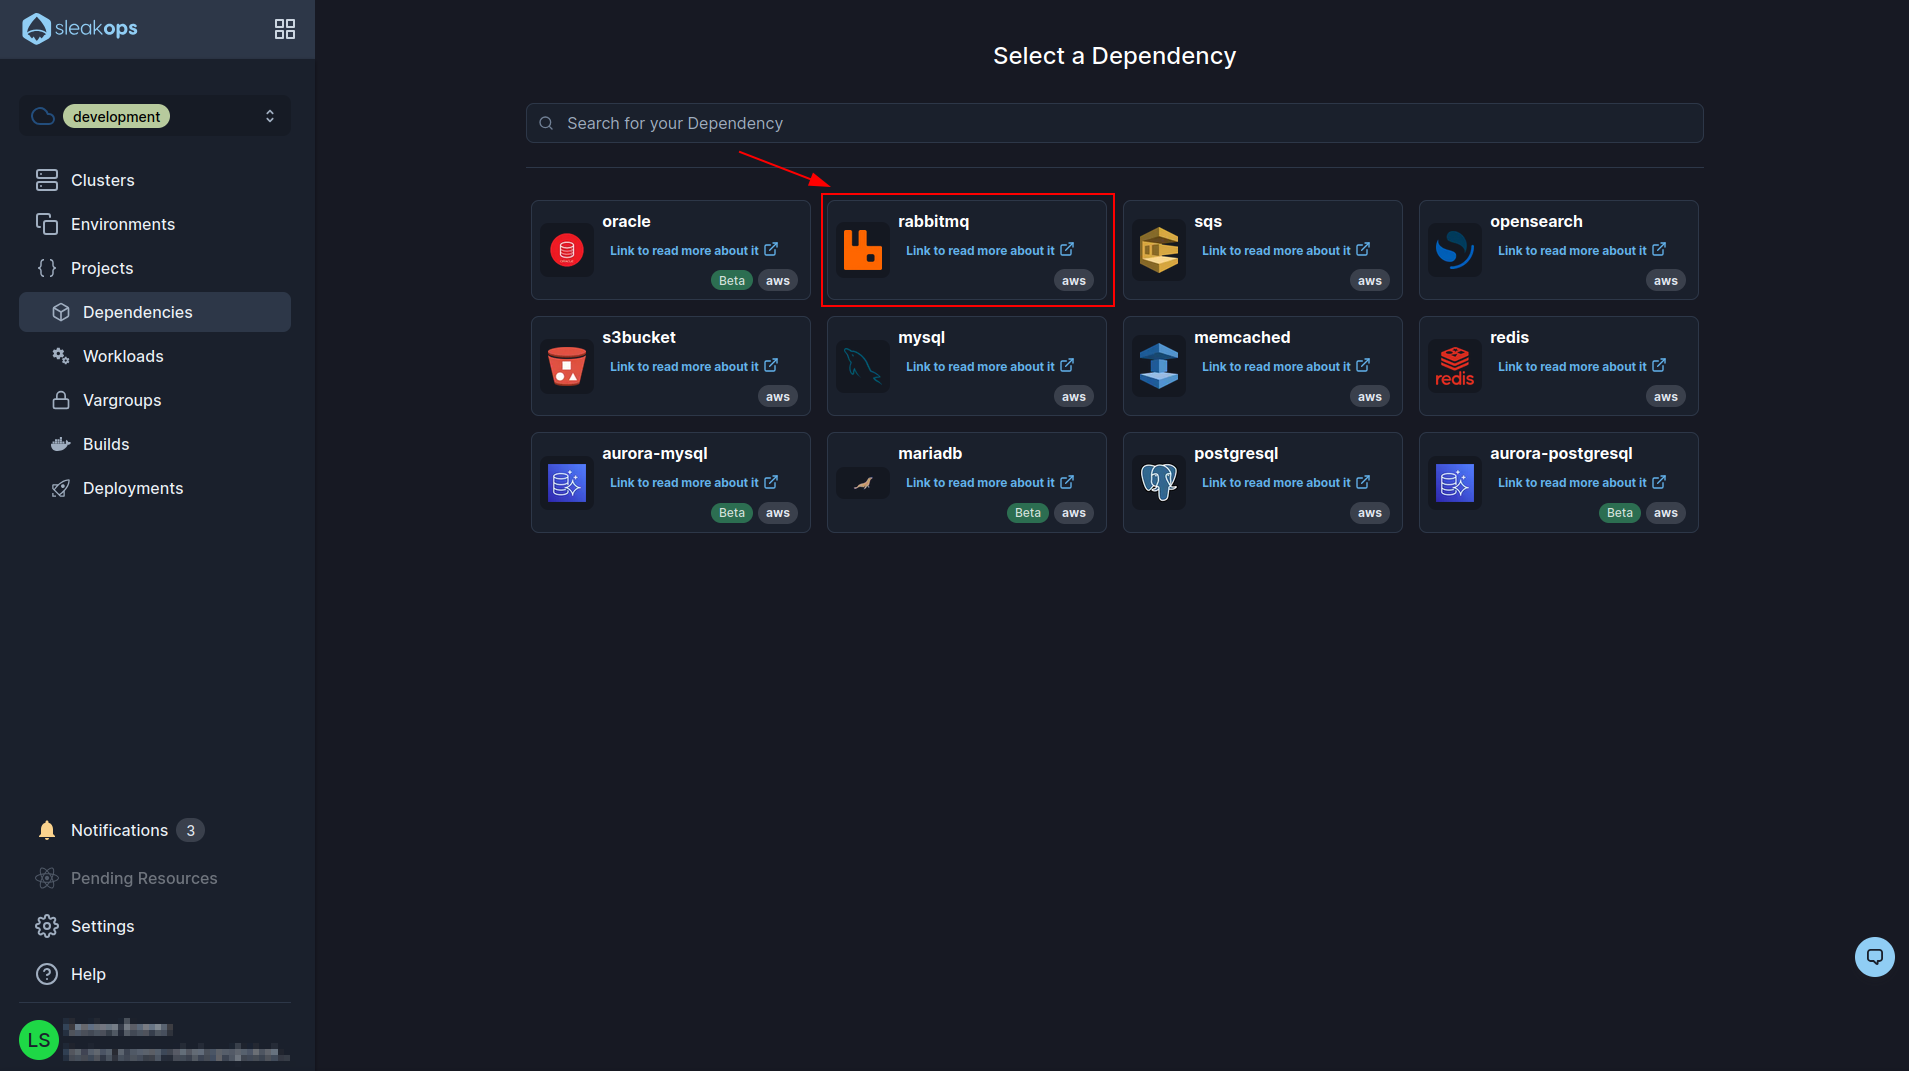
Create Rabbitmq
Now we need one more dependency. Our Rabbitmq to queue celery tasks, so let's get to it:
And select Rabbitmq:
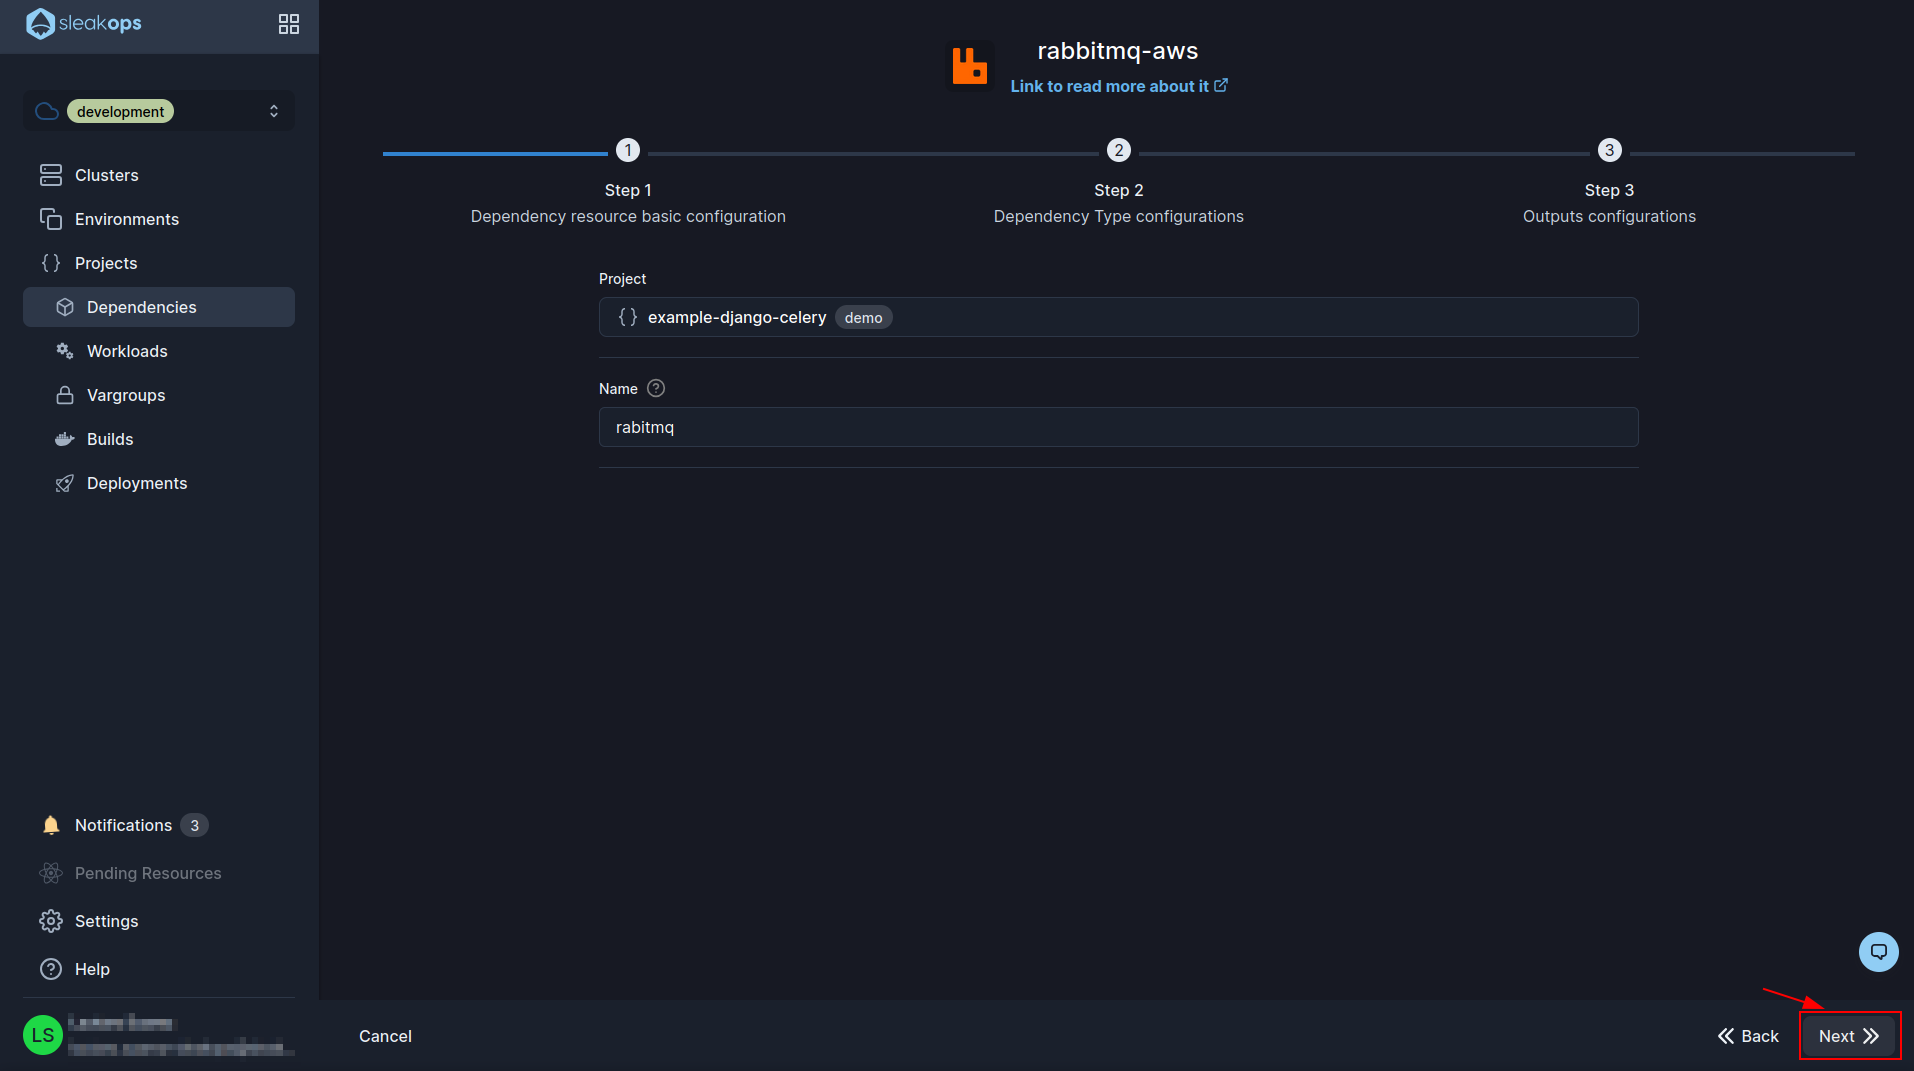
In the first form we will have to select our project and define a name for it. Then click on the “Next” button at the bottom right:
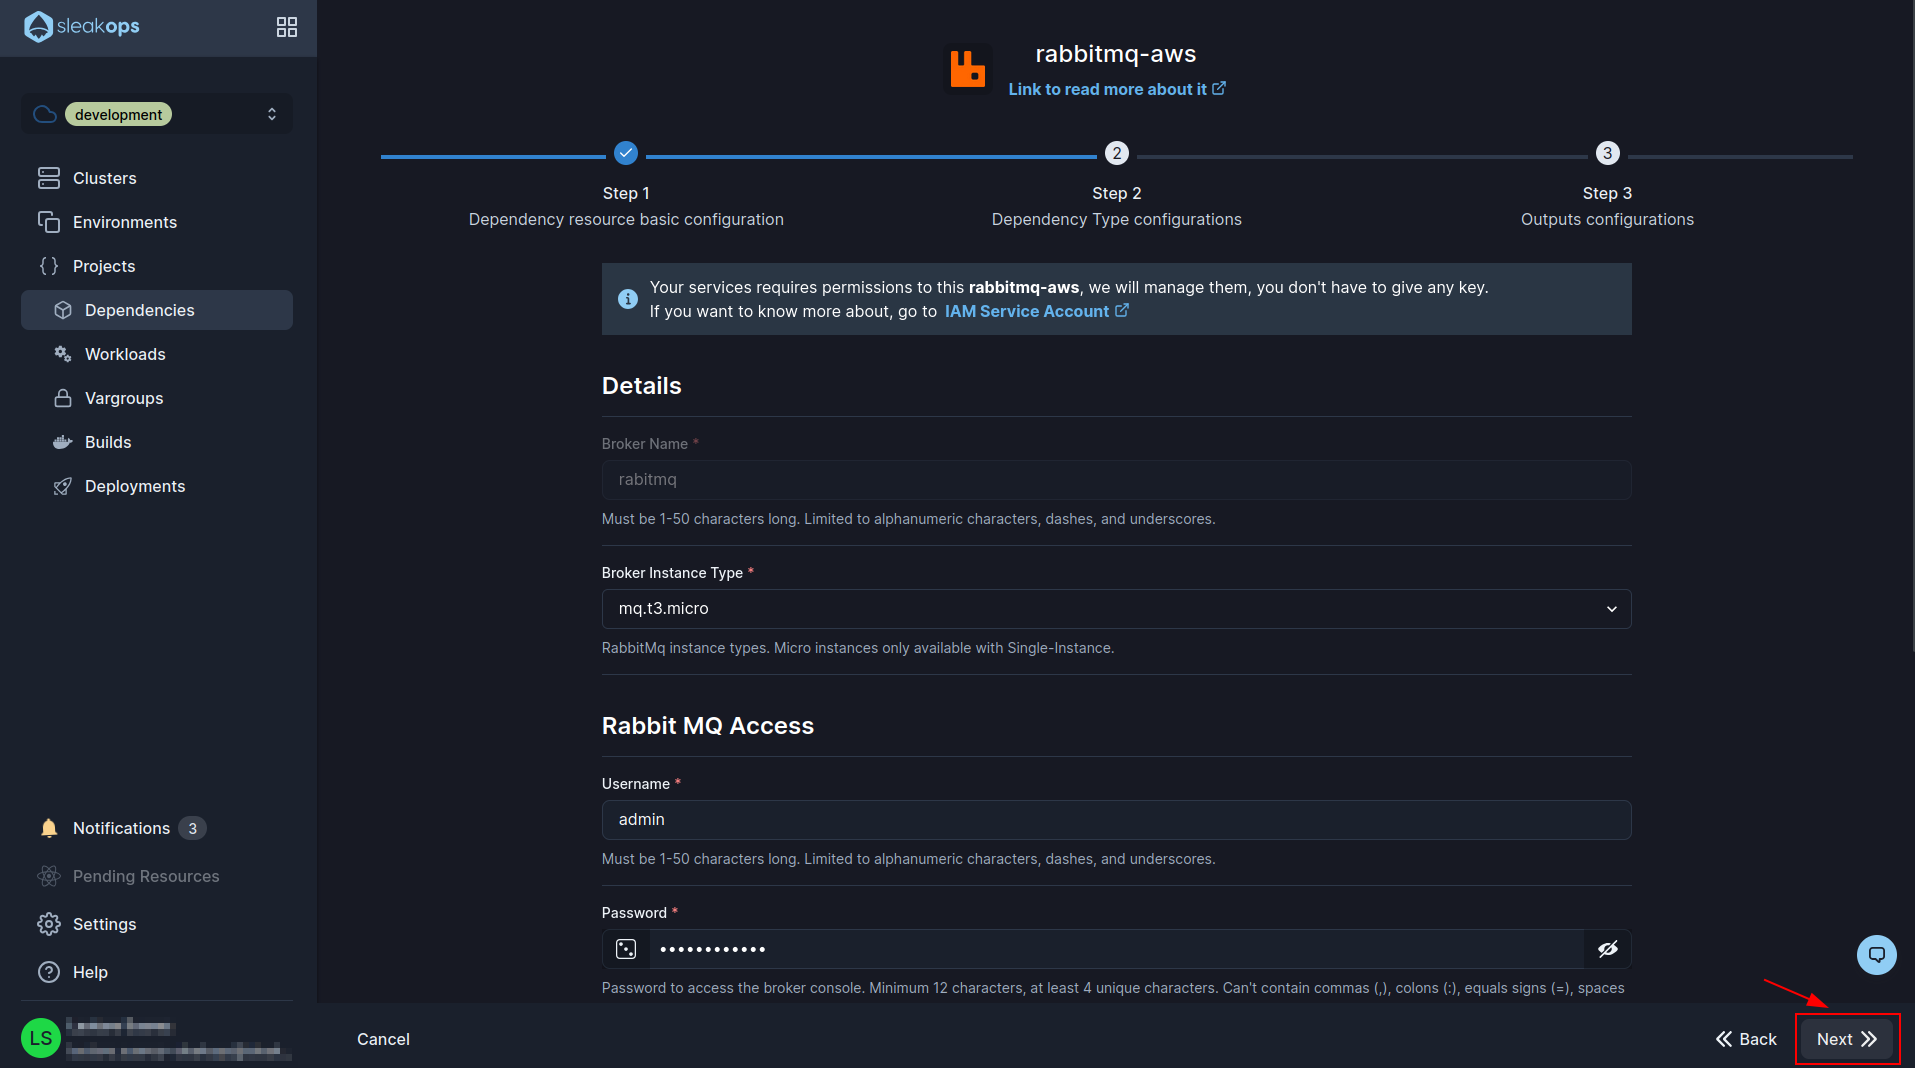
In the following form we have several fields but the only ones that matter to us for this example are the username and password, we can define whatever we want. For this example I chose admin as username and for the password I generated it randomly with the dice button. Then we click on the “Next” button to go to the next form:
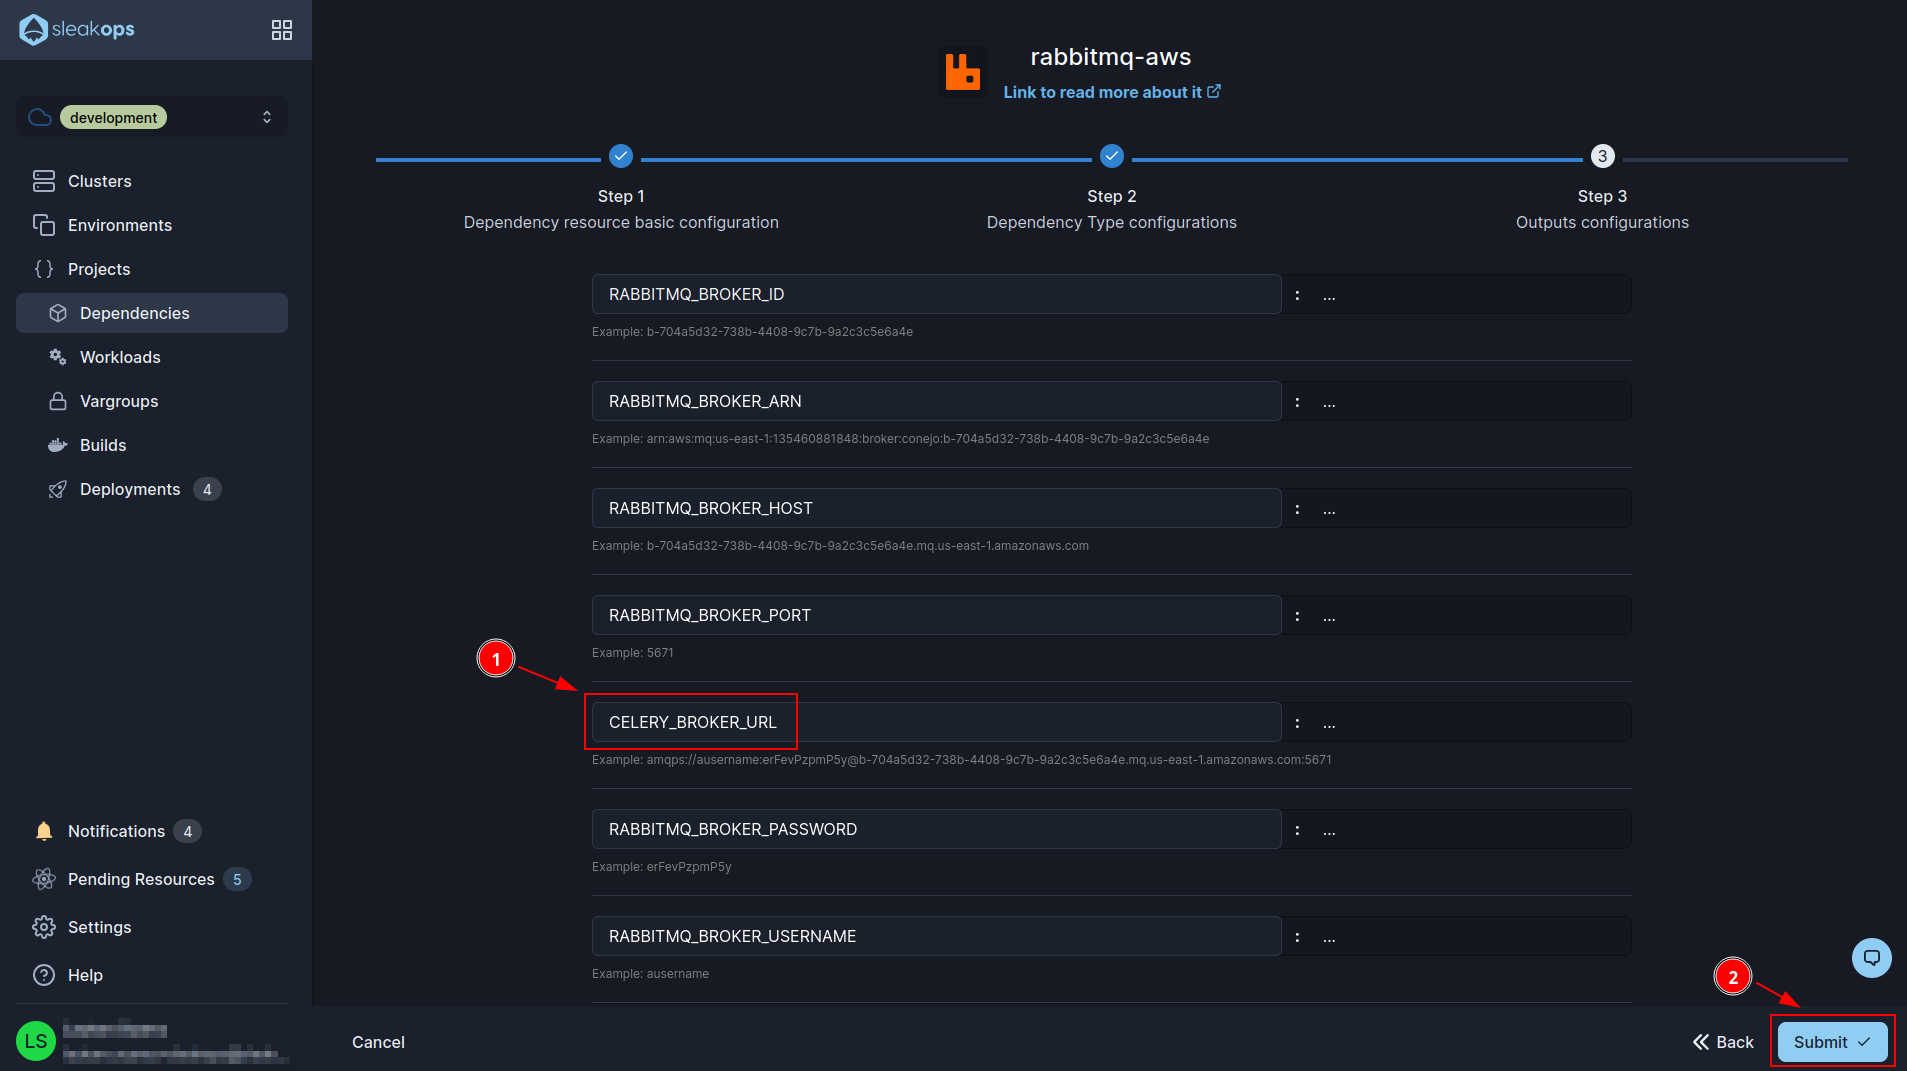
In this last form we have to change the name of the variable that ends in *_BROKER_AUTH_URL to CELERY_BROKER_URL (as shown in the image). Then we click on the “Submit” button at the bottom right to finish creating rabbitmq:
Create yours environment variables
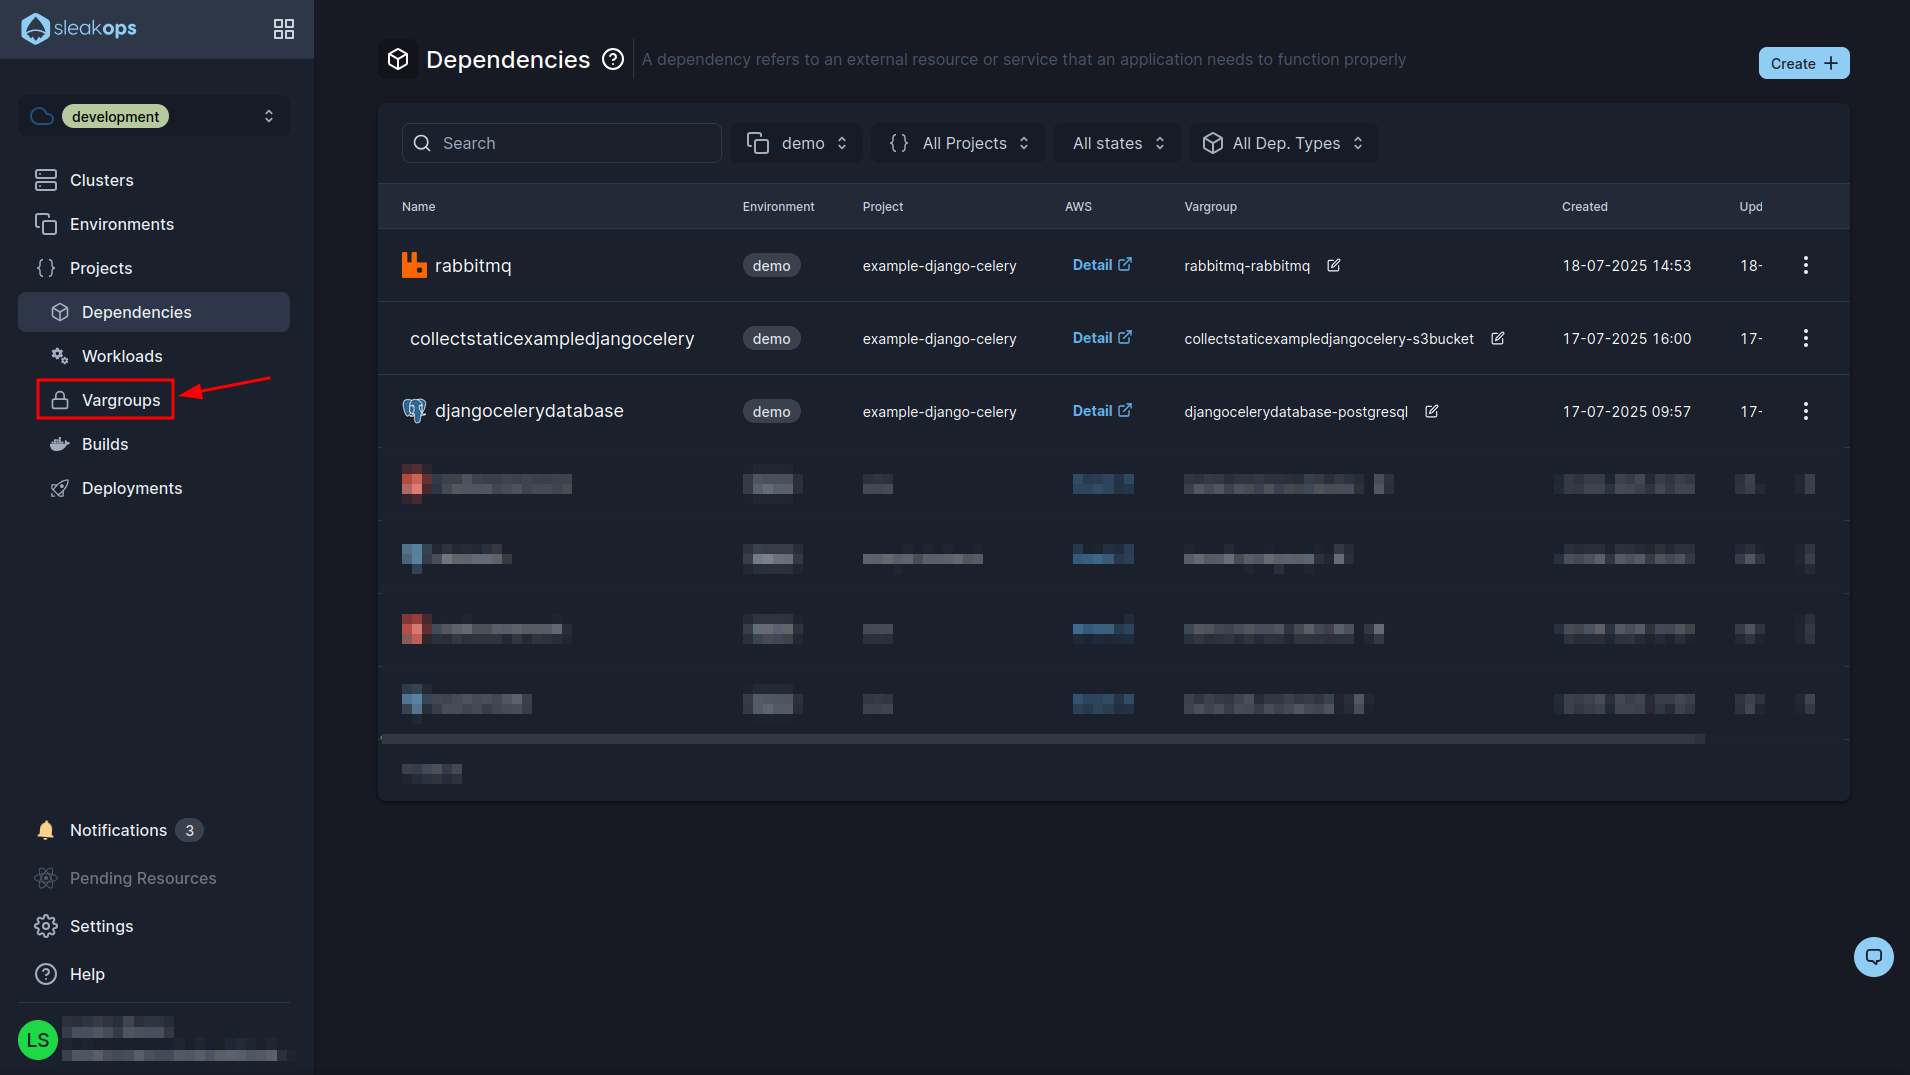
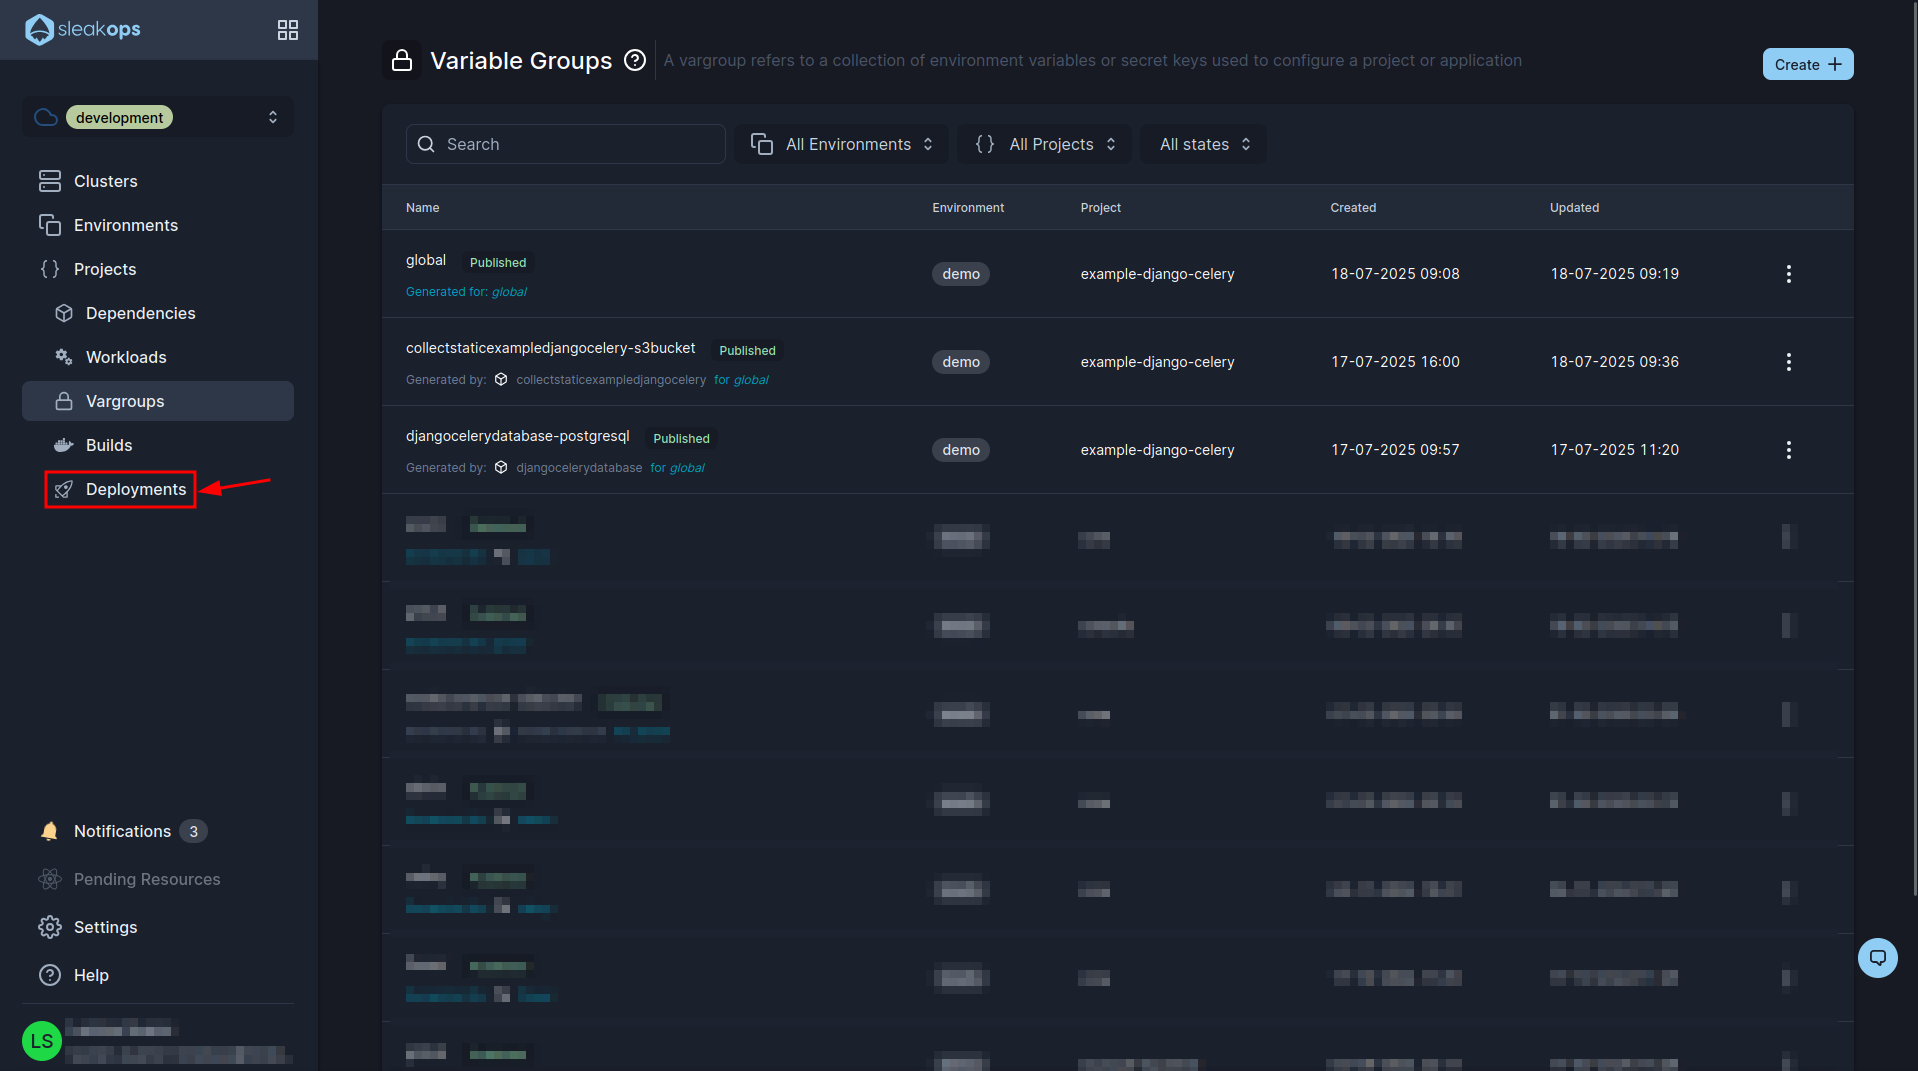
Once the dependencies are deployed we have to configure our environment variables. We are going to go to the Vargroups section:
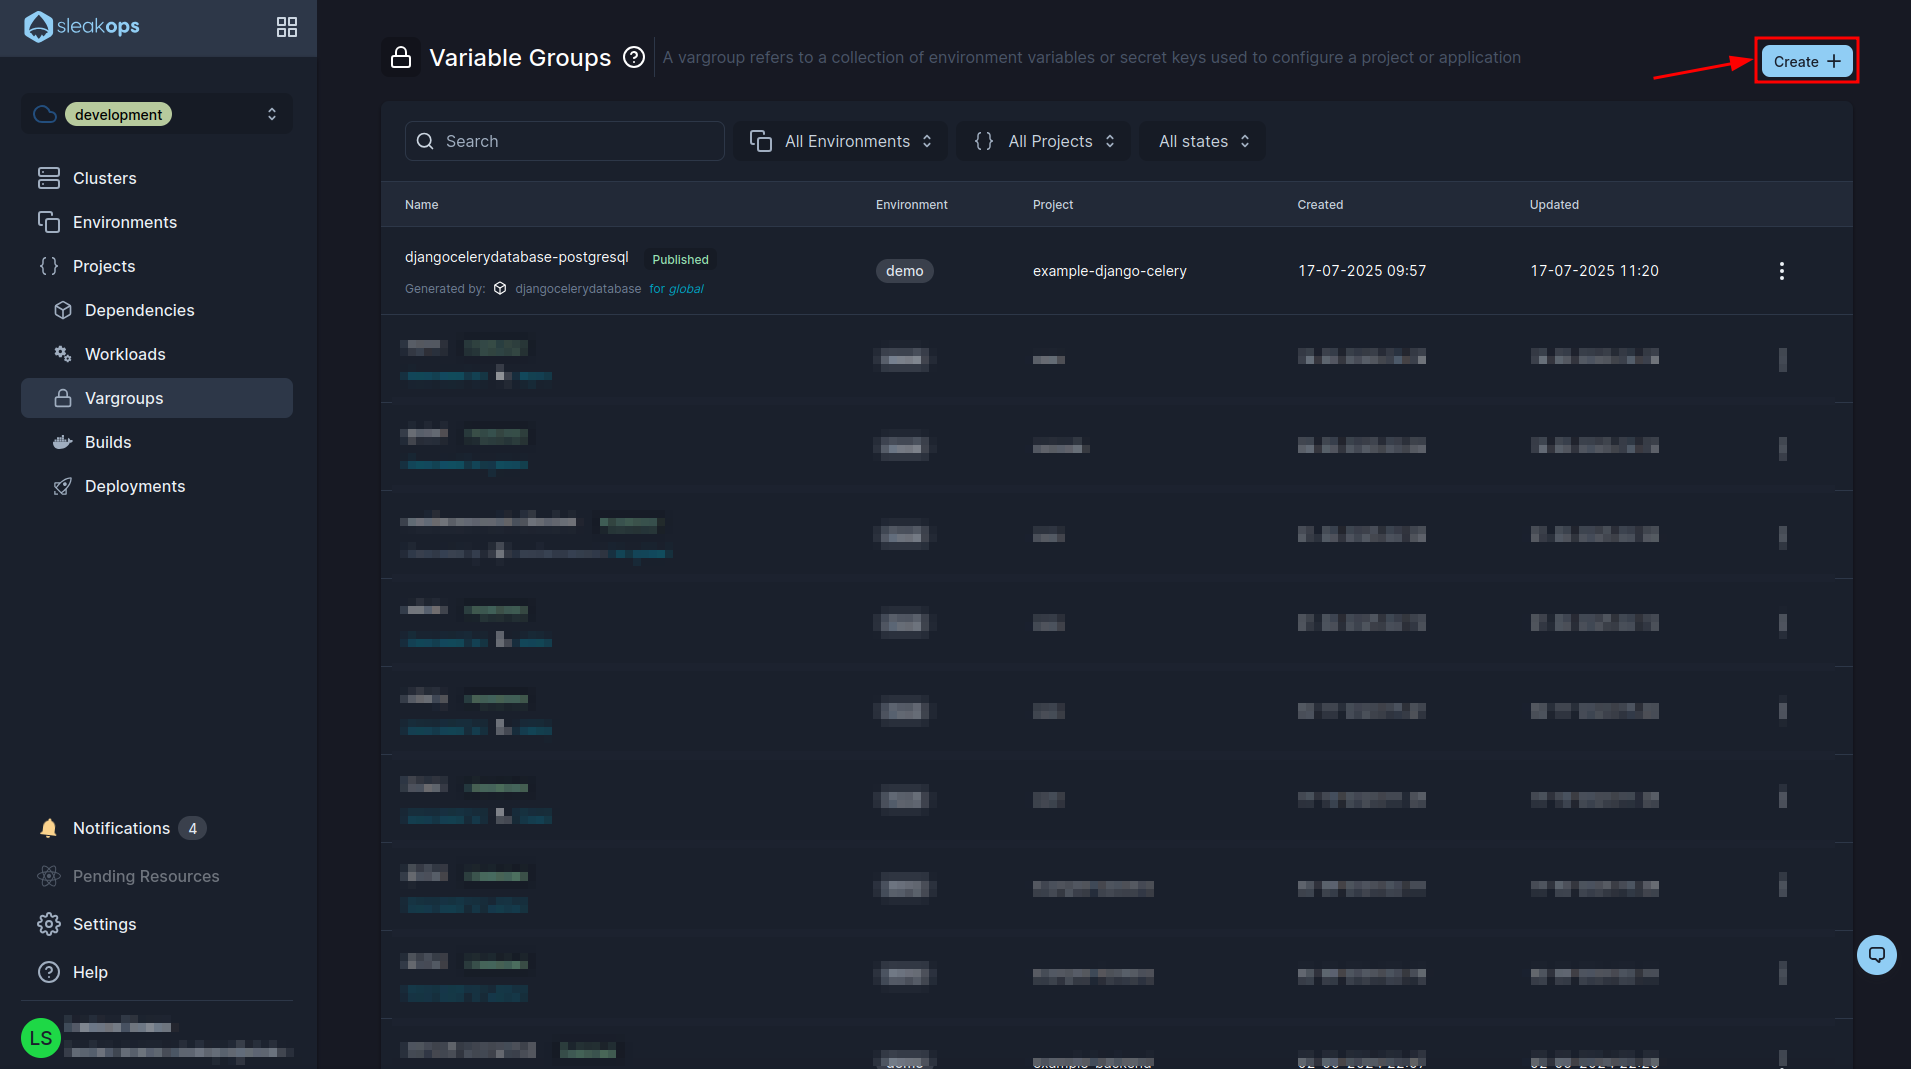
Here you will see all your environment variables that you created grouped in groups, for example you should have created one with the data for the database (which is the one you see in the image). Now we are going to create another one for our django environment variables, for this we click on the “Create” button at the top right:
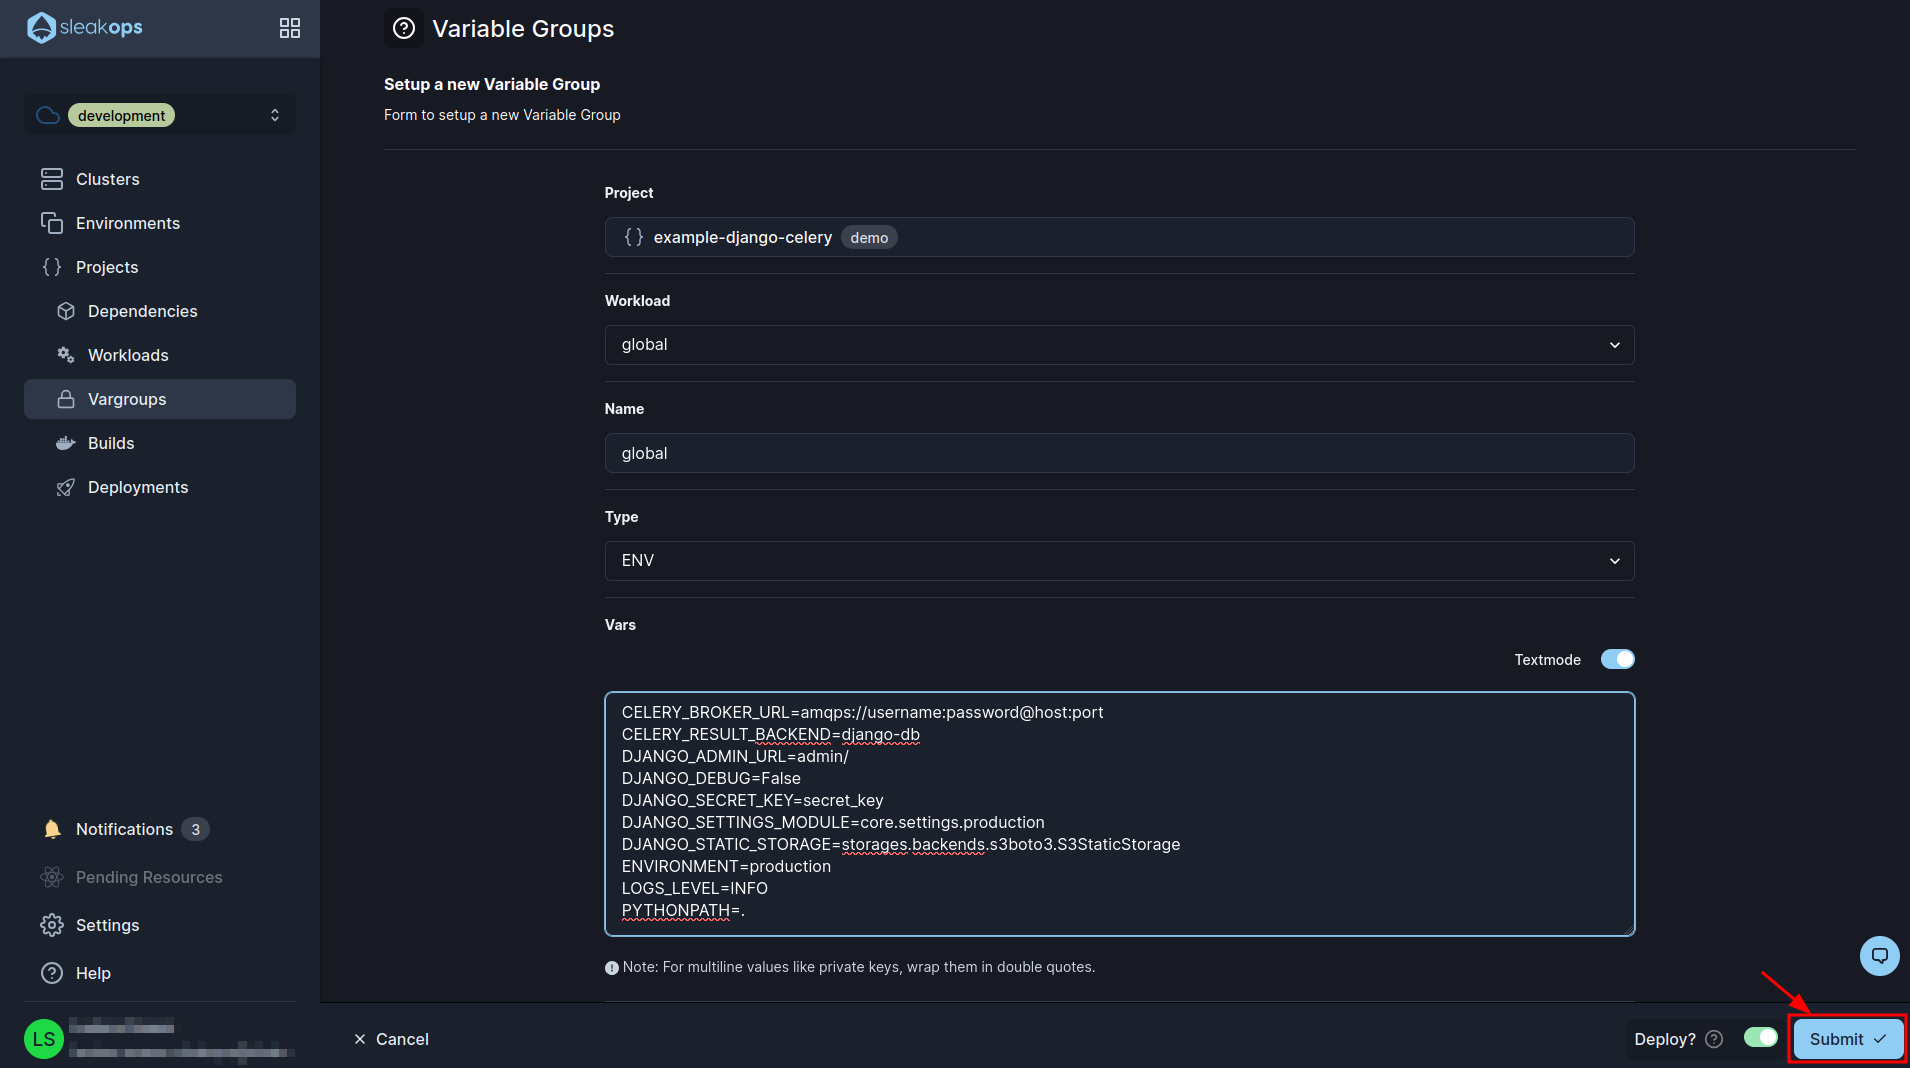
In this form we have the following fields:
- Project: we select the project we created previously.
- Workload: We select “global” that makes reference to be used by all our workloads.
- Name: We define a name for this group of variables.
- Type: If we want to load it by file or by variable.
- Vars: Here we enable the textmode and copy the following environment variables:
CELERY_RESULT_BACKEND=django-db
DJANGO_ADMIN_URL=admin/
DJANGO_DEBUG=False
DJANGO_SECRET_KEY=secret_key
DJANGO_SETTINGS_MODULE=core.settings.production
DJANGO_STATIC_STORAGE=storages.backends.s3boto3.S3StaticStorage
DB_ENGINE=django.db.backends.postgresql_psycopg2
ENVIRONMENT=production
LOGS_LEVEL=INFO
PYTHONPATH=.
These environment variables are required for our example project. Finally click on the “Submit” button at the bottom right to create the variable group.
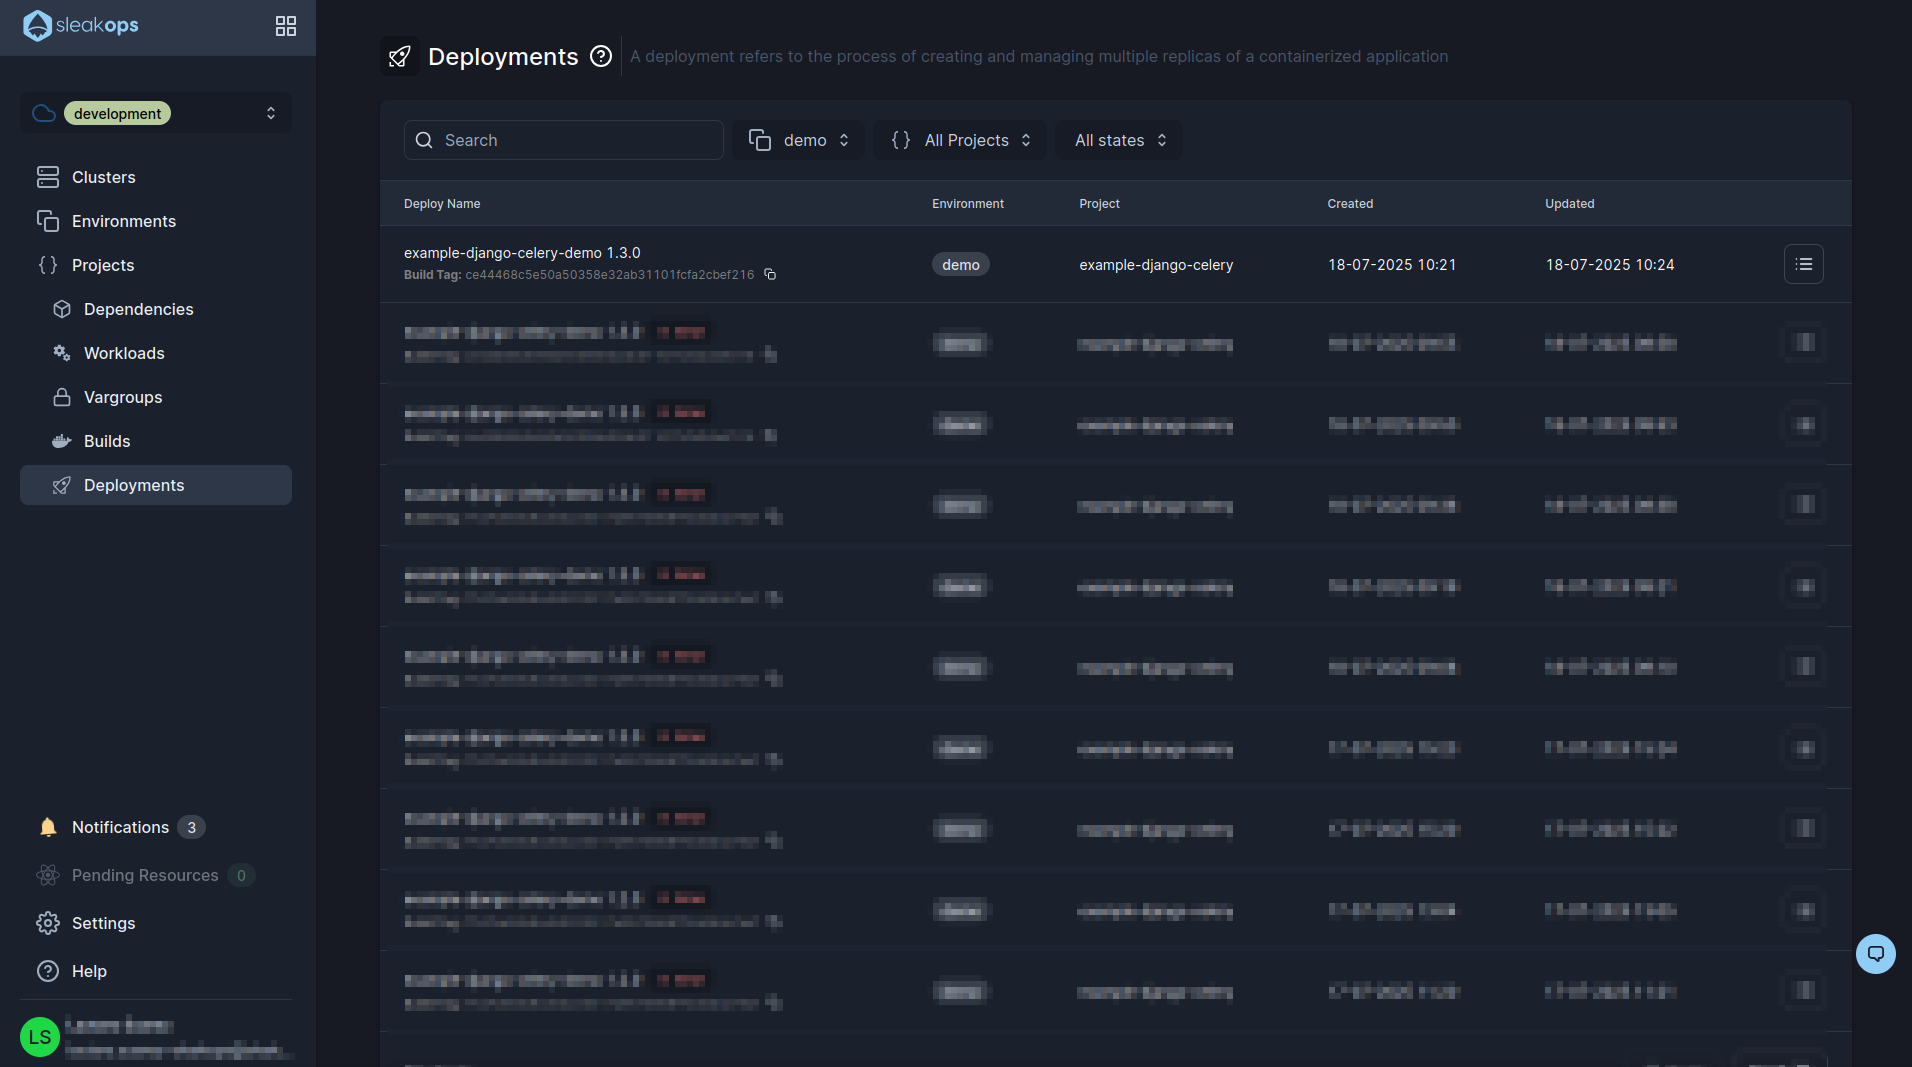
Deployments
As last step we are going to see our project deployed, for this we go to the “Deployments” section of the left panel:
Here we are going to see all the deploys that we do. In our case it is the first one and we can see that it has been created correctly, in case you see any error if you click on “error” you can see a description of it. If we do not see any error then it means that the project is already deployed, we could begin to use it from the url that the web service provided us.
This concludes our project deployment process. We leave you an optional step which is to configure the ci with github.
Optional
CI with Github
Every time you make a change in your code and want to deploy it you will have to do a build and a deploy, this eventually becomes tedious. That's why to avoid this we have to implement ci on github.
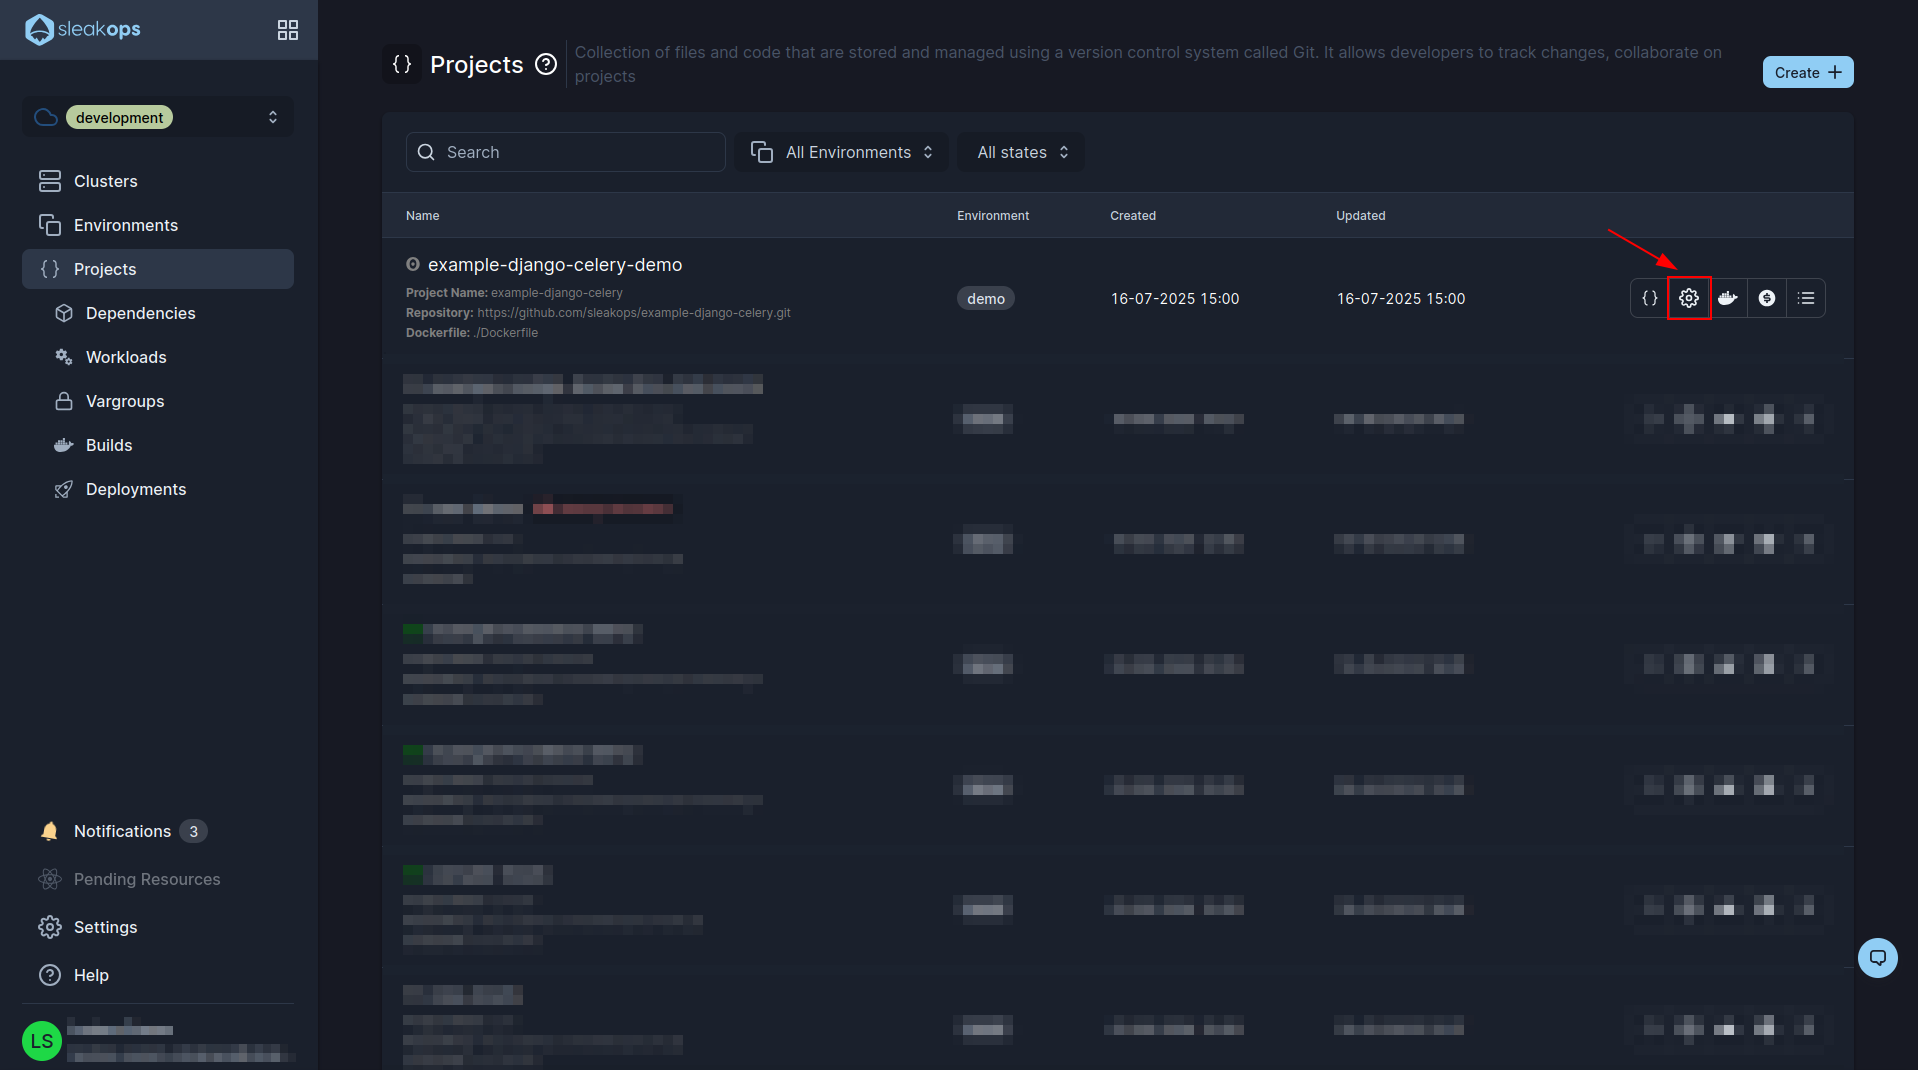
For this we are going to go to “Projects” in the left panel:
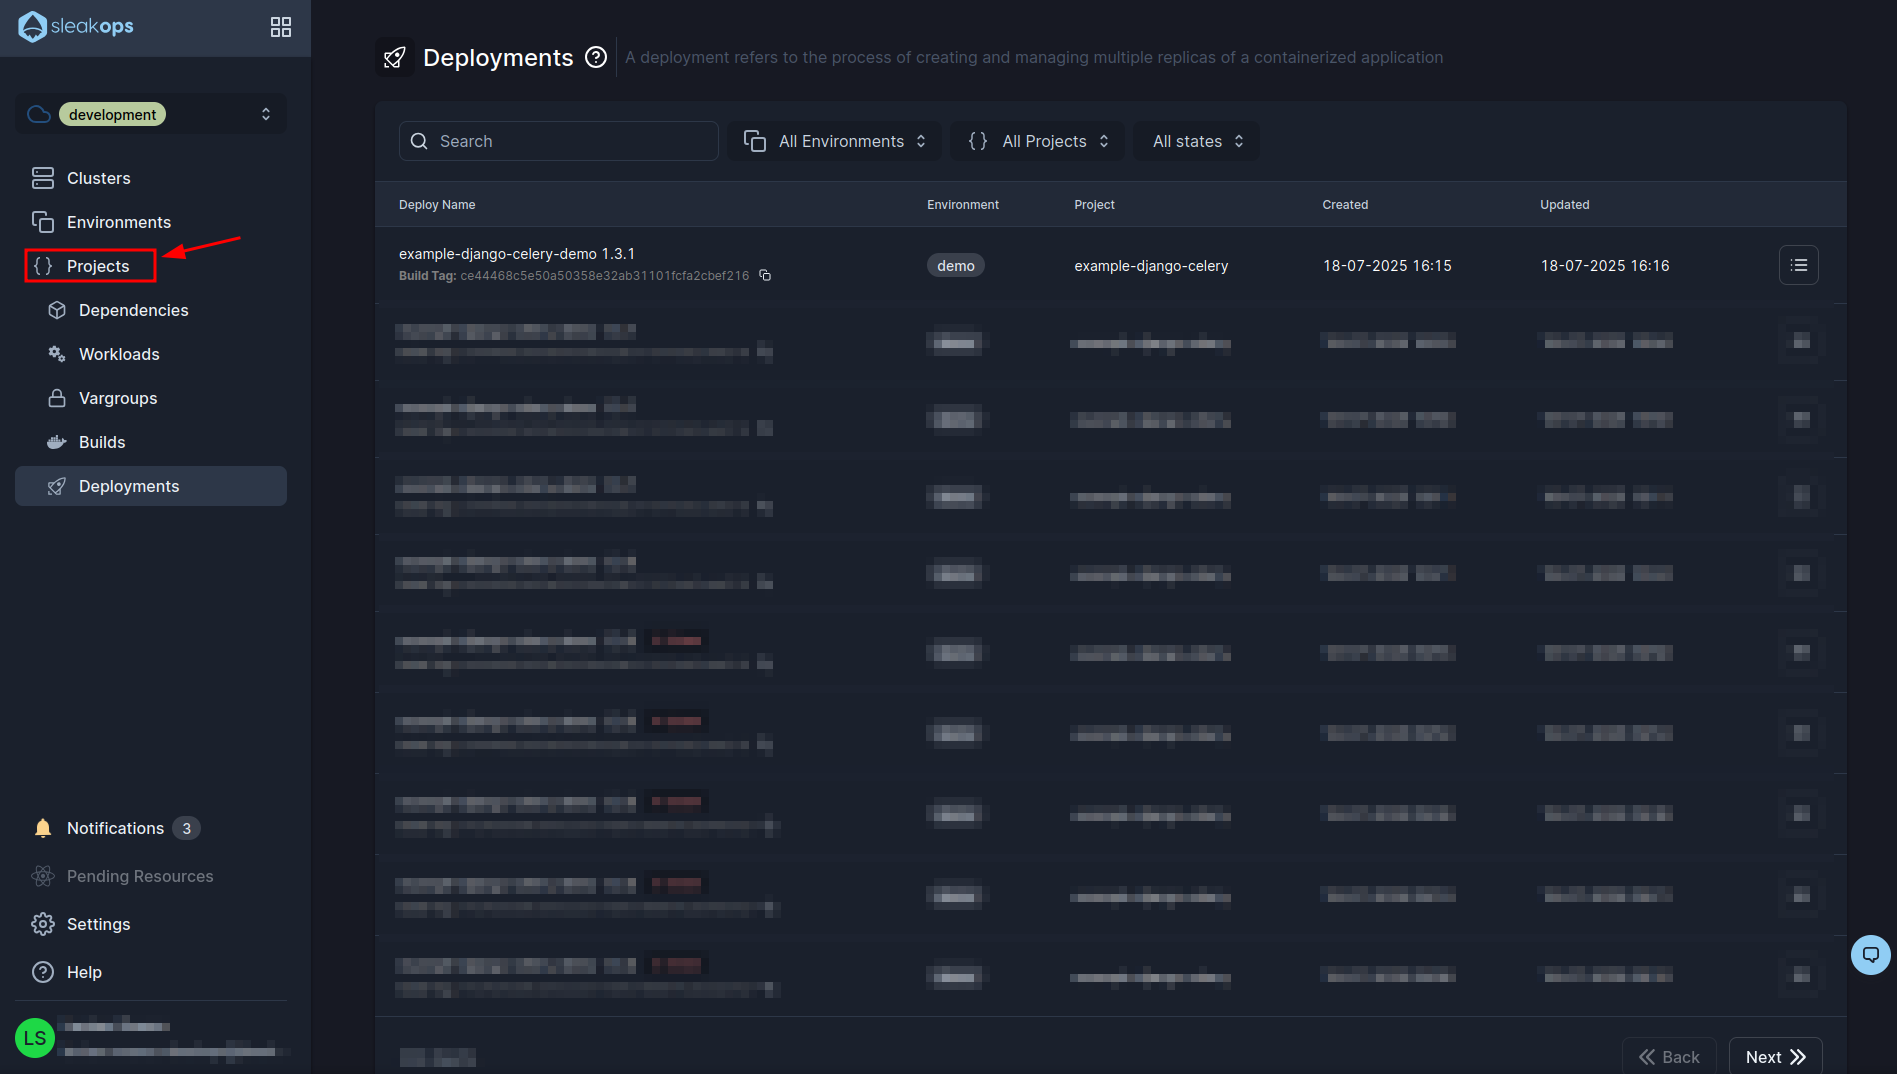
Let's locate our project and click on the gear to access the project configuration:
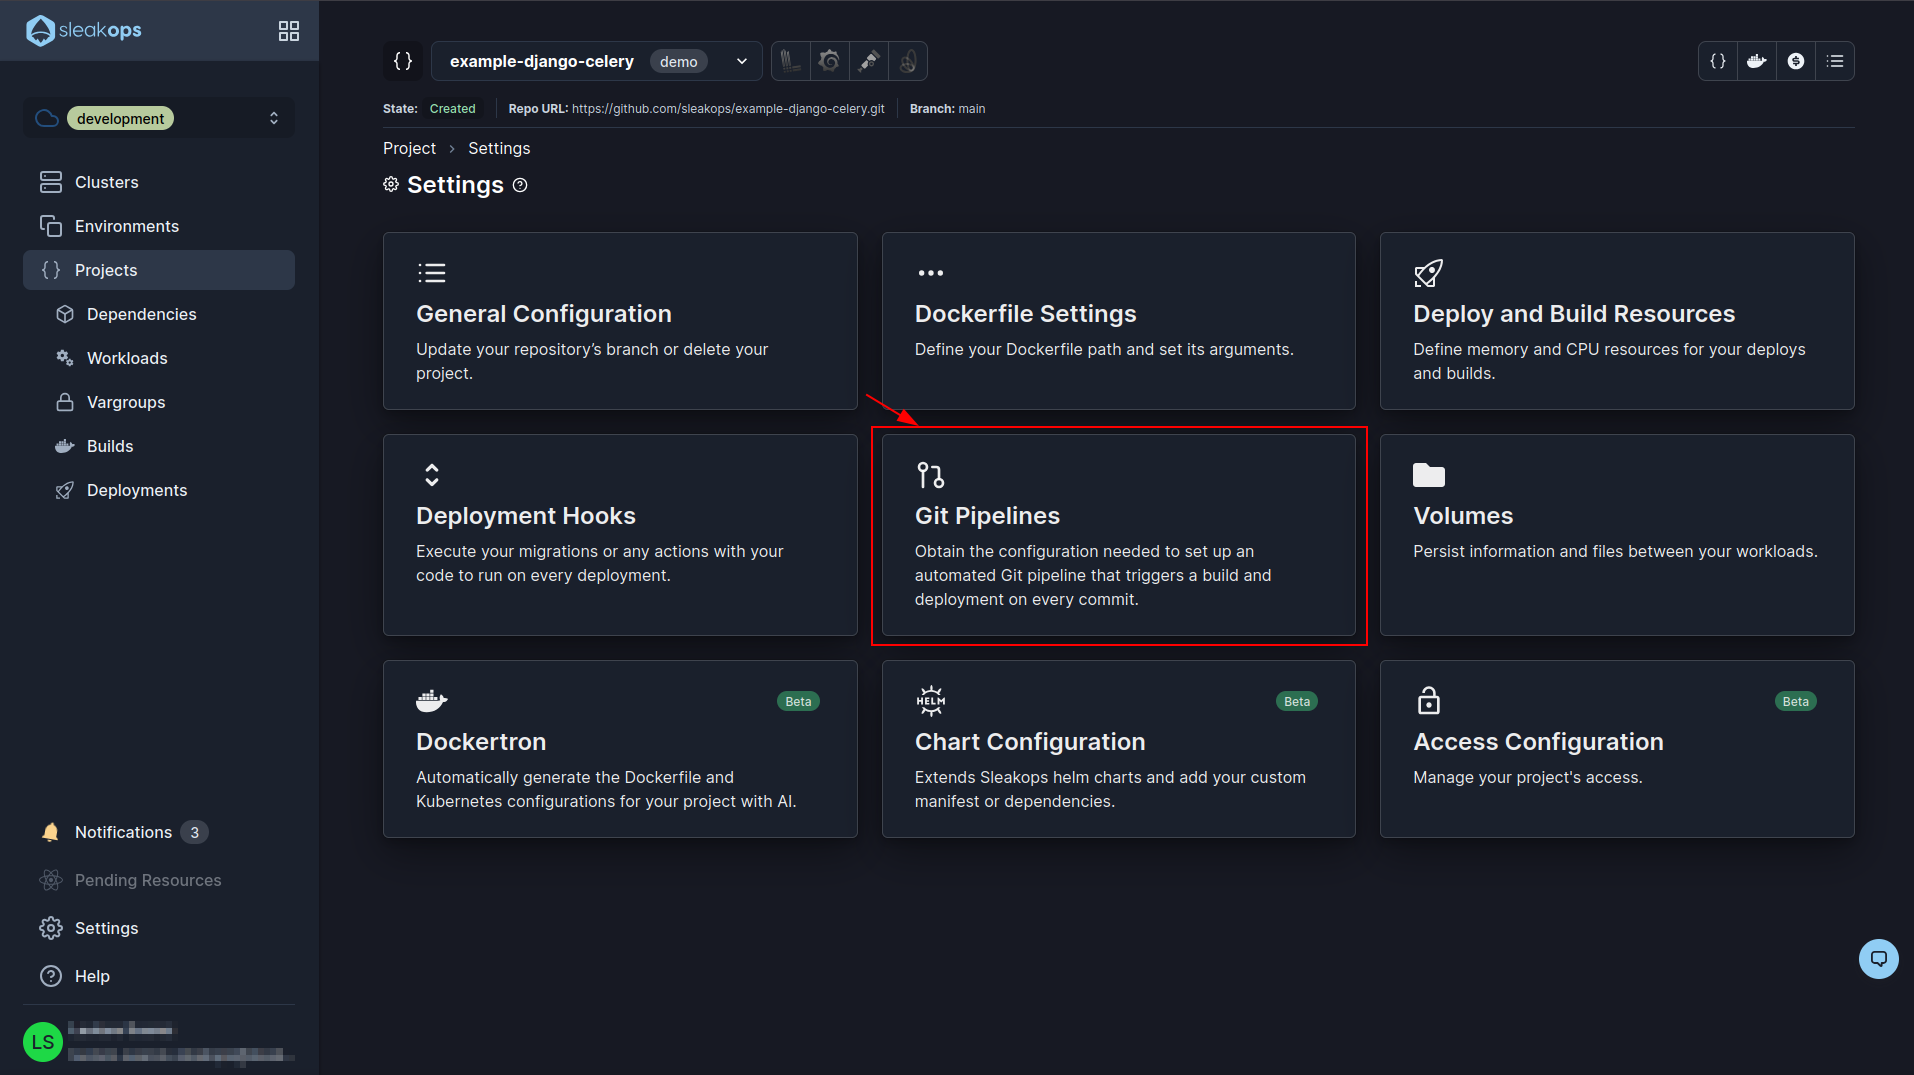
In the project configuration we locate the one that says “Git pipelines” and click on it:
Here we are going to find what we need to do this. Basically we need to set up a file in the root of our project .github/workflows/ called ci_sleakops_demo.yml and in that file we are going to paste the content that appears in this page.
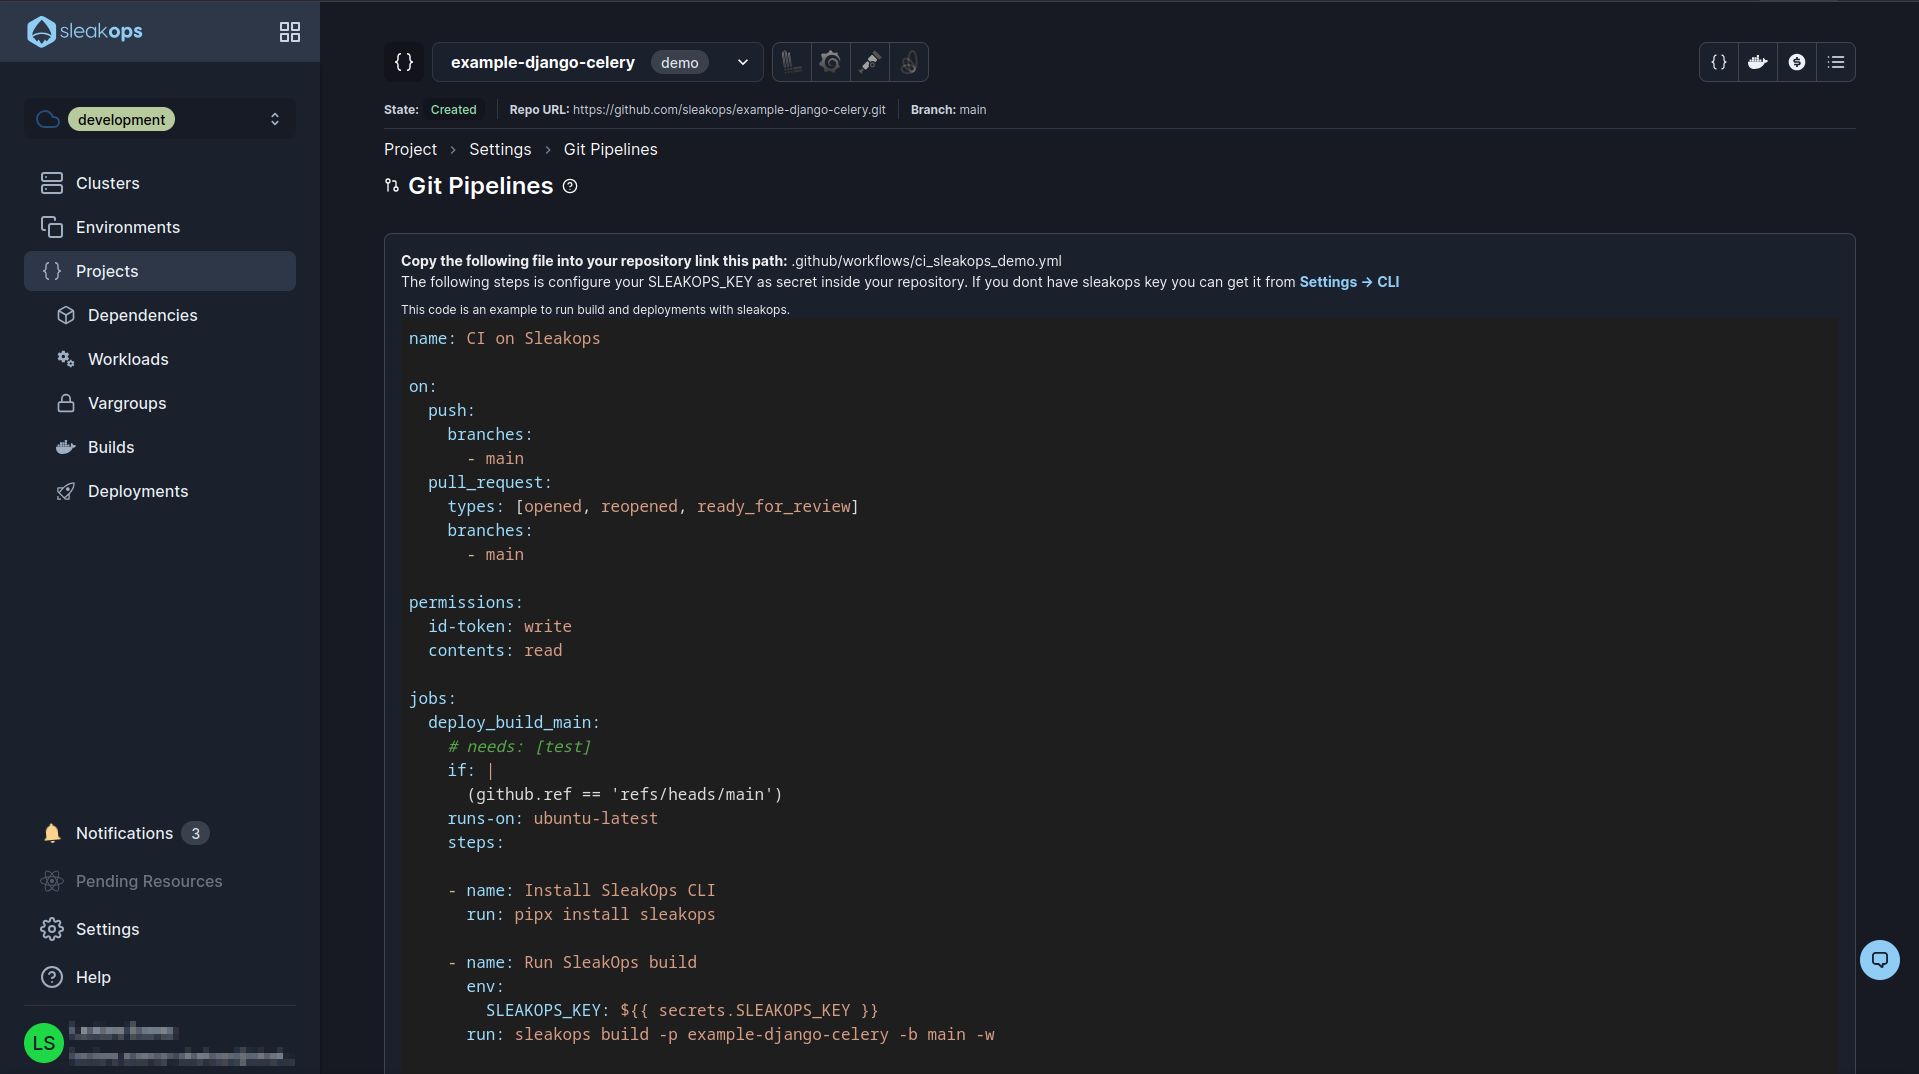
This needs to have an environment variable SLEAKOPS_KEY, if you don't have it you have to go to the link that appears there Settings -> CLI, get it and save it as an environment variable.
With this configured and deployed every time you do a push to your “main” branch a new version of your application will be launched automatically.