Generating Kubeconfig for Easy Cluster Access
To access your EKS cluster, follow these simple steps:
Log in to the SleakOps dashboard.
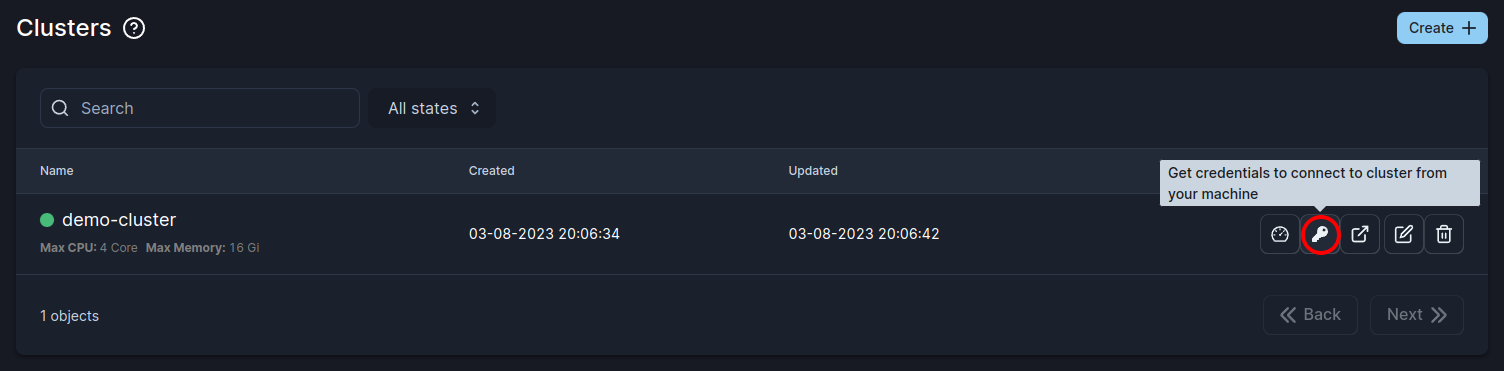
Navigate to the Cluster tab.
Click on the "Generate Kubeconfig" button on the cluster you want to access. As shown in the picture
Complete the steps given and download your kubeconfig file.
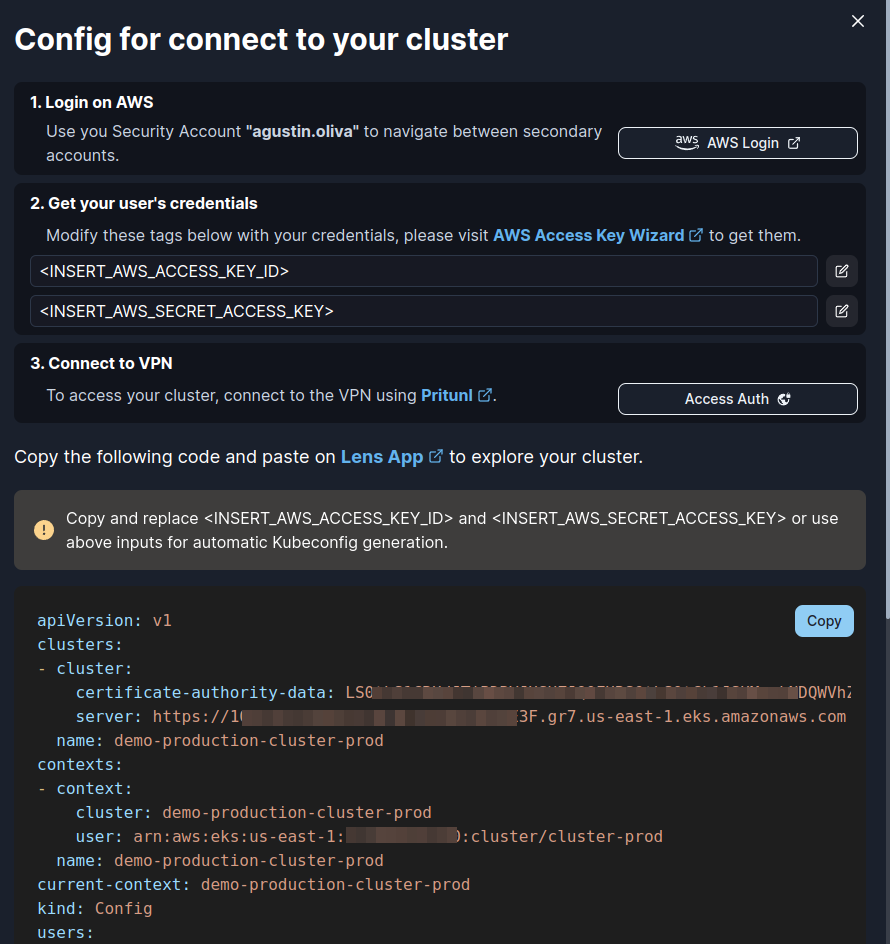
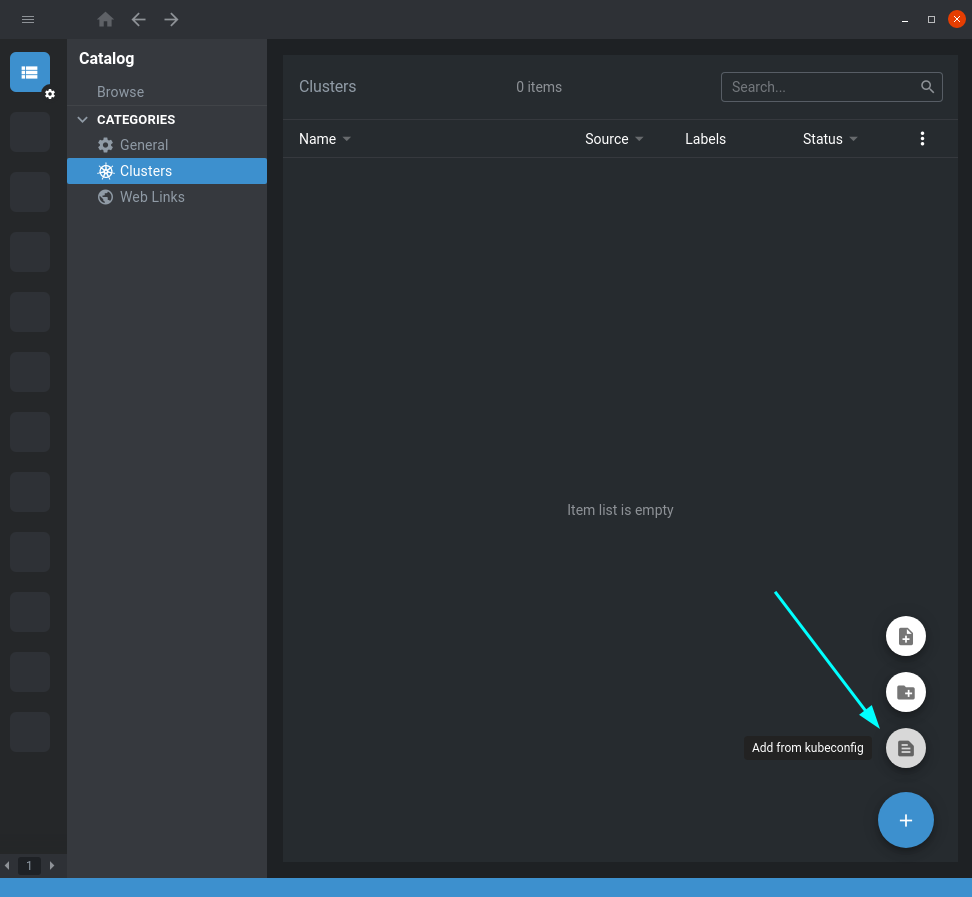
With the kubeconfig file in hand, you can seamlessly interact with your EKS cluster using familiar Kubernetes tools and commands, like Lens .
Troubleshooting
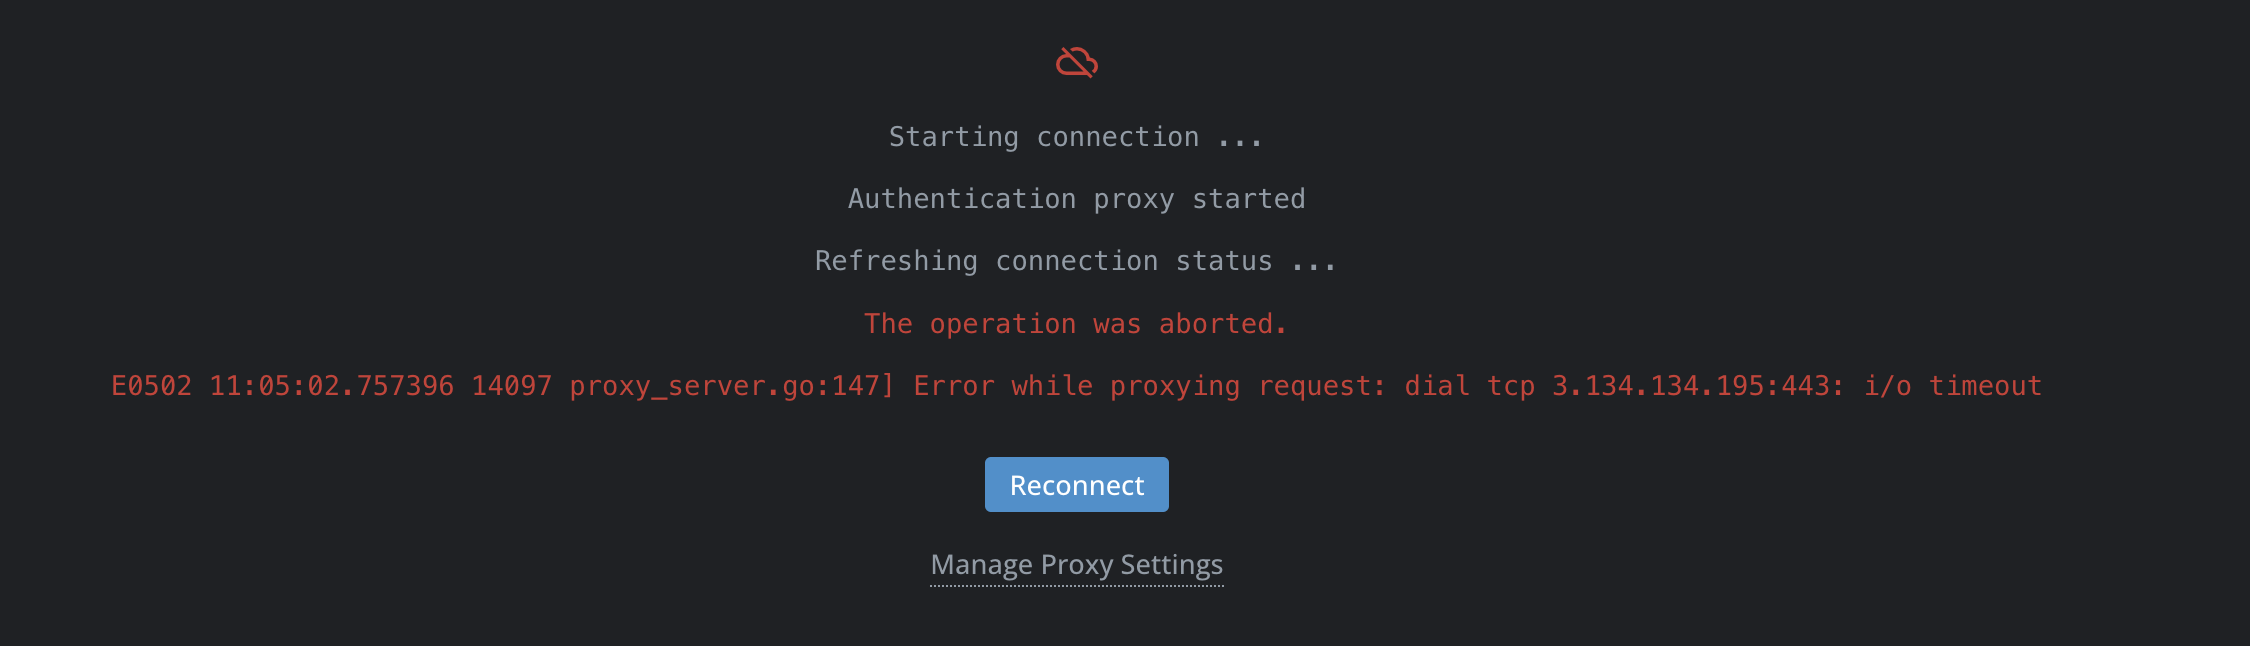
- While accessing your EKS cluster, you may encounter connectivity issues, especially if the DNS server of the Virtual Private Cloud (VPC) fails to resolve all domains within the VPC. In such cases, Lens might attempt to connect to the cluster through its public IP address, leading to connection timeouts or errors.
To resolve this issue, follow these steps:
Find the VPC DNS Server IP Address:
- Switch role to the desired AWS account.
- Navigate to the VPC service.
- Locate a VPC associated with the account. Typically, VPCs are named according to the account they belong to.
VPC_DNS_SERVER_IPwill be the VPC ip ending in '.2'. For example if the VPC network is 10.10.0.0/24 then VPC_DNS_SERVER_IP will be 10.10.0.2
Add VPC DNS Server: Ensure that the VPC DNS server is included in the list of system DNS servers. This step helps Lens and other tools resolve cluster domain names correctly.
Update resolv.conf File: For Linux users, a quick fix involves adding the VPC DNS server to the resolv.conf file. You can do this by appending the VPC DNS server address as a new 'nameserver' entry.
echo "nameserver VPC_DNS_SERVER_IP" | sudo tee -a /etc/resolv.conf